✨ Lesson 32: Particle Systems Overview
Enter the world of dynamic effects and simulations. Particle systems bring life and motion to your scenes—from gentle rain to roaring fires, from flocking birds to swarming crowds. Learn the fundamentals of particle emitters, behavior, and control that power visual effects in games, films, and animations.
🎯 What You'll Learn
- Particle system fundamentals: Emitters, particles, and lifetime management
- Emission types: Surface, volume, vertex, and hair emission modes
- Particle behavior: Physics, forces, and collision systems
- Rendering particles: Display types, materials, and object instancing
- Common effects: Rain, snow, sparks, debris, crowds
- Optimization: Managing performance with large particle counts
- Project: Create realistic rain and splash system with particles
⏱️ Estimated time: 90-120 minutes
🎨 Project: Dynamic weather effect using particle systems
In This Lesson
✨ What Are Particle Systems?
Particle systems are one of Blender's most powerful tools for creating dynamic, complex effects. They generate and manage thousands (or millions) of individual elements that behave according to physical rules, creating effects that would be impossible to animate manually. From subtle atmospheric details to explosive spectacles, particle systems bring scenes to life.
The Particle Concept
🌟 Understanding Particles
What particles are:
- Individual elements: Each particle is a separate entity
- Has position, velocity, rotation
- Born at specific time
- Lives for defined duration
- Dies and disappears
- Managed collectively: System controls thousands simultaneously
- One emitter → many particles
- Shared behaviors and rules
- Physics applied to all
- Efficient computation
- Physically simulated: Real-world physics
- Gravity, velocity, acceleration
- Collision with objects
- Forces and fields affect them
- Natural, believable motion
The particle lifecycle:
- Birth: Particle emits from source (emitter object)
- Life: Particle exists, moves, responds to forces
- Death: Particle reaches lifetime end, disappears
Why Use Particle Systems?
🎯 Use Cases and Applications
Natural phenomena:
- Weather effects:
- Rain droplets falling
- Snow flakes drifting
- Dust clouds swirling
- Fog particles floating
- Fire and smoke:
- Flames licking upward
- Smoke rising and dissipating
- Embers flying from fire
- Steam or mist effects
- Water effects:
- Splashes and droplets
- Spray from fountains
- Bubbles rising
- Water mist
Destruction and debris:
- Exploding objects (fragments flying)
- Crumbling structures (dust and chunks)
- Breaking glass (shards)
- Sparks from impacts
Organic motion:
- Swarms and flocks:
- Birds flying in formation
- Insects swarming
- Fish schooling
- Boids behavior (flocking AI)
- Crowds:
- People walking in background
- Crowd simulations
- Each person as particle
- Instanced characters
Abstract and stylized:
- Magic sparkles and trails
- Energy effects (electricity, lasers)
- Sci-fi particle beams
- Motion graphics patterns
- Abstract data visualization
Hair and fur (specialized particles):
- Character hair systems
- Animal fur
- Grass and vegetation
- Covered in Lesson 33
Particle Systems vs. Other Methods
🔄 When to Use Particles
Particles are best for:
- Many similar elements: Hundreds to millions of copies
- Individual motion: Each element moves independently
- Birth and death: Elements appear and disappear over time
- Physical behavior: Gravity, collisions, forces matter
- Randomization: Variation across elements needed
Alternatives to consider:
- Array modifier:
- Better for: Static repeated objects (no animation)
- Example: Building windows, fence posts
- Geometry Nodes:
- Better for: Procedural scattering (grass, rocks)
- More control, but no physics by default
- Can combine with particles
- Fluid simulation:
- Better for: Connected fluid volumes (water, lava)
- Particles for spray/mist, fluid for main body
- Smoke/fire simulation:
- Better for: Volumetric smoke and flames
- Particles for embers/sparks, simulation for flames
| Effect | Best Method | Why |
|---|---|---|
| Rain | Particles | Thousands of individual droplets, gravity, collision |
| Grass field | Hair particles or Geometry Nodes | Static placement, millions needed |
| Smoke plume | Smoke simulation | Volumetric fluid behavior |
| Sparks | Particles | Individual bright points, physics trails |
| Building facade | Array modifier | Static, architectural pattern |
| Bird flock | Particles (Boids) | Flocking AI, individual creatures |
Types of Particle Systems
📊 Blender's Particle Modes
Emitter particles:
- Purpose: Standard particle system for effects
- Behavior: Particles emit, move, die
- Use cases:
- Rain, snow, sparks
- Debris, explosions
- Magic effects
- Most dynamic effects
- Default type: What you get when adding particle system
Hair particles:
- Purpose: Growing elements from surface
- Behavior: Strands remain attached, don't move freely
- Use cases:
- Character hair and fur
- Grass, plants, feathers
- Surface coverage effects
- Special feature: Grooming tools, styling, physics
- Covered in: Lesson 33 (Hair and Fur)
Key differences:
| Feature | Emitter | Hair |
|---|---|---|
| Movement | Free-flying | Attached to surface |
| Lifetime | Birth and death | Persistent (always visible) |
| Physics | Gravity, forces | Strand dynamics |
| Rendering | Points, objects, etc. | Strand-based |
💡 Particles Are Life and Motion: Static scenes are dead. Objects sit motionless. Light doesn't change. Nothing breathes. But add particles and scenes come alive. Rain falls. Dust swirls. Sparks fly. Crowds move. Suddenly your scene isn't frozen moment—it's living world. Particles represent chaos. Randomness. Organic unpredictability. The things that make scenes feel real. Because real world is full of particles. Air has dust. Surfaces have imperfections. Motion creates trails. Life creates movement. Master particles and you master life and motion. Your scenes breathe. They move. They feel alive. That's the difference between render and experience. Between image and immersion. Particles bridge that gap.
🎯 Particle System Basics
Let's get hands-on with particle systems. Understanding the interface, settings, and basic workflow is essential before diving into complex effects. We'll start simple—creating your first particle system and exploring the fundamental controls that govern particle behavior.
Creating Your First Particle System
✨ Quick Start Guide
Step-by-step setup:
- Create emitter object:
- Add any mesh object (Cube, Plane, Sphere, etc.)
- This object becomes particle emitter
- Particles emit from its surface
- For testing: Plane works well (simple emitter)
- Add particle system:
- Select emitter object
- Properties panel → Particle Properties (icon looks like particles)
- Click "+" button to add new particle system
- Default settings create 1000 particles
- See immediate results:
- Particles appear in viewport
- Press Spacebar to play animation
- Particles emit, fall due to gravity, disappear
- Congratulations—your first particle system!
✅ Quick Test Setup
Try this now:
- Add Plane (Shift+A → Mesh → Plane)
- Particle Properties → Add particle system
- Press Spacebar to play
- Watch particles fall like rain!
This basic setup demonstrates core particle behavior. Now let's understand what's happening.
The Particle Properties Panel
🎛️ Understanding the Interface
Main sections (from top to bottom):
- Type: Emitter or Hair
- Emitter: Flying particles (default)
- Hair: Attached strands
- This lesson focuses on Emitter
- Emission: How particles are born
- Number: Total particle count
- Frame Start/End: When emission occurs
- Lifetime: How long each particle lives
- Controls particle birth
- Velocity: Initial particle movement
- Normal: Speed away from surface
- Tangent: Speed along surface
- Randomize: Variation in velocities
- Rotation: Particle orientation
- Angular velocity
- Random rotation
- Matters when using object instances
- Physics: How particles move
- Physics Type: None, Newtonian, etc.
- Gravity, forces, collisions
- Most important section for behavior
- Render: How particles appear
- Render As: Halo, Object, etc.
- Determines visual appearance
- Links to materials
- Display: Viewport visualization
- Display As: Points, Circles, etc.
- Only affects viewport (not render)
- Helpful for visualizing without rendering
- Children: Interpolated particles
- Multiply particle count for rendering
- Performance optimization
- Advanced feature
- Field Weights: Force field strengths
- How much each force type affects particles
- Gravity, wind, turbulence weights
- Cache: Simulation storage
- Bake simulation for consistent playback
- Essential for final rendering
Viewport controls:
- Eye icon: Show/hide in viewport
- Camera icon: Enable/disable in render
- Percentage value: Display percentage (viewport performance)
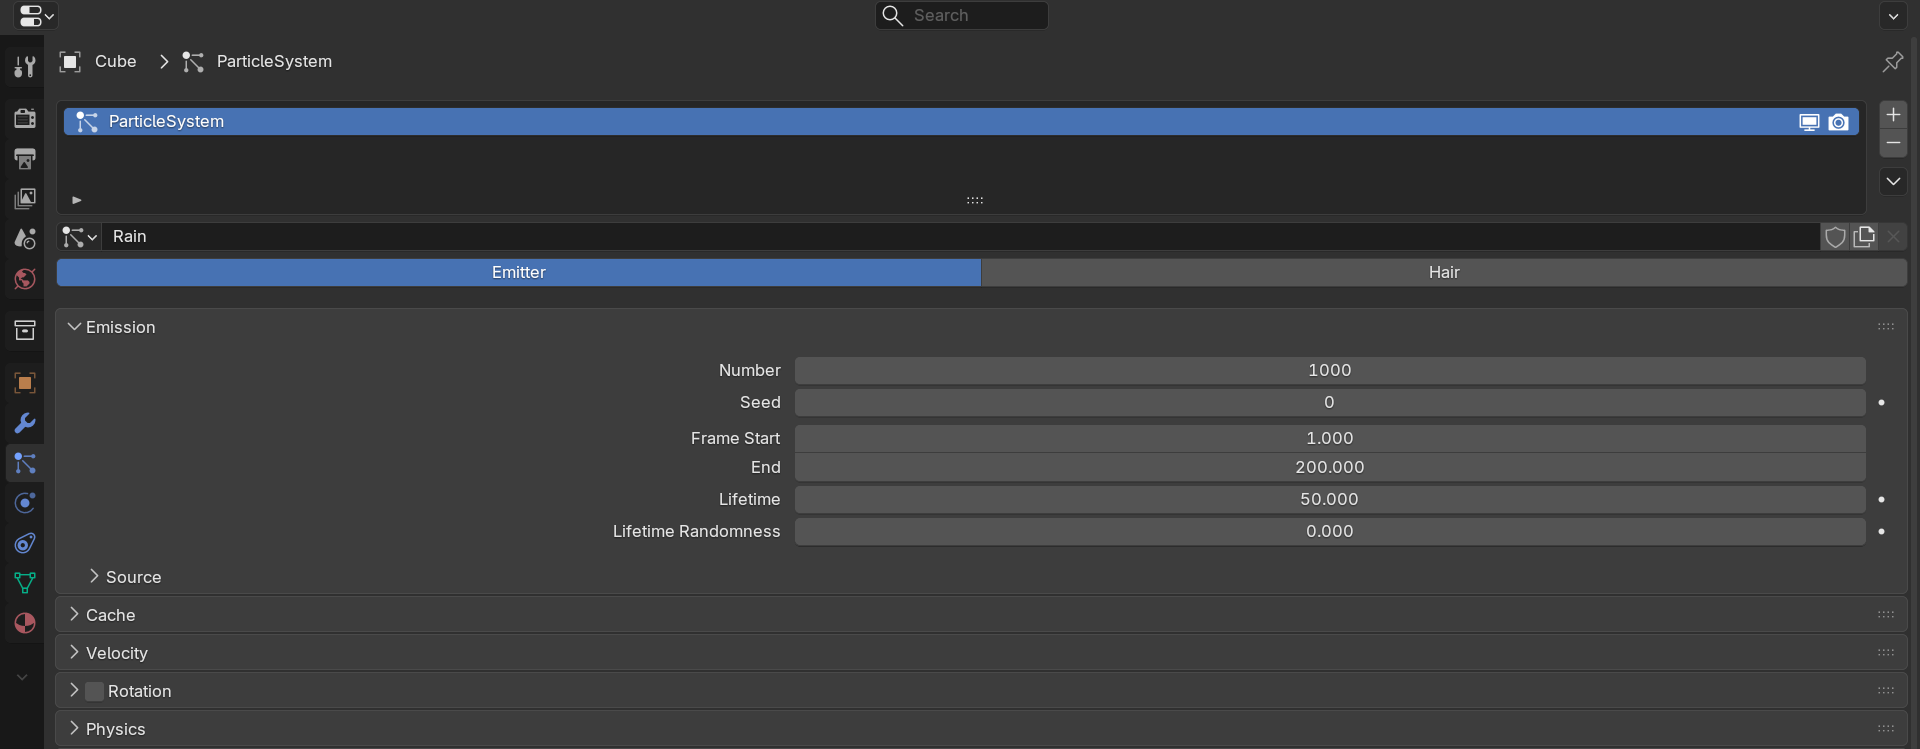
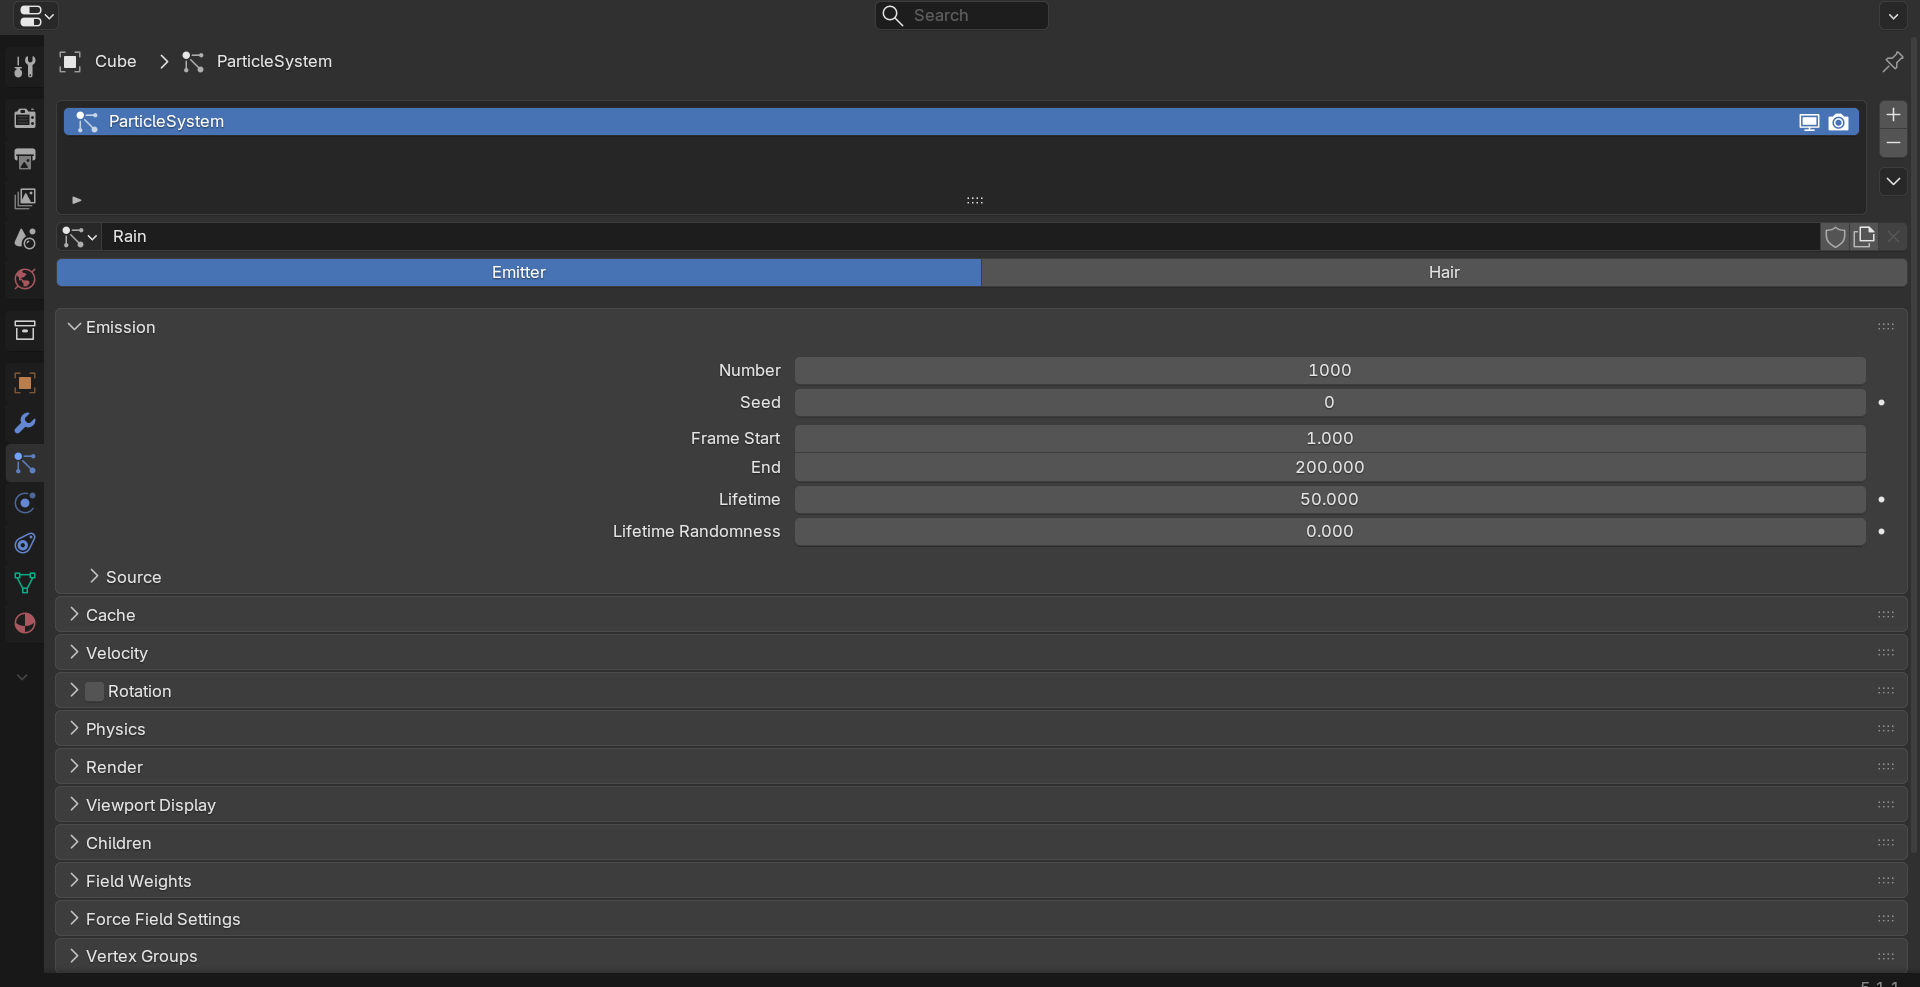
Core Particle Parameters
🔧 Essential Settings
Emission settings:
- Number:
- Total particles created
- Default: 1000
- Rain: 5,000-20,000
- Sparks: 100-500
- Crowds: 50-200 (when instancing complex objects)
- Higher = more detail, slower performance
- Frame Start / End:
- Timeline range for emission
- Start: 1, End: 200 → emits from frame 1-200
- Continuous emission across range
- For burst: Start = End (all particles at once)
- Lifetime:
- How many frames each particle exists
- Default: 50 frames
- Short lifetime (10-20): Sparks, quick effects
- Long lifetime (100-300): Rain, snow (visible longer)
- Lifetime + Lifetime Random: Variation
Velocity settings:
- Normal velocity:
- Speed perpendicular to emitter surface
- Positive: Away from surface
- Negative: Into surface
- Value 1.0 = 1 Blender unit per second
- Rain: Low (0.5-2.0, let gravity do work)
- Explosion: High (10-50, forceful ejection)
- Tangent velocity:
- Speed along emitter surface
- Creates swirling effects
- Usually combined with normal
- Randomize:
- Adds variation to velocities
- 0.0: All particles same speed
- 1.0: Maximum variation
- Natural effects need randomization (0.3-0.7)
Physics type:
- Newtonian (default):
- Realistic physics
- Gravity, velocity, forces apply
- Most common choice
- None:
- No physics calculation
- Particles stay at emission point
- Used with Hair or special effects
- Keyed:
- Particles flow between emitters
- Advanced technique
- Boids:
- Flocking behavior (birds, fish)
- AI-driven movement
- Covered later in lesson
- Fluid:
- Fluid simulation integration
- Specialized use
💡 Pro Tip: Start Simple
When learning particles, start with minimal settings:
- Number: 100-500 (fast feedback)
- Lifetime: 50
- Physics: Newtonian
- Render As: Halo or Object
Once working, increase complexity. Testing with fewer particles = faster iteration.
Timeline and Playback
⏱️ Working with Time
Particle systems are time-based:
- Particles exist in animation timeline
- Must play animation to see behavior
- Static frame shows snapshot
- Full effect visible only when animated
Playback controls:
- Spacebar: Play/pause animation
- Must play to see particles move
- Viewport updates in real-time
- Timeline scrubbing:
- Drag timeline cursor
- Particles update to that frame
- Good for checking specific moments
- Frame range:
- Set in Timeline header (Start/End frames)
- Common: 1-250 frames (10 seconds at 24fps)
- Particles only emit during frame range
Frame rate matters:
- Output Properties → Frame Rate
- Default: 24 fps (film standard)
- 30 fps: Video/broadcast
- 60 fps: Smooth motion, games
- Particle lifetime in frames = duration/framerate in seconds
- Example: 50 frame lifetime at 24fps = ~2 seconds
Common timeline issues:
- Problem: Particles don't appear
- Check: Current frame within emission range?
- Fix: Scrub timeline or play animation
- Problem: Particles frozen
- Check: Physics type set to Newtonian?
- Check: Animation playing?
- Problem: All particles appear at once
- Cause: Frame Start = Frame End
- Fix: Increase Frame End for continuous emission
Viewport Display Options
👁️ Visualizing Particles
Display As options (viewport only):
- Point: Simple dots
- Fastest display
- Good for high particle counts
- Minimal visual detail
- Circle: Small circles
- Better visibility than points
- Still fast
- Common choice for working
- Cross: X-shaped markers
- Easy to see individual particles
- Good for sparse distributions
- Axis: Shows particle orientation
- RGB axes show rotation
- Useful when rotation matters
- Heavier display
Display settings:
- Display Amount (percentage):
- 50% = shows half the particles in viewport
- Improves viewport performance
- Render still uses 100%
- Essential for heavy particle counts
- Size:
- Viewport display size
- Doesn't affect render
- Increase if particles hard to see
- Color:
- Viewport color for particles
- Helps distinguish multiple systems
⚠️ Viewport vs. Render
Important distinction:
- Display As: Only viewport visualization
- Render As: Actual render appearance
- Don't judge render result by viewport display
- Always test render to see true appearance
- Viewport = working view, Render = final result
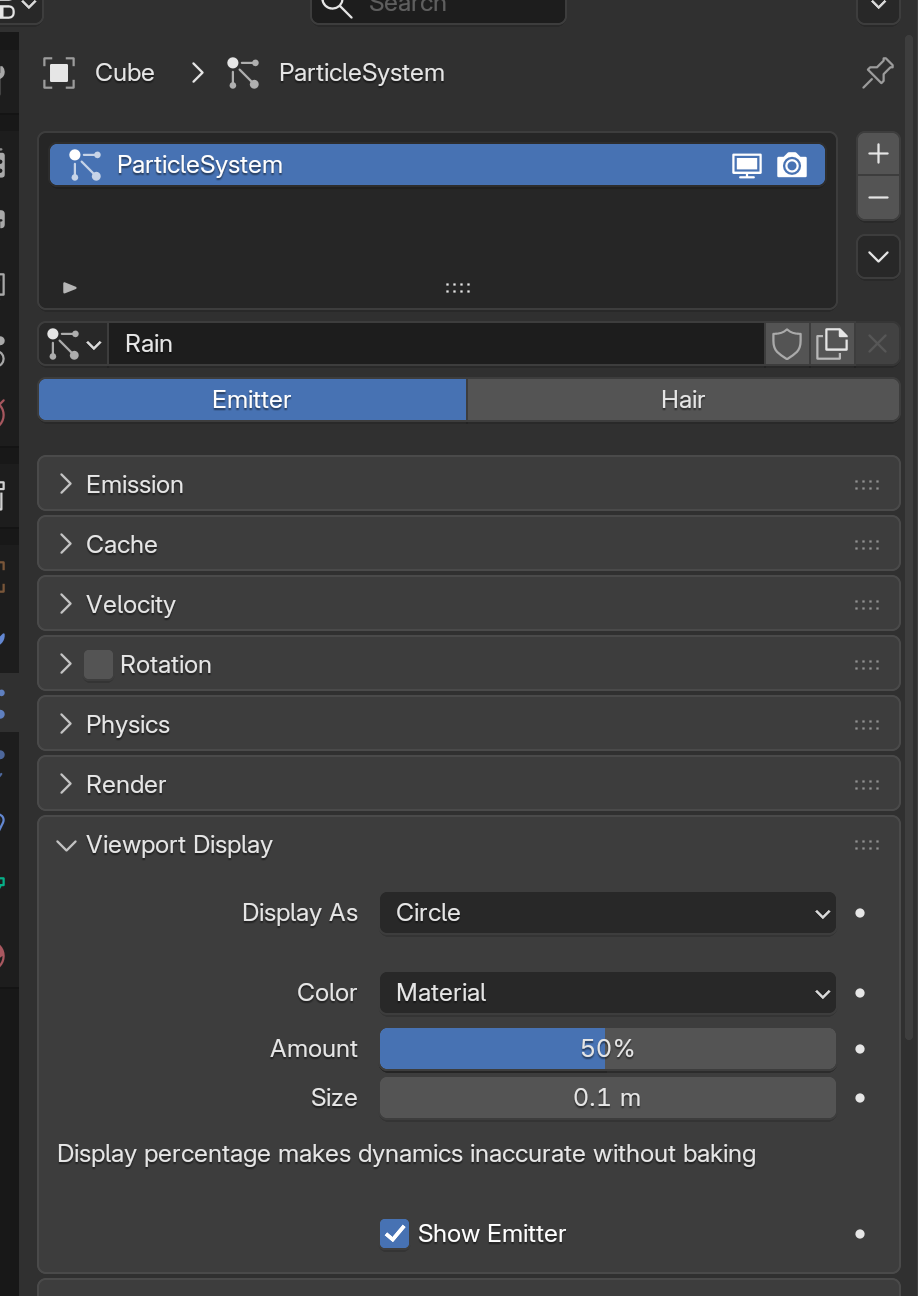
Multiple Particle Systems
🎨 Layering Effects
One object, multiple systems:
- Single emitter can have multiple particle systems
- Each system independent
- Different settings per system
- Combine for complex effects
Adding multiple systems:
- Select emitter object
- Particle Properties panel
- Click "+" button again
- Second particle system appears
- Configure separately
Use cases for multiple systems:
- Fire effect:
- System 1: Large flames (slow, upward)
- System 2: Small embers (fast, chaotic)
- System 3: Smoke particles (rising, expanding)
- Explosion:
- System 1: Large debris (slow, physics)
- System 2: Small fragments (fast, many)
- System 3: Dust cloud (slow dissipation)
- Weather:
- System 1: Rain (falling fast)
- System 2: Mist (floating)
- System 3: Splashes (from ground impacts)
Managing multiple systems:
- Each system named separately (rename for clarity)
- Toggle visibility individually
- Each has own cache
- All evaluate simultaneously
💡 Particles Are Performance-Intensive: Particle systems can bring computers to their knees. Thousands of individual elements. Each with physics. Each with collision checking. Each rendering. It adds up fast. That's why professionals work smart. Low particle counts while designing. Viewport display percentage at 50% or less. Simple display types. Bake simulation before final render. Because particles are powerful—but power requires management. Learn to work efficiently now. Before you crash Blender trying to render million particles at once. Trust me. Everyone learns this lesson eventually. Learn it early. Work smart. Your computer (and your deadlines) will thank you.
🌊 Emission Settings and Types
How particles are born determines everything about your effect. Emission controls where particles appear, when they appear, and how they're distributed across your emitter. Understanding emission modes and settings transforms simple particle systems into precise, controllable effects.
Emission Source Types
📍 Where Particles Emit From
Emission → Emit From dropdown:
- Faces:
- Particles emit from face surfaces
- Distributed across mesh faces
- Most common choice
- Good for: Surface effects, area emission
- Example: Rain from cloud plane, sparks from object surface
- Volume:
- Particles emit from inside mesh volume
- Fills 3D space of object
- Mesh must be closed (no holes)
- Good for: Explosions from center, volumetric effects
- Example: Smoke from inside object, debris explosion
- Vertices:
- Particles emit from vertex points only
- One or more particles per vertex
- Precise control over emission points
- Good for: Specific locations, controlled patterns
- Example: Lights on city model vertices, specific effect points
Choosing emission source:
| Effect | Best Emission | Why |
|---|---|---|
| Rain | Faces | Large plane emits across area |
| Explosion | Volume | Debris from inside sphere |
| Sparks from weld | Faces (small area) | Concentrated surface emission |
| City lights | Vertices | Precise placement per vertex |
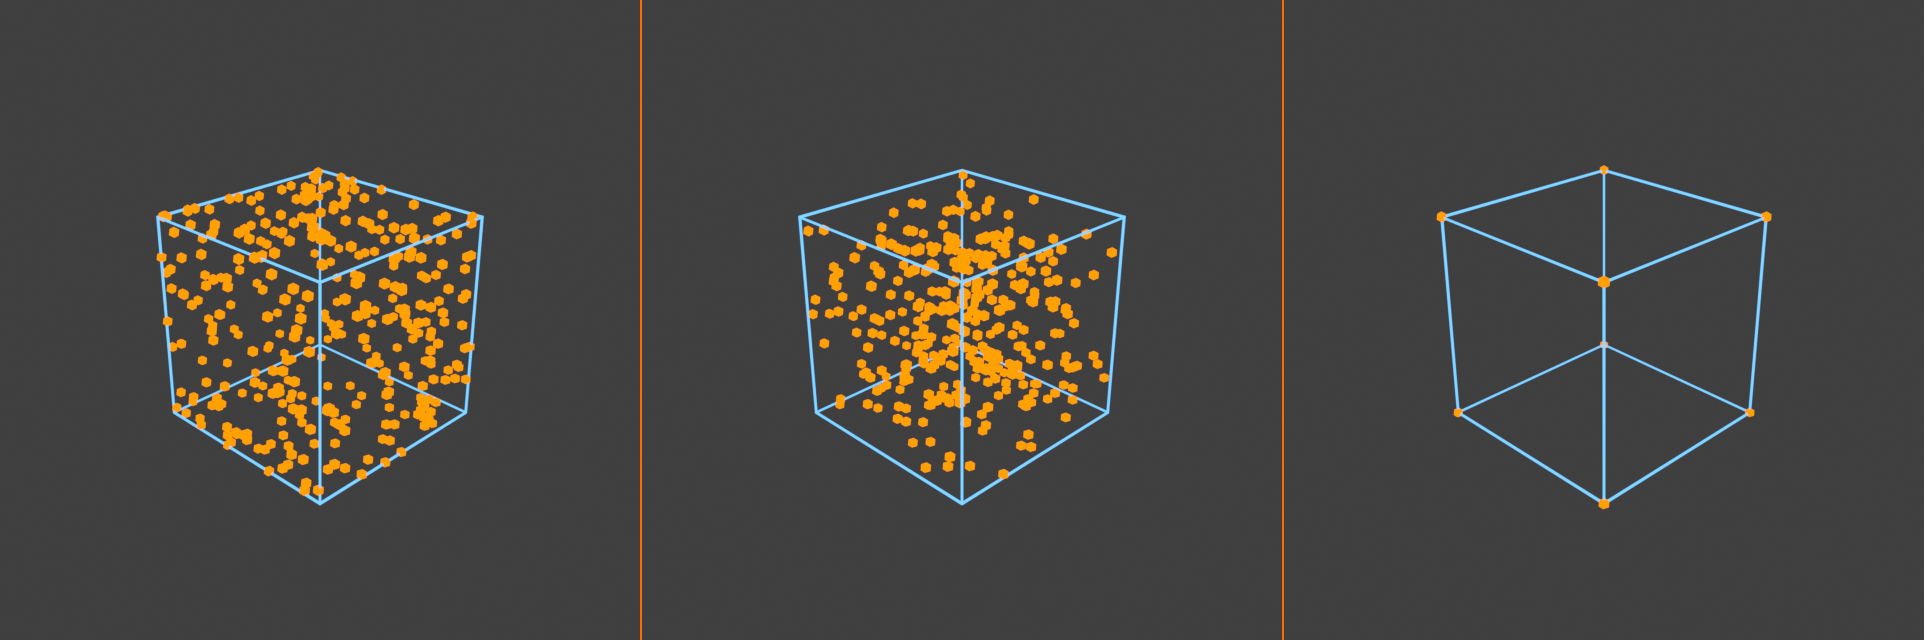
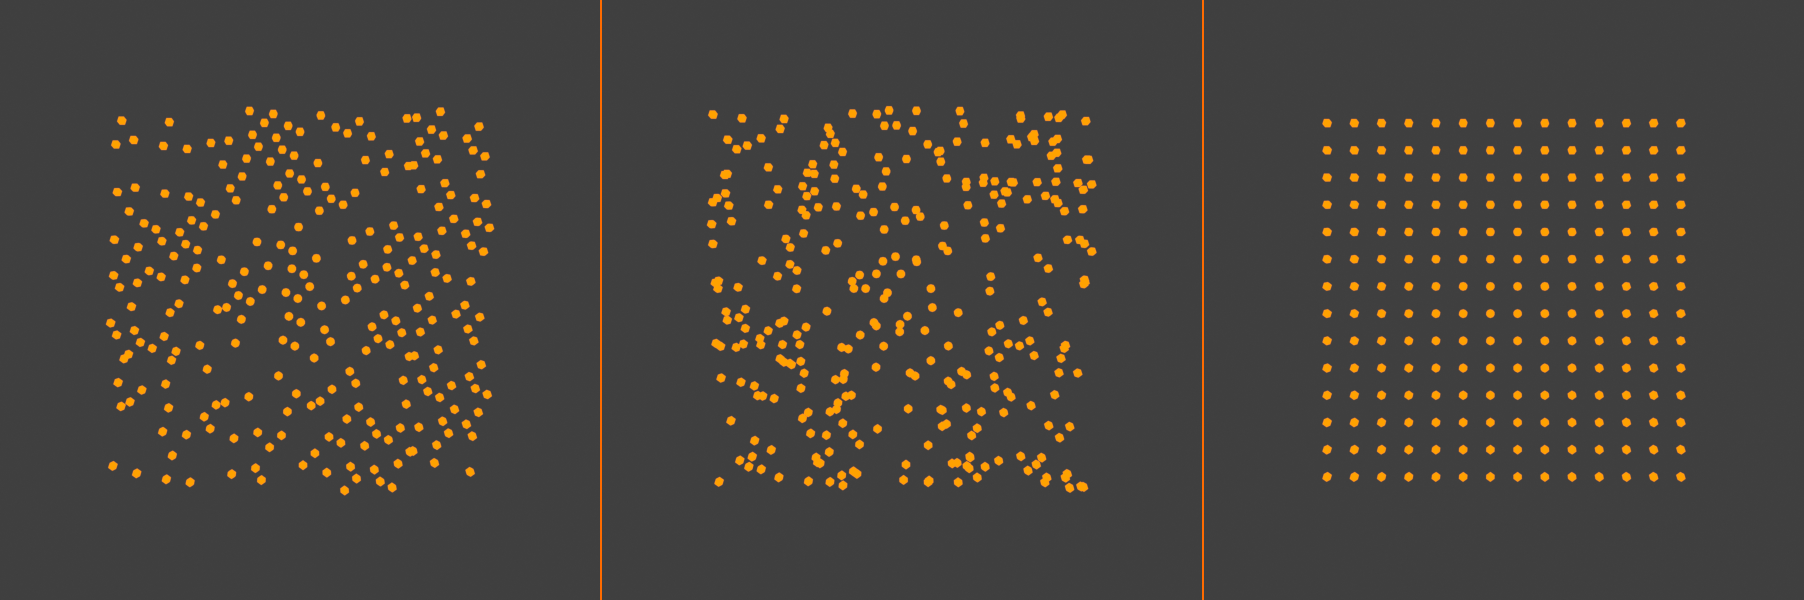
Distribution Modes
📐 Particle Placement
When Emit From = Faces:
- Random:
- Particles randomly distributed across faces
- Natural, organic distribution
- Most common for effects
- No visible pattern
- Jittered:
- Grid-based with randomization
- More even coverage than random
- Prevents clustering
- Good for even distributions
- Grid:
- Perfect grid pattern
- Evenly spaced particles
- Looks artificial
- Use for specific effects only
Distribution visualization:
Natural clusters] B[Jittered:
Even coverage] C[Grid:
Perfect spacing] style A fill:#4CAF50,stroke:#333,stroke-width:2px,color:#fff style B fill:#888,stroke:#333,stroke-width:2px,color:#fff style C fill:#f0f0f0,stroke:#333,stroke-width:2px
Use face area:
- When enabled:
- Larger faces emit more particles
- Maintains even density across surface
- Good for: Organic meshes with varied face sizes
- When disabled:
- Each face emits equal particles
- Small faces denser, large faces sparser
- Good for: Uniform meshes, specific distributions
Vertex Groups for Emission Control
🎯 Precise Emission Areas
Vertex group emission:
- Limit emission to specific areas of mesh
- Paint where particles should emit
- Gradual density control via vertex weights
- Professional technique for controlled effects
Setup process:
- Create vertex group:
- Select emitter mesh
- Object Data Properties → Vertex Groups
- Click "+" to add new group
- Name it: "Emission_Area"
- Paint vertex weights:
- Enter Weight Paint mode (Ctrl+Tab → Weight Paint)
- Select vertex group in sidebar
- Paint areas where particles should emit
- Red = full emission, Blue = no emission
- Gradient = gradual transition
- Assign to particle system:
- Particle Properties → Vertex Groups section
- Density: Select "Emission_Area" vertex group
- Now particles only emit from painted areas
Use cases:
- Fire from specific areas: Paint where flames should appear
- Sparks from weld seam: Paint along edge
- Leaking water: Paint around damage area
- Smoke from vents: Paint vent locations
- Grass density variation: Less grass on paths, more in fields
💡 Pro Tip: Vertex Group Workflow
Vertex groups give you control impossible otherwise:
- Paint emission exactly where needed
- Gradual density transitions
- No particles in unwanted areas
- Animate vertex weights for moving emission zones
- Essential for professional VFX work
Emission Timing
⏰ When Particles Are Born
Frame Start and Frame End:
- Continuous emission (typical):
- Frame Start: 1
- Frame End: 200
- Particles emit steadily from frame 1-200
- New particles born every frame
- Good for: Rain, snow, ongoing effects
- Burst emission:
- Frame Start: 50
- Frame End: 50
- All particles emit at once on frame 50
- Sudden emission event
- Good for: Explosions, impacts, bursts
- Delayed start:
- Frame Start: 100
- Frame End: 200
- No particles before frame 100
- Then continuous emission 100-200
- Good for: Timed effects, sequenced events
Lifetime considerations:
- Lifetime = 50 frames:
- Each particle lives 50 frames after birth
- Particle born frame 1 → dies frame 51
- Particle born frame 100 → dies frame 150
- Steady state:
- After initial ramp-up (= lifetime duration)
- Particle count stays constant
- New births replace deaths
- Calculation:
- Emission duration = Frame End - Frame Start
- Total lifespan = Emission duration + Lifetime
- Last particle dies at Frame End + Lifetime
Lifetime randomness:
- Lifetime Random: 0.0 to 1.0
- 0.0: All particles live exact lifetime
- 0.5: Lifetime varies ±50%
- 1.0: Lifetime varies 0-200%
- Natural effects need variation (0.2-0.5 typical)
Source Object Considerations
🎭 Emitter Shape Matters
Different emitter shapes create different patterns:
- Plane:
- Flat, wide emission area
- Good for: Rain, snow (overhead plane)
- Particles fall straight down
- Sphere:
- Radial emission in all directions
- Good for: Explosions, bursts
- Normal velocity shoots outward
- Cube:
- Rectangular emission volume
- Good for: Room-filling effects
- Volume emission fills space
- Custom mesh:
- Any shape works
- Particles follow mesh surface
- Complex shapes create complex patterns
- Example: Character mesh emits particles from body
Emitter visibility:
- Usually hide emitter in render:
- Object Properties → Visibility → Camera (uncheck)
- Or move to hidden collection
- Particles visible, emitter invisible
- Clean final render
- Sometimes keep visible:
- Smoke from chimney (chimney visible)
- Fountain with water particles
- Character with magic effects
Animated emitters:
- Emitter can move during animation
- Particles emit from moving position
- Creates trails and dynamic patterns
- Example: Moving torch leaves fire trail
- Example: Flying character emits magic sparkles
Emission Modifiers
🔧 Modifiers Affect Emission
Modifiers change emitter geometry:
- Particles emit from modified geometry
- Not original mesh
- Order matters (modifier stack)
Common combinations:
- Array + Particles:
- Array modifier duplicates emitter
- Particles emit from all duplicates
- Example: Row of torches, each emitting smoke
- Subdivision + Particles:
- More faces = more emission points
- Denser particle distribution
- Example: Smooth emission from subdivided surface
- Boolean + Particles:
- Modified shape emits particles
- Example: Particles from cut-out areas
Modifier application:
- Unapplied modifiers:
- Particles use modified geometry in real-time
- Non-destructive workflow
- Can adjust modifiers, particles update
- Applied modifiers:
- Geometry frozen
- Apply before particle system for fixed emission
- Or after for modifier-driven emission
⚠️ Modifier Stack Order
Particle modifier position matters:
- Particle system appears as modifier in stack
- Modifiers above it affect emission geometry
- Modifiers below it don't affect particles
- Example: Subdivision before particles = denser emission
- Example: Subdivision after particles = doesn't affect emission
💡 Emission Is Foundation: Everything starts with emission. Where particles are born. When they appear. How they're distributed. Get emission wrong and no amount of physics, forces, or rendering will save your effect. But get emission right—precise placement, good timing, smart distribution—and half your work is done. Particles already look good before you touch velocity or forces. Professional VFX artists spend significant time on emission setup. Not because it's complicated. Because it's critical. Control birth and you control the effect. Master emission and you master particle systems. The rest is refinement. But foundation matters most.
🌀 Particle Physics and Forces
Physics transforms static particles into dynamic, believable effects. Gravity pulls. Wind pushes. Turbulence swirls. Collisions redirect. Understanding particle physics means controlling how particles move through space, how they respond to their environment, and how they interact with objects. This is where particle systems go from "things appearing" to "things behaving naturally."
Velocity and Initial Motion
🚀 How Particles Start Moving
Initial velocity determines birth motion:
- Velocity → Normal:
- Particles shoot perpendicular to emitter surface
- Default: 1.0 (moderate speed)
- Higher values = faster initial speed
- Negative values = shoot inward (into emitter)
- Zero = particles don't move initially (just gravity)
- Example normal velocities:
- 0.5: Gentle emission (soft smoke, light dust)
- 1.0: Standard emission (rain, sparks)
- 5.0: Fast emission (explosion debris, projectiles)
- 20.0: Violent emission (shrapnel, burst)
Velocity components (Velocity panel):
- Normal: Speed perpendicular to surface (primary control)
- Sphere emitter: particles shoot radially outward
- Plane emitter: particles shoot straight up (or down)
- Custom mesh: follows face normals
- Tangent: Speed along surface tangent
- Particles move along surface before leaving
- Creates swirl or rotation patterns
- Usually keep at 0.0 for simple effects
- Object Velocity: Inherit emitter's motion
- 0.0: Particles don't inherit motion (stay in place)
- 1.0: Particles fully inherit emitter velocity
- Important for moving emitters (flying torch, moving car)
- Creates realistic motion trails
- Random: Randomize initial velocity
- 0.0: All particles same velocity
- 1.0: Maximum randomization
- Adds natural variation
- Typical range: 0.1 to 0.3 for realism
Perpendicular] A --> C[Tangent Velocity
Along Surface] A --> D[Object Velocity
Inherited Motion] B --> E[Primary Direction] C --> E D --> E style A fill:#888,stroke:#333,stroke-width:2px,color:#fff style E fill:#4CAF50,stroke:#333,stroke-width:2px,color:#fff
Physics Types
⚙️ How Particles Behave
Physics Type dropdown (Particle Properties → Physics):
- Newtonian:
- Standard physics simulation
- Gravity, air resistance, forces
- Most common choice
- Realistic physical behavior
- Use for: Rain, debris, sparks, most effects
- Keyed:
- Particles follow path between targets
- Animated point-to-point motion
- No physics applied
- Use for: Scripted particle motion, special effects
- Advanced technique (covered later)
- Boids:
- Flocking/swarming artificial intelligence
- Particles avoid each other, follow leader
- Organic group behavior
- Use for: Birds, fish, insects, crowds
- Complex system (covered in advanced lessons)
- Fluid:
- Particles act as fluid simulation
- SPH (Smoothed Particle Hydrodynamics)
- Particles interact, maintain volume
- Use for: Liquid effects, water droplets
- Computationally expensive
Choosing physics type:
| Effect | Physics Type | Why |
|---|---|---|
| Rain | Newtonian | Simple gravity and collision |
| Bird flock | Boids | Flocking AI behavior |
| Magic trail | Keyed | Controlled path following |
| Explosion | Newtonian | Debris with gravity/forces |
| Water splash | Fluid or Newtonian | Fluid for cohesion, Newtonian for simple |
💡 Pro Tip: Start with Newtonian
Newtonian physics handles 90% of effects:
- Simple, predictable, fast to calculate
- Works for most common scenarios
- Other types are specialized tools
- Master Newtonian before exploring others
- You can always change type later if needed
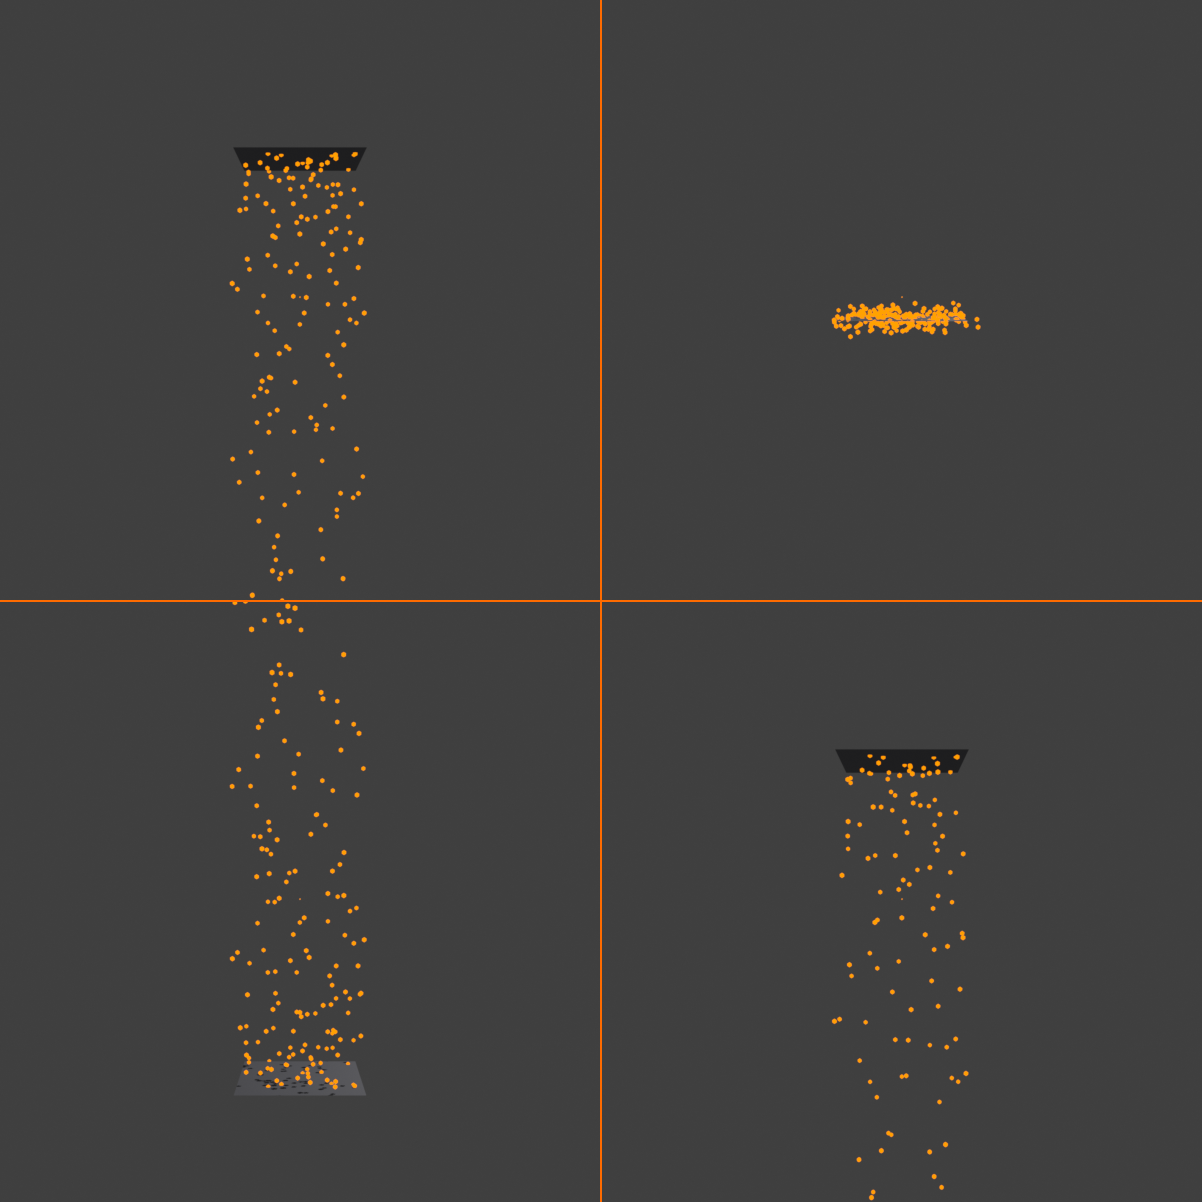
Gravity and Field Weights
🌍 Gravity Control
Physics → Field Weights → Gravity:
- Default: 1.0
- Full Earth gravity applied
- Particles fall naturally
- Standard for most effects
- 0.0: No gravity
- Particles float weightlessly
- Only initial velocity and forces affect them
- Use for: Space scenes, floating magic, bubbles
- Negative values: Reverse gravity
- -1.0: Particles fall upward
- Use for: Rising smoke, helium balloons, anti-gravity
- Useful for effects that need upward motion
- Values > 1.0: Strong gravity
- 2.0: Double gravity (heavy objects)
- Use for: Dense debris, emphasizing weight
Practical gravity values:
- Rain: 1.0 (standard fall)
- Snow: 0.3 (gentle drift)
- Feathers: 0.1 (very light)
- Debris: 1.0-2.0 (weighty chunks)
- Sparks: 0.5 (lighter than solid matter)
- Smoke: -0.5 to -1.0 (rises)
- Bubbles: -0.3 (float upward)
Scene gravity settings:
- Scene Properties → Gravity:
- Sets global gravity direction and strength
- Default: Z = -9.81 (Earth gravity, downward)
- Particle gravity weight multiplies this value
- Calculation:
- Actual gravity = Scene Gravity × Particle Weight
- Example: -9.81 × 0.5 = -4.905 (half gravity)
Force Fields
💨 External Forces
Force fields affect particle motion:
- Add force field objects to scene
- Particles respond within field influence
- Multiple fields can combine
- Essential for wind, turbulence, magnetism effects
Adding force field:
- Add → Force Field → [Type]
- Position field in scene
- Adjust strength and falloff
- Particles automatically respond (if Field Weight enabled)
Common force field types:
- Wind:
- Constant directional push
- Blows particles in one direction
- Good for: Weather effects, directional flow
- Strength: 1.0-10.0 typical
- Align field rotation to control wind direction
- Turbulence:
- Random swirling motion
- Creates organic, chaotic movement
- Good for: Smoke, dust clouds, magical effects
- Strength: 5.0-30.0 typical
- Size: Controls turbulence scale
- Essential for realistic atmospheric effects
- Force:
- Pushes/pulls from point
- Radial influence
- Positive strength: Pushes away (repel)
- Negative strength: Pulls toward (attract)
- Good for: Explosions (push), black holes (pull)
- Vortex:
- Spinning tornado-like force
- Pulls particles into spiral
- Good for: Tornado, drain, magical vortex
- Drag:
- Air resistance, slows particles
- Reduces velocity over time
- Good for: Water resistance, thick atmosphere
Directional push] A --> C[Turbulence:
Random chaos] A --> D[Force:
Radial push/pull] A --> E[Vortex:
Spiral motion] A --> F[Drag:
Resistance] style A fill:#888,stroke:#333,stroke-width:2px,color:#fff

Field weights (Particle Properties → Field Weights):
- All: 1.0
- Master control for all fields
- 0.0: Ignore all force fields
- 1.0: Full field response
- Individual field types:
- Wind: Weight for wind fields
- Turbulence: Weight for turbulence fields
- Can disable specific field types
- Fine control over which forces affect particles
✅ Turbulence for Realism
Most effects benefit from turbulence:
- Perfect motion looks artificial
- Nature is chaotic and unpredictable
- Turbulence adds that chaos
- Even subtle turbulence (Strength: 5-10) improves realism
- Dust, smoke, rain, sparks—nearly everything needs turbulence
- Rule of thumb: If it moves in air, add turbulence
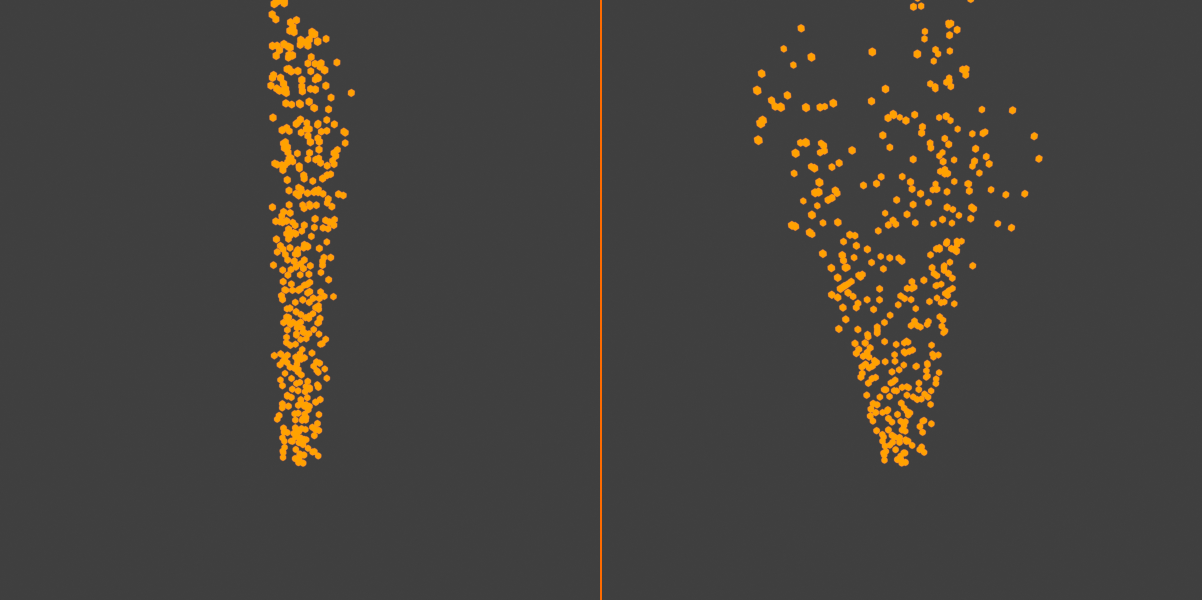
Damping and Drag
🎯 Velocity Control
Physics → Damping:
- Reduces velocity over time
- Particles gradually slow down
- Simulates air resistance
- Value: 0.0 to 1.0
- Damping = 0.0:
- No slowdown
- Particles maintain velocity forever
- Unrealistic in atmosphere
- Use for: Space, vacuum, fantasy effects
- Damping = 0.1-0.3:
- Subtle resistance
- Natural air resistance
- Most realistic for atmospheric effects
- Damping = 0.5-1.0:
- Strong resistance
- Particles slow quickly
- Use for: Underwater, thick smoke, heavy drag
When to use damping:
- Explosions: Initial burst, then particles slow (0.2-0.4)
- Smoke: Rises then dissipates, slowing (0.3-0.5)
- Sparks: Quick burst, air resistance slows (0.2)
- Water droplets: Some drag in air (0.1-0.2)
- No damping: Rain (constant fall speed), projectiles in space
Damping vs. Drag force field:
| Feature | Damping (Particle Property) | Drag (Force Field) |
|---|---|---|
| Scope | Affects all particles equally | Localized to field area |
| Control | Global setting | Positioned in scene |
| Use case | General air resistance | Specific areas (water, wind tunnel) |
| Typical | Most effects use this | Special situations only |
Mass and Size
⚖️ Particle Weight
Physics → Mass:
- Affects force response:
- Heavier particles harder to push
- Lighter particles more affected by forces
- Default: 1.0
- Mass does NOT affect gravity:
- Common misconception
- All masses fall at same rate (physics!)
- Mass only matters for forces and collisions
- Use cases:
- Heavy debris (Mass: 2.0-5.0): Less affected by wind
- Light dust (Mass: 0.1-0.5): Blown easily by forces
- Standard particles (Mass: 1.0): Balanced behavior
Size affects behavior:
- Render → Scale:
- Visual size of particles
- Also affects collision size
- Larger particles = bigger collision volume
- Scale Randomness:
- Varies particle sizes
- Natural variation
- Typical: 0.2-0.5 for organic effects
Mass in context:
- Useful when multiple force fields present
- Heavy particles resist turbulence, light forces
- Light particles blown around easily
- Example: Heavy rocks vs. light leaves in wind
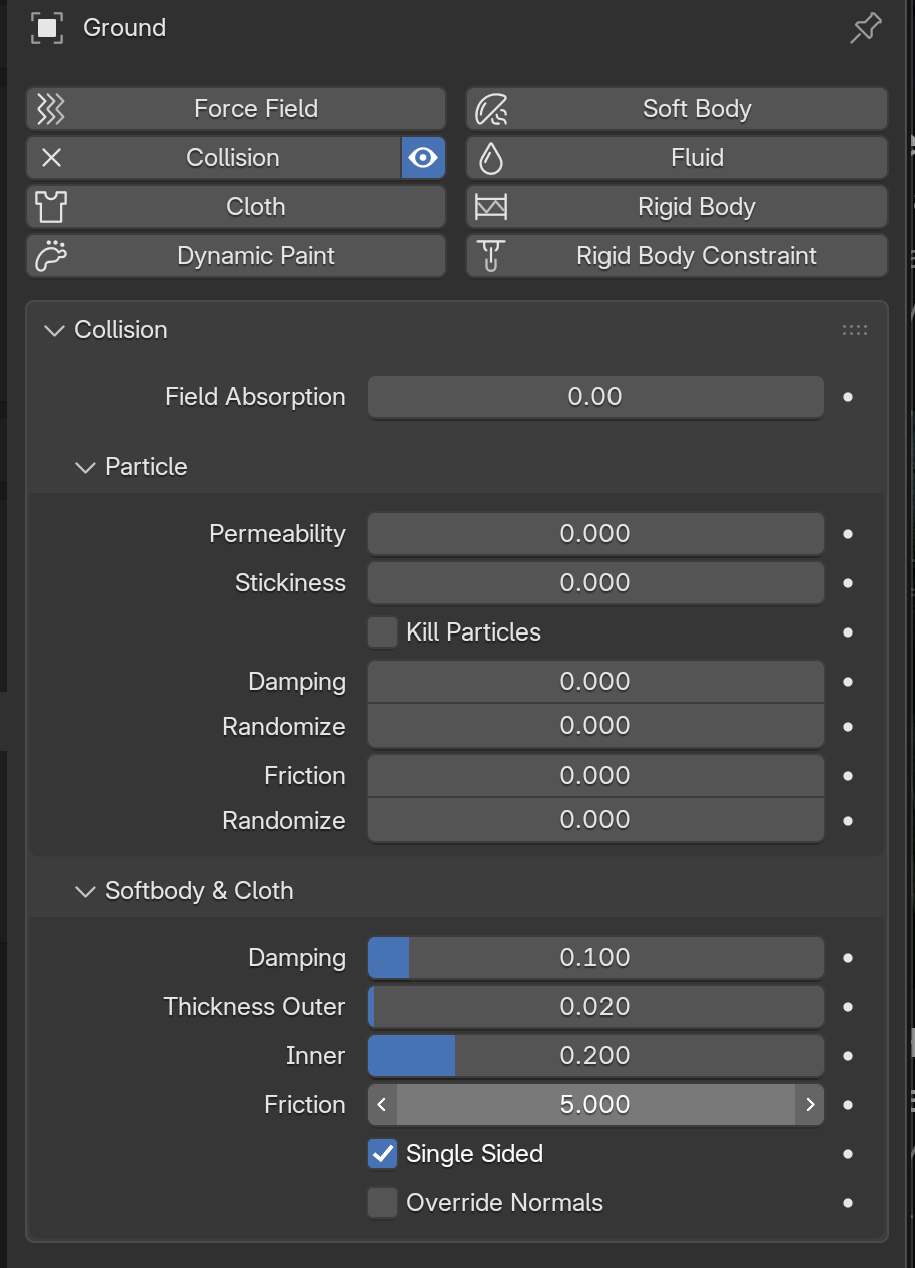
Collisions
💥 Particle-Object Interaction
Collision setup (two-step process):
- Enable collision on particles:
- Particle Properties → Physics → Collision
- Check "Collision" checkbox
- Now particles CAN collide
- Enable collision on objects:
- Select object that should block particles
- Physics Properties → Collision (icon looks like two spheres)
- Check "Collision" checkbox
- Now object blocks particles
Collision settings (Particle Properties → Physics):
- Permeability: 0.0 to 1.0
- 0.0: Solid collision (all particles blocked)
- 0.5: Half particles pass through
- 1.0: No collision (all pass through)
- Use for: Semi-permeable barriers, screens, grids
- Stickiness: 0.0 to 1.0
- 0.0: Particles don't stick
- 1.0: Particles stick on contact
- Stuck particles stop moving
- Use for: Water droplets on surface, snow accumulation
- Kill Particles on collision
- Checkbox: Particles die when hitting object
- Instantly disappear on contact
- Use for: Bullets hitting targets, rain on ground
- Efficient—reduces particle count
- Damping: 0.0 to 1.0
- Energy lost on collision
- 0.0: Perfect bounce (no energy loss)
- 1.0: Complete absorption (no bounce)
- Typical: 0.5-0.8 (some bounce, some loss)
- Friction: 0.0 to 1.0
- Surface friction on collision
- Slows particles sliding across surface
- 0.0: Slippery (no friction)
- 1.0: High friction (particles slow quickly)
Particle disappears] B --> D[Stick?
Particle stays on surface] B --> E[Bounce?
Damping controls bounce] B --> F[Slide?
Friction affects motion] style A fill:#888,stroke:#333,stroke-width:2px,color:#fff style C fill:#f44336,stroke:#333,stroke-width:2px,color:#fff style D fill:#FF9800,stroke:#333,stroke-width:2px,color:#fff style E fill:#4CAF50,stroke:#333,stroke-width:2px,color:#fff style F fill:#2196F3,stroke:#333,stroke-width:2px,color:#fff
Practical collision examples:
- Rain hitting ground:
- Kill Particles: ON (rain disappears)
- Optional: Emit splash particles on collision
- Ball bouncing:
- Damping: 0.3 (loses some energy each bounce)
- Friction: 0.2 (some surface drag)
- Debris hitting wall:
- Damping: 0.6 (significant energy loss)
- Friction: 0.5 (slides to rest)
- Stickiness: 0.0 (doesn't stick to wall)
- Water droplets on window:
- Stickiness: 0.8 (most stick)
- Damping: 0.9 (little bounce)
- Some particles slide down slowly
⚠️ Collision Performance
Collisions are computationally expensive:
- Every particle checks against collision objects
- Complex collision meshes slow simulation
- Optimization tips:
- Use simple collision geometry (low-poly proxies)
- Kill particles after collision if they're not needed
- Limit collision to essential objects only
- Enable "Kill Particles" when particles won't be seen after impact
Integration and Simulation Quality
🎛️ Simulation Accuracy
Physics → Integration:
- Timestep / Timestep:
- Controls simulation accuracy
- Higher values = more sub-steps per frame
- More accurate but slower
- Default: 0.04 (usually sufficient)
- When to increase:
- Fast-moving particles passing through collision objects
- Erratic, jittery motion
- Particles behaving strangely
- Try: 0.02 or 0.01 (double or quadruple accuracy)
- When to decrease:
- Simulation too slow
- Simple effects that don't need precision
- Try: 0.1 (less accurate but faster)
Subframes (Scene Properties → Rigid Body World):
- Applies to scene-wide physics
- Affects particle/rigid body interaction
- Usually leave at default unless problems occur
Caching (Particle Properties → Cache):
- Automatic caching:
- Blender caches simulation as it plays
- Faster playback after first run
- Memory-based (not saved to disk by default)
- Baking simulation:
- Cache → Bake All Dynamics
- Calculates entire simulation, saves to disk
- Required before rendering animation
- Locked simulation (can't change settings until freed)
- Free bake:
- Delete baked cache to adjust settings
- Must re-bake after changes
💡 Pro Tip: Always Bake Before Final Render
Baking ensures consistent results:
- Unbaked simulations may vary between renders
- Baking locks simulation, guarantees identical results
- Essential for animation rendering
- Workflow: Adjust → Test → Bake → Render
- Can bake to external cache files for safety
Particle Rotation
🔄 Orientation and Spin
Rotation → Orientation:
- None:
- No rotation applied
- Particles stay in default orientation
- Use for: Simple point effects, spheres
- Normal:
- Align to emission surface normal
- Particles face away from emitter
- Use for: Directional particles (arrows, projectiles)
- Velocity / Hair:
- Align to velocity direction
- Particles point where they're moving
- Dynamic orientation follows motion
- Use for: Rain streaks, motion-oriented objects
- Most common for realistic effects
- Global X/Y/Z:
- Align to world axis
- Static orientation
- Use for: Specific directional needs
Rotation → Angular Velocity:
- Mode:
- None: No spin
- Spin: Rotate around axis
- Random: Random rotation rates
- Angular Velocity:
- Rotation speed in radians/second
- Positive: Clockwise spin
- Negative: Counter-clockwise
- Use for: Tumbling debris, spinning objects
Use cases:
- Rain: Velocity orientation (streaks point down)
- Leaves: Random angular velocity (tumble naturally)
- Arrows: Velocity orientation (point forward)
- Debris: Random rotation (chaotic tumbling)
- Spheres: None (rotation not visible)
💡 Physics Makes It Real: You can place thousand particles perfectly. Give them beautiful materials. Light them dramatically. But without physics they're dead. Frozen. Artificial. Physics is what makes particles feel alive. Gravity pulls. Forces push. Collisions redirect. Rotation spins. Suddenly particles don't just exist—they behave. They respond to environment. They feel weight, resistance, momentum. Professional VFX artists spend more time on physics than emission. Because physics is where "looks good" becomes "feels real." Audience doesn't consciously notice good physics. But they absolutely notice bad physics. Brain knows how things should move. Violate those expectations and immersion breaks. Match them and magic happens. Scene goes from "that's CG" to "that's real." Physics is the difference. Master forces, collisions, motion—master believability. Everything else is secondary.
🎨 Rendering and Display
Physics determines how particles move. Rendering determines how particles look. From simple dots to complex instanced objects, from flat circles to volumetric clouds—rendering transforms invisible simulation points into visible effects. Understanding render settings means controlling exactly how your audience sees particles, from viewport preview to final render.
Render Types Overview
👁️ How Particles Appear
Render → Render As dropdown:
- None:
- Particles invisible in render
- Only visible in viewport
- Use for: Emission sources, hidden drivers
- Halo:
- Circular glowing spots (legacy option)
- Simple billboards facing camera
- Limited in modern Blender
- Better alternatives available
- Path:
- Particles render as curved lines/trails
- Shows particle motion path
- Good for: Motion trails, streaks, hair-like effects
- Length based on particle history
- Object:
- Replace each particle with 3D object
- Most versatile and powerful option
- Any mesh can be instanced
- Use for: Debris, rocks, leaves, complex particles
- Most common for professional effects
- Collection:
- Randomly choose from collection of objects
- Variation across particles
- Use for: Mixed debris, varied vegetation, crowds
- Each particle gets random collection member
Invisible] A --> C[Halo:
Glowing dots] A --> D[Path:
Motion trails] A --> E[Object:
3D instance] A --> F[Collection:
Random instances] style E fill:#4CAF50,stroke:#333,stroke-width:2px,color:#fff style F fill:#888,stroke:#333,stroke-width:2px,color:#fff
Choosing render type:
| Effect | Best Render Type | Why |
|---|---|---|
| Rain | Object (stretched sphere) or Path | Raindrops as stretched shapes |
| Sparks | Halo or Object (small sphere) | Bright glowing points |
| Debris | Collection (varied rocks/chunks) | Natural variation needed |
| Magic trail | Path | Visible motion streak |
| Leaves | Collection (different leaf models) | Variety creates realism |
| Crowd | Collection (different characters) | Each person different |

Object Instancing
🎯 Rendering as 3D Objects
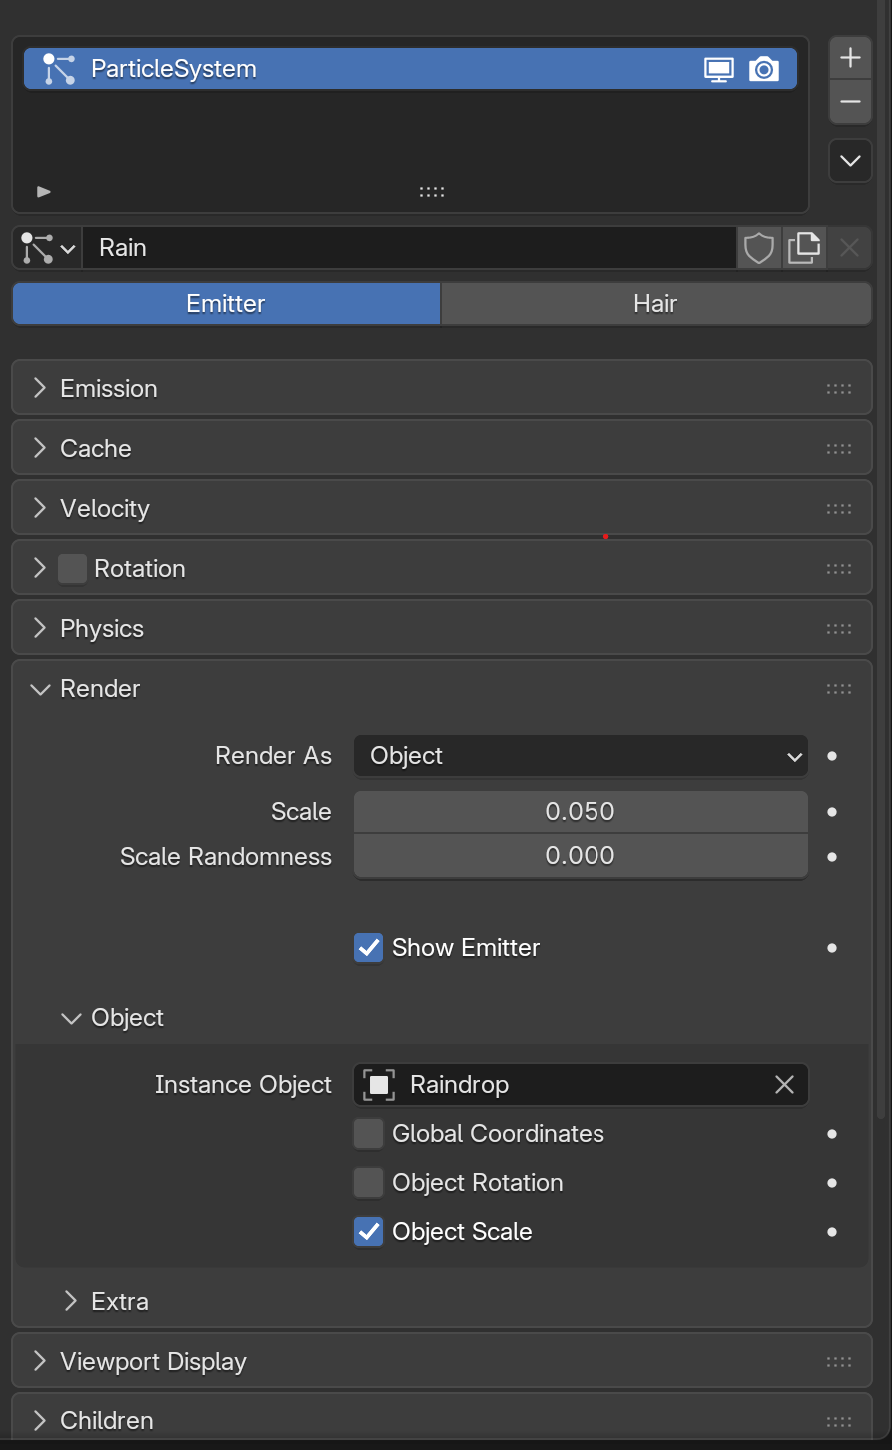
Setup for Object rendering:
- Create instance object:
- Model the object particles will look like
- Example: Rock mesh for debris, sphere for droplets
- Apply materials and textures
- Keep relatively low-poly (will be instanced many times)
- Assign to particle system:
- Select particle system
- Render → Render As: Object
- Render → Instance Object: [Your object name]
- Particles now render as that object
- Optional: Hide instance object:
- Original object can be hidden in render
- Move to separate collection, disable in render
- Only particle instances visible
Object instance settings:
- Scale:
- Multiplier for instance object size
- 1.0: Original size
- 0.5: Half size
- 2.0: Double size
- Easily adjust without remodeling
- Scale Randomness:
- Varies instance sizes
- 0.0: All same size
- 0.5: ±50% variation
- Natural effects need variation (0.2-0.5 typical)
- Use Global:
- When enabled: Instances maintain world orientation
- When disabled: Instances follow particle rotation
- Usually disabled for natural rotation
- Object Rotation:
- Add rotation offset to instances
- Useful if object isn't oriented correctly by default
- Rotate 90° if object facing wrong direction
✅ Instance Object Best Practices
Optimize instance objects:
- Low poly count: Will be duplicated thousands of times
- Clean geometry: No unnecessary complexity
- Proper scale: Model at reasonable size (1-2 Blender units typical)
- Origin placement: Set origin thoughtfully (bottom for standing objects, center for floating)
- Applied transforms: Apply rotation and scale before using as instance
- Efficient materials: Simple shaders when possible
Collection Instancing
🎲 Random Object Variation
Why use collections:
- Natural effects need variety
- Real debris isn't identical chunks
- Forest has different trees
- Crowds are different people
- Variation creates realism
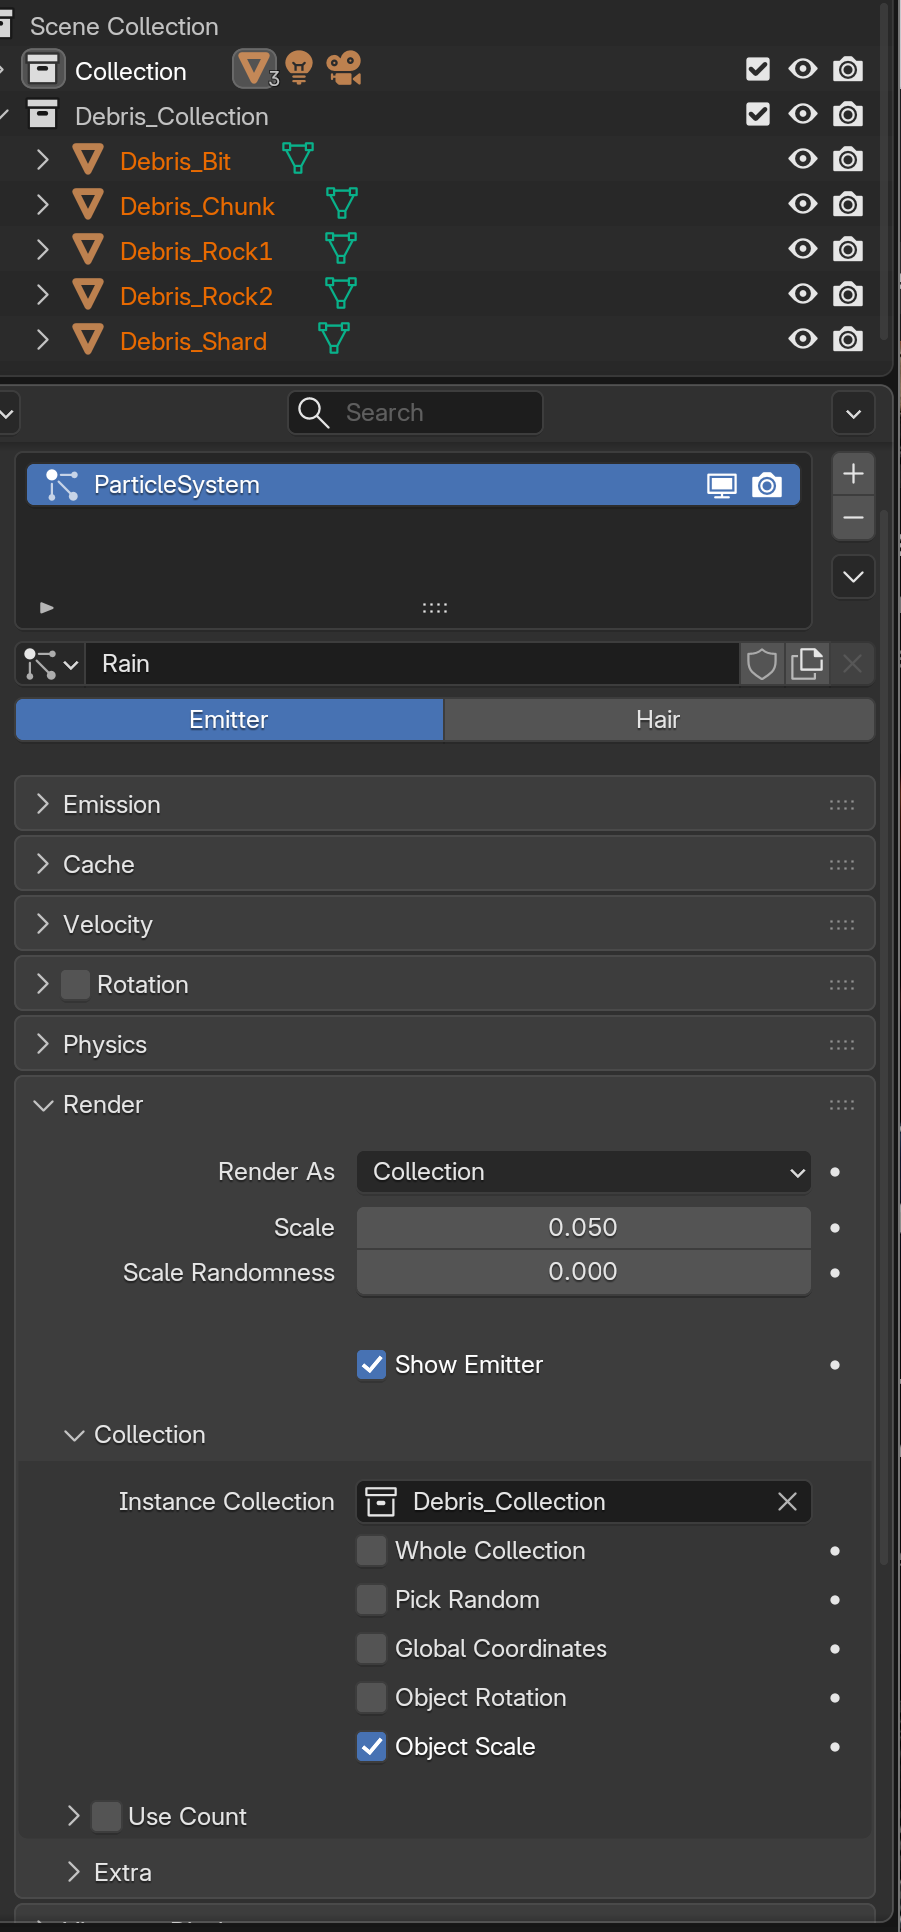
Setup for Collection rendering:
- Create collection:
- Outliner → Right-click → New Collection
- Name it: "Particle_Objects" or similar
- Add objects to collection:
- Create 3-10 different objects
- Model variations (different rocks, leaves, etc.)
- Drag objects into collection in Outliner
- All objects in collection become possible instances
- Assign to particle system:
- Render → Render As: Collection
- Render → Instance Collection: [Your collection name]
- Each particle randomly picks collection object
Collection distribution:
- Use Count (checkbox):
- When enabled: Objects with more instances in scene appear more in particles
- When disabled: All objects equally likely
- Usually keep disabled for even distribution
- Pick Random:
- Default behavior: Random selection
- Each particle independently chooses
- Natural variation
- Whole Collection:
- Alternative: Use entire collection as one unit
- Rare use case
Example collections:
- Debris collection:
- Rock_Large, Rock_Medium, Rock_Small
- Chunk_Angular, Chunk_Broken
- 5-7 objects typical
- Leaf collection:
- Leaf_Maple, Leaf_Oak, Leaf_Birch
- Each with slight variations
- Different colors, shapes
- Crowd collection:
- Person_Standing, Person_Walking1, Person_Walking2
- Different character models
- Varied poses, clothing
💡 Pro Tip: Collection Object Count
Sweet spot is 5-10 objects:
- Too few (1-2): Repetition obvious, looks artificial
- Just right (5-10): Good variation, not overwhelming
- Too many (20+): Diminishing returns, harder to manage
- 5-7 well-designed objects create convincing variety
- Quality over quantity—make each object distinct
Path Rendering
🌟 Motion Trails and Streaks
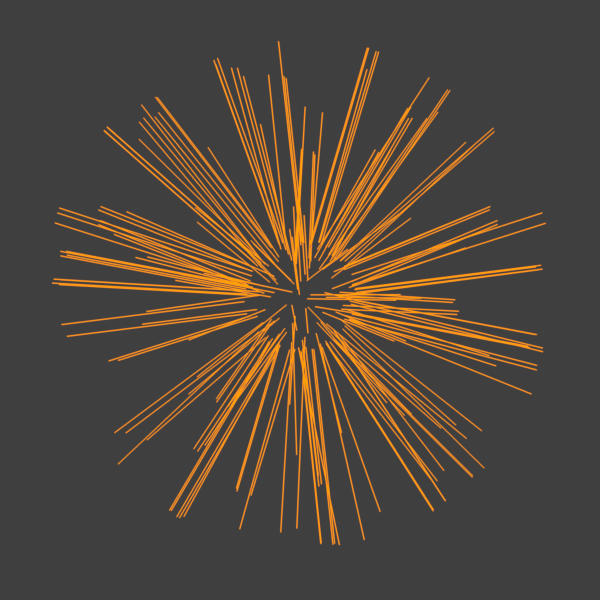
Path rendering creates visible trails:
- Particles render as curved lines
- Shows particle trajectory
- Dynamic, fluid appearance
- Good for: Motion blur effects, energy trails, hair-like strands
Setup for Path rendering:
- Enable path rendering:
- Render → Render As: Path
- Adjust path settings:
- Steps: Path resolution (higher = smoother)
- Length: Trail length in frames
- Trail Count: Number of particles shown in trail
Path rendering settings:
- Render → Timing → Absolute Path Time:
- When enabled: Trail length in frames
- When disabled: Trail length as fraction of lifetime
- Path Steps:
- Subdivisions along path
- Higher = smoother curves
- Default: 5 (usually sufficient)
- Increase to 10-20 for smooth, elegant trails
Material considerations for paths:
- Paths need materials like any mesh
- Can use emission for glowing trails
- Transparency for fade-out effects
- Gradients along path length
Use cases:
- Magic sparkle trails: Glowing emission material, short paths
- Energy beams: Long paths with bright emission
- Motion streaks: Fast-moving objects leaving trails
- Hair-like effects: Many fine paths creating strand appearance
Viewport Display
👁️ Working View Settings
Viewport Display (separate from render):
- Controls how particles appear while working
- Independent of final render appearance
- Optimize for performance during editing
Viewport Display → Display As:
- Point:
- Tiny dots
- Fastest viewport performance
- Hard to see with many particles
- Circle:
- Flat circles facing camera
- Good visibility
- Moderate performance
- Most common viewport choice
- Cross:
- Small crosses
- Very visible
- Shows orientation
- Axis:
- 3D axis indicators
- Shows rotation clearly
- Heavy on performance with many particles
Display settings:
- Color:
- Viewport particle color
- Doesn't affect render
- Choose color that contrasts with scene
- Display Amount:
- Percentage of particles shown in viewport
- 100%: All particles (can be slow)
- 10-50%: Good for performance with many particles
- Doesn't affect render—all particles always rendered
- Size:
- Viewport display size
- Make particles easier to see
- Doesn't affect render size
✅ Viewport Performance Tips
Keep viewport responsive:
- Display Amount: 25-50% when working with 10,000+ particles
- Display As: Circle or Point (not Axis) for speed
- Hide particle system (H key) when not actively editing
- Limit frame range to section you're working on
- Remember: Viewport display ≠ render quality
Materials for Particles
🎨 Coloring and Texturing
Material assignment depends on render type:
- Object/Collection instances:
- Materials assigned to instance object itself
- Create material on the object being instanced
- All instances inherit that material
- Most straightforward approach
- Path rendering:
- Material assigned to emitter object
- Paths inherit emitter's material
- Use emission shaders for glowing trails
- Halo (legacy):
- Material assigned to emitter
- Limited material support
Common material techniques:
- Emission for glowing particles:
- Sparks, magic effects, energy
- Shader Editor → Emission node
- High strength values (10-100) for bright effects
- Enable bloom in render settings for glow
- Transparency for fading:
- Particles fade in/out
- Glass BSDF or Transparent BSDF
- Mix with Principled BSDF using Alpha
- Blend mode: Alpha Blend (Material Properties)
- Random colors per particle:
- Shader Editor → Object Info node
- Use "Random" output
- Connect to ColorRamp for color variation
- Each instance gets different color
- Age-based effects:
- Particle Info node → Age
- Fade particles over lifetime
- Change color as particles age
- Professional technique for natural effects
Particle Info node (powerful tool):
- Available in Shader Editor
- Outputs particle-specific data:
- Index: Particle number (0, 1, 2...)
- Random: Random value per particle (0-1)
- Age: Current age (0 = birth, 1 = death)
- Lifetime: Total lifetime in frames
- Location: Particle world position
- Velocity: Particle speed
- Angular Velocity: Rotation speed
- Use cases:
- Random: Vary colors per particle
- Age: Fade out as particle dies
- Velocity: Brighter particles when moving fast
- Combine outputs for complex effects
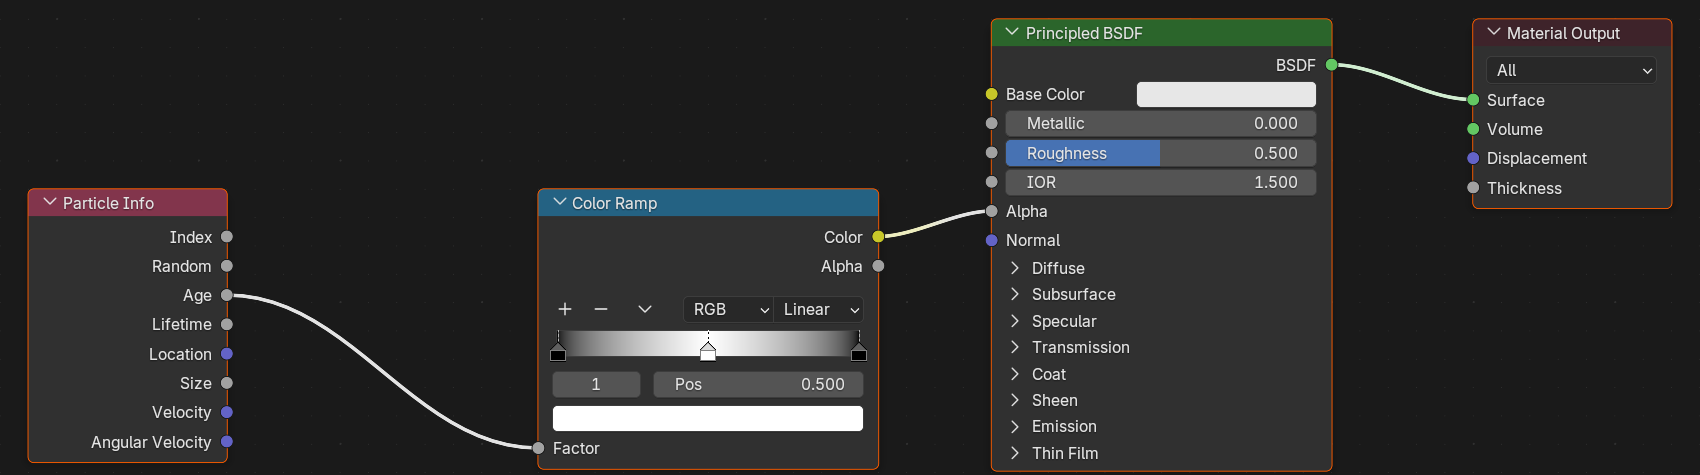
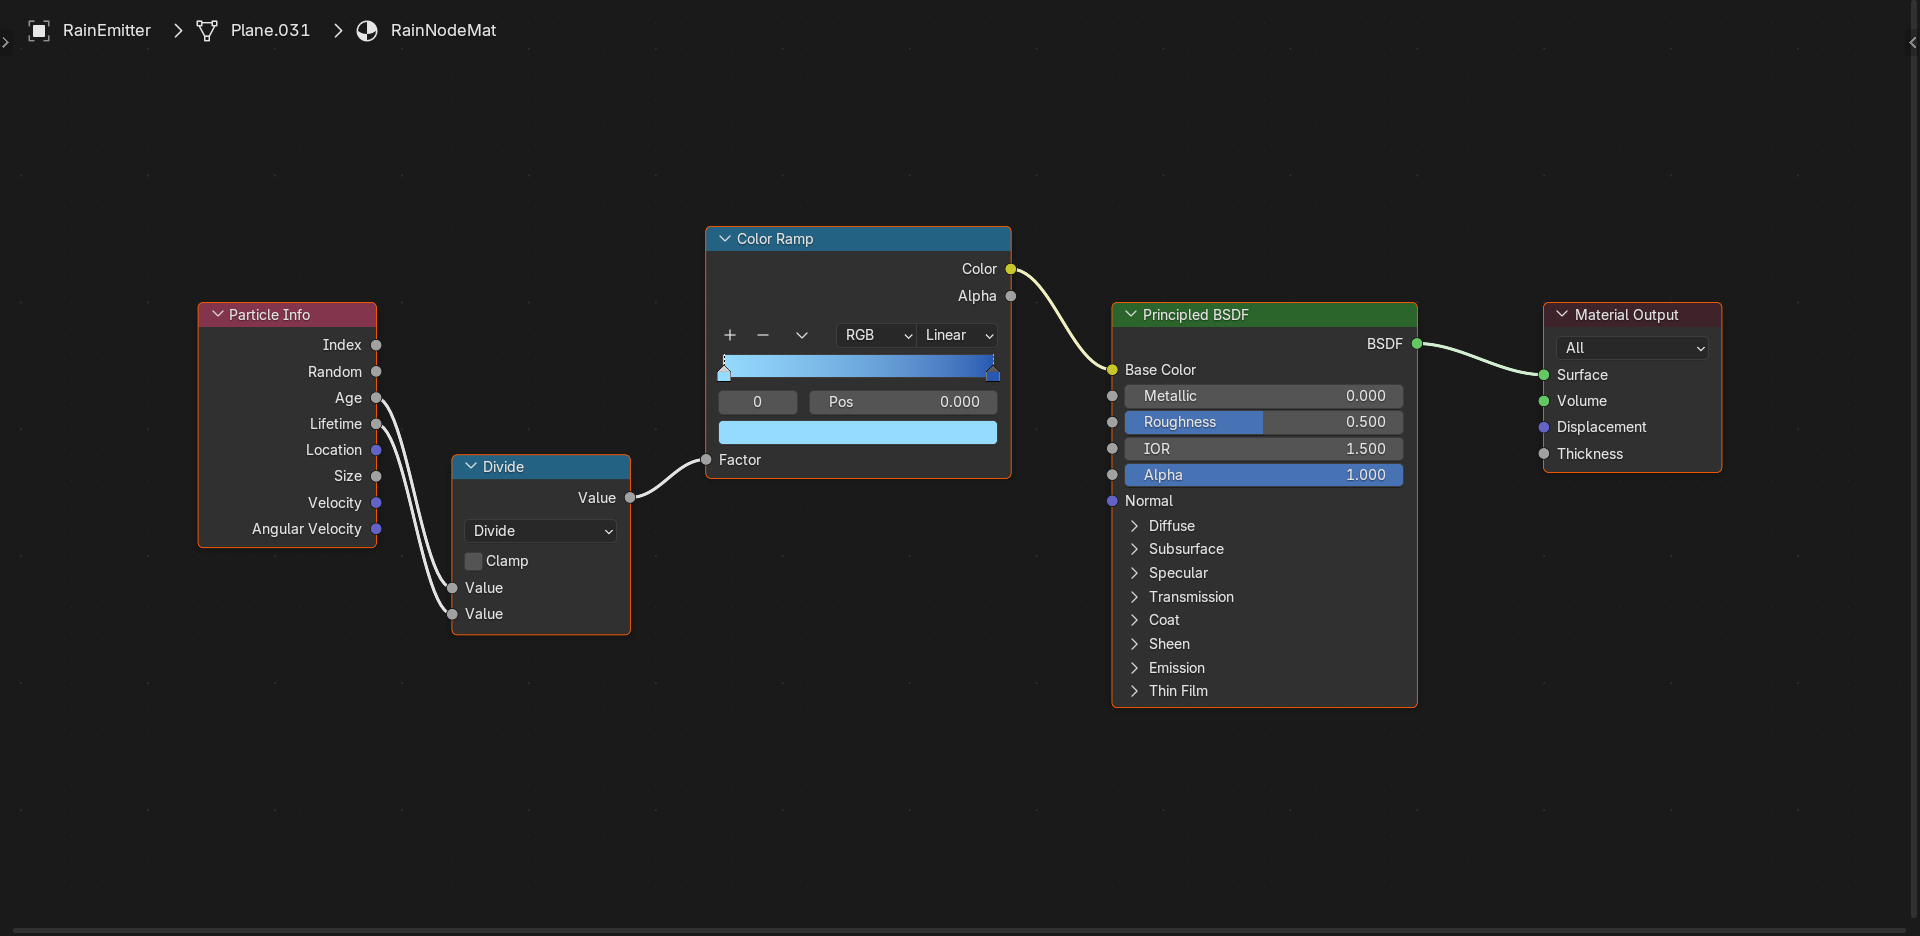
💡 Pro Tip: Age-Based Transparency
Make particles fade in and out naturally:
- Shader Editor → Add → Input → Particle Info
- Add → Converter → ColorRamp
- Connect Particle Info "Age" to ColorRamp "Fac"
- Adjust ColorRamp: Black at 0.0, White at 0.1, White at 0.9, Black at 1.0
- Connect ColorRamp to Principled BSDF "Alpha"
- Result: Particles fade in, stay visible, fade out
This technique makes effects look professional and natural!
Performance Considerations
⚡ Optimization for Large Counts
Particle count impacts performance:
- 100-1,000 particles: No issues
- 1,000-10,000 particles: Monitor performance
- 10,000-100,000 particles: Optimization critical
- 100,000+ particles: Extreme optimization needed
Optimization strategies:
- Instance object optimization:
- Use low-poly meshes (under 500 triangles ideal)
- Simple materials (avoid complex node trees)
- Limit texture resolution (512-1024px often sufficient)
- Disable unnecessary features (subsurface scattering, etc.)
- Particle count reduction:
- Use fewest particles that achieve effect
- Close-up shots need more particles
- Wide shots can use fewer
- Camera distance matters—don't over-particle distant effects
- Viewport optimization:
- Display Amount: 10-25% for huge systems
- Simplify render (N panel → Simplify → Max Subdivisions)
- Hide particles when not editing
- Render optimization:
- Bake particle simulation (Cache → Bake)
- Use render instances efficiently (Object/Collection)
- Consider particle motion blur carefully (expensive)
- Limit render to visible particles only
Memory management:
- Instance memory:
- Instances share mesh data (memory efficient)
- 10,000 instances ≠ 10,000 copies in memory
- Only one mesh stored, referenced many times
- Cache size:
- Long animations with many particles = large cache
- Cache Settings → Disk Cache for very large systems
- Monitor system memory usage
⚠️ When to Split Particle Systems
Multiple smaller systems often better than one huge system:
- Different behaviors: Heavy debris + light dust = 2 systems
- Different timing: Initial burst + sustained emission = 2 systems
- Different rendering: Object instances + paths = 2 systems
- Performance control: Easier to optimize individual systems
- Iteration speed: Adjust one system without affecting others
Rendering Output Quality
📸 Final Render Settings
Render engine considerations:
- Cycles (path tracing):
- Realistic lighting and materials
- Accurate shadows and reflections
- Slower but higher quality
- Best for final production renders
- Handles transparency, emission well
- Eevee (real-time):
- Fast preview and animation
- Good quality with setup
- Requires some scene configuration
- Great for iteration and playblasts
- Bloom and screen-space effects available
Motion blur for particles:
- Render Properties → Motion Blur:
- Enable motion blur checkbox
- Particles automatically included
- Creates realistic blur on fast-moving particles
- Expensive—increases render time significantly
- Shutter curve:
- Controls blur shape
- Default usually good
- Adjust for stylized effects
- When to use:
- Fast particles (sparks, explosions)
- Camera motion through particle field
- Professional, cinematic look
Depth of field interaction:
- Particles respect camera DoF
- Out-of-focus particles blur naturally
- Creates depth and atmosphere
- Useful for focusing attention
Bloom and glow effects:
- Eevee bloom:
- Render Properties → Bloom
- Enable checkbox
- Threshold: Brightness needed for bloom
- Creates glow around bright particles (sparks, magic)
- Cycles glare node:
- Compositor → Add → Filter → Glare
- Post-process glow effect
- More control than Eevee bloom
💡 Rendering Reveals Reality: Perfect physics with invisible particles accomplishes nothing. Rendering is where simulation becomes image. Where motion becomes visual. Where mathematics becomes art. Professional artists spend equal time on rendering as physics. Because beautiful motion rendered badly looks terrible. And simple motion rendered beautifully can look amazing. Material choices matter. Instance objects matter. Transparency, emission, variation—all matter. Audience doesn't see particle system settings. They see final pixels. Those pixels either convince or they don't. Glow either feels magical or artificial. Variation either feels natural or repetitive. Details make difference. That random color per particle. That age-based fadeout. That motion blur on fast sparks. Small touches that audience doesn't consciously notice. But brain registers. And when all rendering pieces align—physics, materials, lighting, camera—simulation transcends mechanics. Becomes experience. That's the goal. Not just working particle system. Beautiful, believable, cinematic particle system.
🌟 Common Particle Effects
Theory becomes practice when you build real effects. Rain falling. Sparks flying. Smoke rising. These aren't abstract concepts—they're specific particle systems with proven settings. Understanding common effects gives you templates and starting points. You learn what works. What doesn't. How professionals achieve specific looks. Let's build the essential effects every 3D artist needs to know.
Rain Effect
🌧️ Creating Realistic Rain
Rain is perfect first particle effect:
- Simple physics (gravity only)
- Straightforward emission
- Clear visual feedback
- Immediately recognizable
- Teaches core concepts
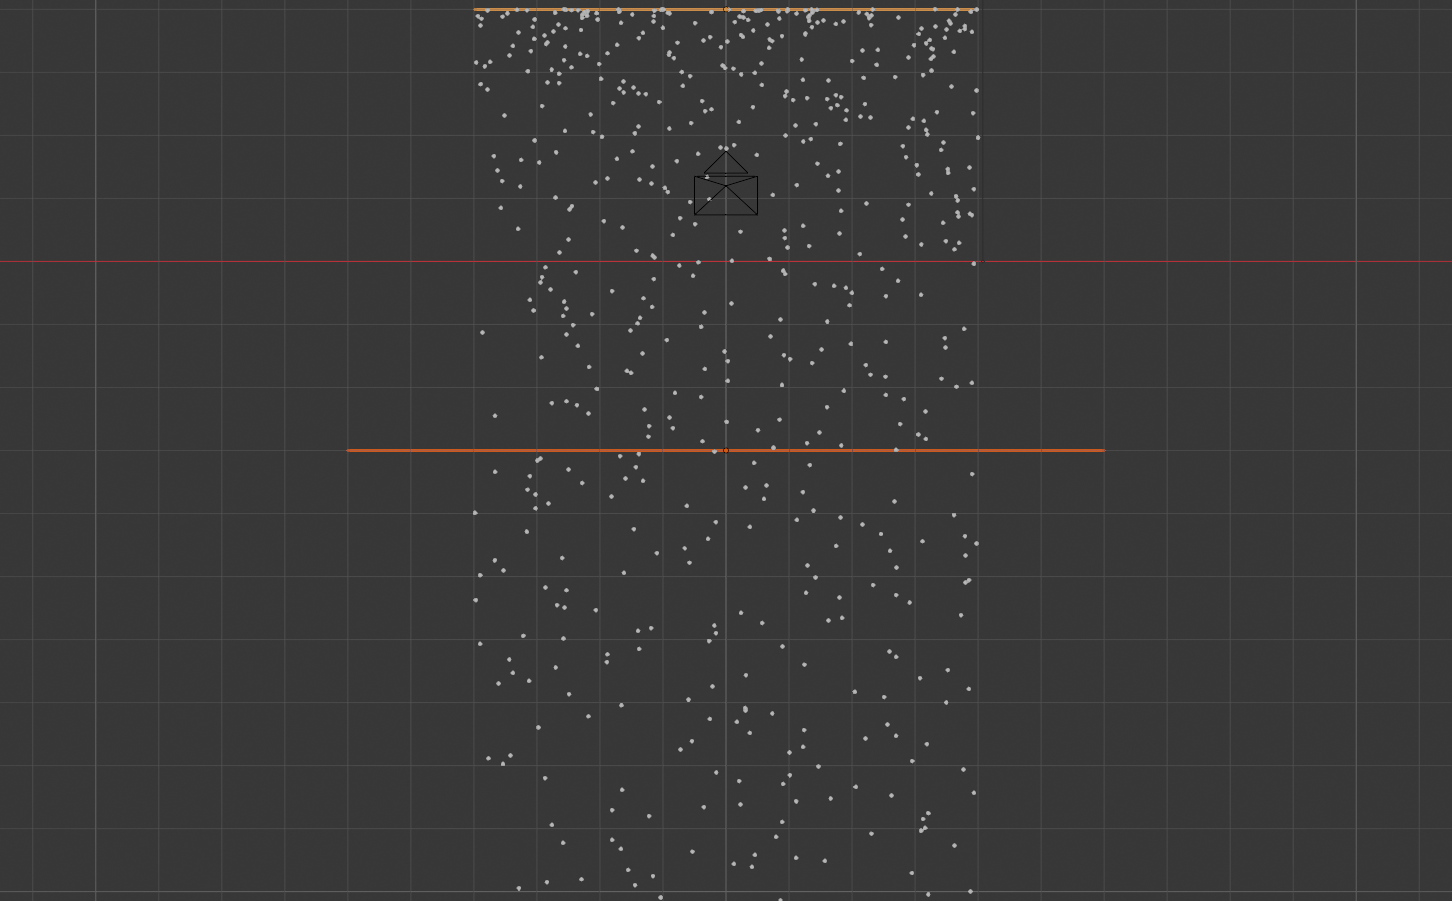
Rain setup workflow:
- Create emitter plane:
- Add → Mesh → Plane
- Scale large (S, 20, Enter) to cover scene area
- Position above scene (G, Z, 10, Enter)
- This is your "rain cloud"
- Add particle system:
- Select plane → Particle Properties
- Click "+" to add system
- Type: Emitter (default)
- Configure emission:
- Number: 2000-5000 (adjust for scene size)
- Lifetime: 80-120 frames (how long rain falls before hitting ground)
- Emit From: Faces
- Random: Enabled
- Configure velocity:
- Velocity → Normal: 0.0 (rain doesn't shoot sideways)
- Velocity → Random: 0.1 (slight variation)
- Configure physics:
- Physics Type: Newtonian
- Gravity: 1.0 (full gravity)
- Damping: 0.0 (rain doesn't slow in air)
- Configure rendering:
- Render As: Object
- Create raindrop: Add → Mesh → UV Sphere
- Scale and stretch: S, Z, 3 (elongate into raindrop shape)
- Assign as instance: Instance Object → Sphere
- Scale: 0.05-0.1 (small raindrops)
- Add collision (optional):
- Select ground plane
- Physics Properties → Collision → Enable
- Particle system → Physics → Collision → Enable
- Kill Particles: ON (rain disappears on ground)
- Material for rain:
- Principled BSDF
- Base Color: Light blue tint
- Transmission: 1.0 (transparent)
- Roughness: 0.1 (shiny)
- IOR: 1.33 (water)
Raindrop Shape] D --> E[Collide with Ground] E --> F[Kill on Impact] style A fill:#888,stroke:#333,stroke-width:2px,color:#fff style F fill:#f44336,stroke:#333,stroke-width:2px,color:#fff
Rain enhancement techniques:
- Add wind force field:
- Add → Force Field → Wind
- Rotate slightly (rain at angle)
- Strength: 0.5-2.0
- Creates more dynamic, natural rain
- Splash particles:
- Add second particle system to ground
- Emit from faces
- Short bursts at impact points
- Advanced technique (separate lesson)
- Motion blur:
- Render Properties → Motion Blur → Enable
- Creates realistic streaks
- Essential for fast-falling rain
✅ Rain Settings Summary
| Number: | 2000-5000 |
| Lifetime: | 80-120 frames |
| Normal Velocity: | 0.0 |
| Gravity: | 1.0 |
| Render: | Stretched sphere, Scale 0.05-0.1 |
| Collision: | Kill on impact with ground |
Snow Effect
❄️ Gentle Snowfall
Snow differs from rain in key ways:
- Falls much slower (lighter)
- Drifts and swirls (affected by wind)
- Tumbles as it falls (rotation)
- White, opaque, irregular shapes
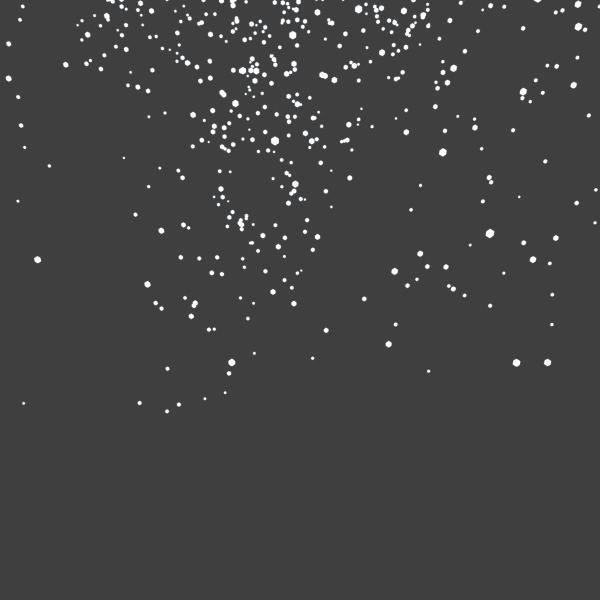
Snow setup (modifications from rain):
- Emission:
- Number: 1000-3000 (fewer than rain)
- Lifetime: 150-250 frames (falls slower, lives longer)
- Normal Velocity: 0.0
- Random: 0.2 (more variation)
- Physics:
- Gravity: 0.2-0.4 (much lighter than rain)
- Damping: 0.1-0.2 (slight air resistance)
- Mass: 0.3 (very light)
- Forces (essential for snow):
- Add Turbulence field:
- Add → Force Field → Turbulence
- Strength: 10-20
- Size: 2.0
- Creates swirling, drifting motion
- Optional Wind field:
- Subtle directional push
- Strength: 0.5-1.0
- Add Turbulence field:
- Rotation:
- Angular Velocity → Mode: Random
- Angular Velocity → Amount: 0.5-1.0
- Snowflakes tumble as they fall
- Rendering:
- Instance object: Small irregular mesh or simple plane
- Alternative: Collection of different snowflake shapes
- Scale: 0.05-0.15
- Scale Random: 0.5 (varied sizes)
- Material:
- Pure white or very light blue
- Principled BSDF
- Slight emission for visibility in dark scenes
- SSS (subsurface scattering) for realism (optional)
💡 Snow Realism Trick
Turbulence is essential for snow:
- Real snow never falls straight
- Air currents create swirls and eddies
- Turbulence field simulates this perfectly
- Strength: 10-20 with Size: 2.0 looks most natural
- Experiment to match weather conditions (gentle vs. blizzard)
Sparks and Embers
✨ Fire Particles
Spark characteristics:
- Burst emission (sudden appearance)
- High initial velocity
- Affected by slight gravity
- Bright, glowing appearance
- Short lifetime
- Fade as they cool
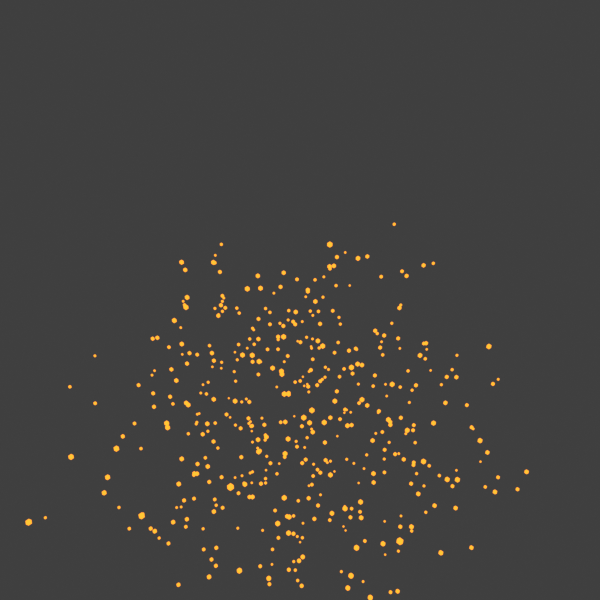
Spark setup:
- Emitter:
- Small sphere or point at spark source
- Could be weld point, fire, impact location
- Emission:
- Number: 100-500 per burst
- Frame Start/End: Same frame for burst (e.g., 50/50)
- Lifetime: 30-60 frames (sparks die quickly)
- Lifetime Random: 0.5 (lots of variation)
- Emit From: Volume (explode from center)
- Velocity:
- Normal: 5-15 (high initial speed)
- Random: 0.5 (very random directions)
- Physics:
- Gravity: 0.5-0.8 (lighter than solid matter)
- Damping: 0.3 (air resistance slows them)
- Rendering:
- Render As: Object (small sphere)
- Scale: 0.02-0.05 (tiny points)
- Scale Random: 0.5
- Material (critical for sparks):
- Emission shader:
- Shader Editor → Add → Shader → Emission
- Color: Bright orange-yellow (fire colors)
- Strength: 10-50 (very bright)
- Age-based brightness:
- Particle Info node → Age
- ColorRamp: Bright at birth, dim at death
- Connect to Emission Strength
- Sparks fade as they cool
- Emission shader:
- Bloom effect (optional but recommended):
- Render Properties → Bloom → Enable (Eevee)
- Threshold: 1.0
- Creates glow around bright sparks
All Directions] B --> C[Gravity Curves Path] C --> D[Damping Slows] D --> E[Age Fades Brightness] E --> F[Particle Dies] style A fill:#FF9800,stroke:#333,stroke-width:2px,color:#fff style E fill:#FFC107,stroke:#333,stroke-width:2px style F fill:#999,stroke:#333,stroke-width:2px,color:#fff
Spark variations:
- Weld sparks:
- Smaller emission area (point or tiny sphere)
- Lower velocity (2-5)
- More frequent bursts
- Shorter lifetime (20-40 frames)
- Explosion embers:
- Large emission area (sphere)
- Very high velocity (10-25)
- Single massive burst
- Longer lifetime (60-120 frames)
- Higher gravity (1.0) for heavier debris
- Campfire embers:
- Continuous emission
- Low velocity (0.5-2)
- Negative gravity (-0.5) for rising
- Add turbulence for swirling
Smoke Rising (Simple Version)
💨 Particle-Based Smoke
Note on smoke: Blender has dedicated smoke simulation system (volumetric). But simple smoke effects work well with particles—faster, lighter, good for background elements or stylized looks.
Particle smoke setup:
- Emitter:
- Plane, sphere, or custom shape at smoke source
- Chimney top, fire, exhaust pipe, etc.
- Emission:
- Number: 500-2000
- Lifetime: 100-200 frames
- Frame Start/End: Continuous emission (1-250)
- Emit From: Faces or Volume
- Velocity:
- Normal: 0.5-2.0 (gentle upward push)
- Random: 0.3
- Physics:
- Gravity: -0.5 to -1.0 (negative = rises)
- Damping: 0.4-0.6 (smoke slows as it rises)
- Mass: 0.1 (very light)
- Forces (essential):
- Turbulence field:
- Strength: 15-30
- Size: 2.0-4.0
- Creates swirling, billowing motion
- Makes smoke look organic
- Turbulence field:
- Rendering:
- Render As: Object (UV sphere)
- Scale: 0.3-1.0 (larger puffs)
- Scale Random: 0.5 (varied sizes)
- Material (creates smoke look):
- Principled BSDF:
- Base Color: Gray (0.5, 0.5, 0.5)
- Transmission: 0.0
- Alpha: Use Particle Info → Age for fadeout
- Blend Mode: Alpha Blend
- Age-based transparency:
- Particle Info → Age
- ColorRamp: 0.0=Transparent, 0.1=Opaque, 0.9=Opaque, 1.0=Transparent
- Smoke fades in, stays visible, fades out
- Principled BSDF:
Improving particle smoke:
- Multiple overlapping systems:
- Different sizes and speeds
- Creates volume and depth
- More convincing than single system
- Scale increases over time:
- Advanced: Animate instance object scale with drivers
- Smoke puffs expand as they rise
- More realistic dissipation
- Color variation:
- Particle Info → Random
- Slight color variation (dark to light gray)
- More organic appearance
⚠️ When to Use Volumetric Smoke
Particle smoke has limitations:
- Use particles for: Background smoke, stylized effects, distant smoke, performance-critical scenes
- Use volumetric smoke for: Hero smoke (close-up), realistic fire, detailed plumes, professional VFX
- Particle smoke is faster, lighter, easier
- Volumetric smoke is more realistic but heavier
- Choose based on needs and camera distance
Explosion Debris
💥 Flying Fragments
Explosion characteristics:
- Burst emission (all at once)
- Very high initial velocity
- Radial outward motion
- Random rotation (tumbling)
- Gravity pulls down after initial burst
- Varied debris shapes and sizes
Explosion debris setup:
- Emitter:
- Sphere at explosion center
- Scale: 0.5-1.0 (defines burst radius)
- Emission:
- Number: 200-1000 (depends on explosion size)
- Frame Start/End: Same frame (burst: 1/1)
- Lifetime: 150-300 frames (debris falls and settles)
- Emit From: Volume (explode from sphere interior)
- Velocity:
- Normal: 15-30 (violent outward burst)
- Random: 0.5-0.8 (very chaotic)
- Object Velocity: 0.0 (unless emitter moving)
- Physics:
- Gravity: 1.0-2.0 (heavy debris)
- Damping: 0.3 (air resistance slows)
- Mass: 1.0-3.0 (weighty chunks)
- Rotation (critical for realism):
- Orientation: None or Normal
- Angular Velocity → Mode: Random
- Angular Velocity → Amount: 2.0-5.0 (violent tumbling)
- Debris spins chaotically
- Rendering (collection for variety):
- Create debris collection:
- 5-10 different rock/chunk models
- Varied shapes, sizes, detail levels
- All with materials applied
- Render As: Collection
- Instance Collection: [Debris collection]
- Scale: 0.2-0.5
- Scale Random: 0.7 (huge variation)
- Create debris collection:
- Collision (optional):
- Enable ground collision
- Damping: 0.6 (bounces but loses energy)
- Friction: 0.5 (slides to rest)
- Some pieces bounce, others stick
Radial Outward] C --> D[Chaotic Rotation] D --> E[Gravity Curves Down] E --> F[Collision with Ground] F --> G[Bounce and Settle] style A fill:#f44336,stroke:#333,stroke-width:2px,color:#fff style C fill:#FF9800,stroke:#333,stroke-width:2px,color:#fff style G fill:#4CAF50,stroke:#333,stroke-width:2px,color:#fff
Layering explosion effects:
- Layer 1: Large debris (5-20 big chunks, high mass)
- Layer 2: Medium fragments (50-100 medium pieces)
- Layer 3: Small particles (200-500 dust/small bits)
- Layer 4: Sparks (separate system, emission shader)
- Layer 5: Smoke (volumetric or particle-based)
- Professional explosions combine multiple particle systems
- Each layer different settings, scales, behaviors
Magical Sparkles
✨ Fantasy Effects
Magical particle characteristics:
- Often defy normal physics
- Glowing, bright colors
- Swirling, flowing motion
- Path rendering works well
- Creative freedom (it's magic!)
Sparkle trail setup:
- Emitter:
- Attach to moving object (wand, hand, magical object)
- Small sphere or point
- Emission:
- Number: 100-300
- Lifetime: 30-60 frames (trails fade quickly)
- Continuous emission: While object moving
- Velocity:
- Normal: 0.5-2.0
- Random: 0.5
- Object Velocity: 0.3-0.8 (some inherit, some independence)
- Physics:
- Gravity: 0.0 (magic defies gravity)
- Or negative: -0.2 (sparkles rise)
- Damping: 0.5 (slow gradually)
- Forces:
- Turbulence field:
- Strength: 5-15
- Creates magical swirling
- Organic, flowing motion
- Turbulence field:
- Rendering:
- Option A - Path rendering:
- Render As: Path
- Shows motion trails
- Elegant, flowing appearance
- Option B - Object rendering:
- Small sphere instances
- Scale: 0.03-0.08
- Emission material with bloom
- Option A - Path rendering:
- Material:
- Emission shader:
- Bright magical colors (purple, cyan, gold)
- Strength: 5-20
- Age-based intensity:
- Particle Info → Age
- Bright at birth, fade to nothing
- Trail effect
- Color variation:
- Particle Info → Random
- ColorRamp with 2-3 magical colors
- Each particle different hue
- Emission shader:
- Bloom (essential):
- Render Properties → Bloom
- Creates ethereal glow
- Makes magic feel magical
💡 Magical Effect Tips
Fantasy effects are creative playground:
- Don't follow real physics—create interesting motion
- Bright colors and bloom are your friends
- Layer multiple particle systems (different colors, speeds)
- Turbulence makes motion organic and flowing
- Age-based fadeout prevents clutter
- Experiment freely—it's magic, not science!
Quick Reference Table
📋 Common Effects Settings
| Effect | Count | Velocity | Gravity | Key Forces |
|---|---|---|---|---|
| Rain | 2000-5000 | 0.0 | 1.0 | Wind (optional) |
| Snow | 1000-3000 | 0.0 | 0.2-0.4 | Turbulence (essential) |
| Sparks | 100-500 | 5-15 | 0.5-0.8 | None typically |
| Smoke | 500-2000 | 0.5-2.0 | -0.5 to -1.0 | Turbulence (essential) |
| Explosion | 200-1000 | 15-30 | 1.0-2.0 | None typically |
| Magic | 100-300 | 0.5-2.0 | 0.0 to -0.2 | Turbulence |
Remember: These are starting points. Adjust based on scale, scene, and desired effect. Real-world testing and iteration always improve results.
💡 Templates Are Starting Points: Professional artists don't memorize settings. They understand principles. Rain falls at terminal velocity. Snow drifts in air. Sparks cool and fade. Smoke rises and billows. Physics guide choices. But templates help. Starting point beats blank canvas. Copy rain settings. Adjust lifetime for your scene scale. Tweak velocity for storm intensity. Add wind for drama. Now you have custom rain. Your rain. Not template rain. That's the goal. Understand why settings work. Then modify fearlessly. Create library of working effects. Rain preset. Snow preset. Explosion preset. Not to use verbatim. But to launch from. To remix. To evolve. Every effect teaches lessons. What worked. What failed. Why turbulence mattered. Why age-based fadeout helped. Build intuition through practice. Templates accelerate learning. Understanding enables mastery. Both matter. Use templates wisely.
🎯 Hands-On Project: Rain and Splash System
Time to apply everything you've learned. This project combines multiple particle systems, physics, collision, rendering, and materials to create a complete weather effect: realistic rain falling onto surfaces with splash particles on impact. You'll build a production-ready effect from scratch, making decisions about settings, troubleshooting issues, and iterating toward quality results.
🎨 Project Goal
Create a rain system with:
- Falling rain particles (streaked droplets)
- Ground collision detection
- Splash particles triggered on impact
- Wind effect for natural motion
- Proper materials and rendering
- Optional: Puddle accumulation areas
Skills practiced: Emission, physics, collision, forces, rendering, materials, multi-system coordination
Project Setup
🏗️ Scene Preparation
Step 1: Create base scene
- Start fresh:
- File → New → General
- Delete default cube (X, confirm)
- Keep default camera and light
- Create ground plane:
- Add → Mesh → Plane
- Scale large: S, 15, Enter
- This is your impact surface
- Optionally add some height variation (subdivide, proportional editing)
- Add simple environment objects (optional):
- Cube as simple building
- Sphere as boulder
- Gives rain something interesting to fall around
- Keep it simple—focus is on particles
- Position camera:
- Select camera
- Move to good viewing angle: G, Z, 5, Enter
- Rotate to look at ground: R, X, 70, Enter
- Test view: Numpad 0 (camera view)
- Basic lighting:
- Default light is fine for now
- Or add Area light above scene (rainy day = overcast)
- Lower strength for moody atmosphere (50-100W)
💡 Scene Scale Matters
Particle behavior depends on scene scale:
- Blender's default cube = 2m across
- Rain settings assume realistic scale (meters)
- If your scene is tiny or huge, adjust particle counts and velocities
- For this project: Treat 1 Blender unit = 1 meter
Part 1: Main Rain System
🌧️ Creating Falling Rain
Step 2: Rain emitter
- Create emitter plane:
- Add → Mesh → Plane
- Position above scene: G, Z, 10, Enter
- Scale to cover area: S, 20, Enter
- Rename: "Rain_Emitter"
- Hide emitter in render:
- Select Rain_Emitter
- Object Properties (orange square icon)
- Visibility → Camera → Uncheck
- Emitter invisible in final render
Step 3: Add particle system
- Create system:
- With Rain_Emitter selected
- Particle Properties (icon: dot cluster)
- Click "+" button
- New particle system created
- Basic emission settings:
- Number: 3000
- Frame Start: 1
- Frame End: 250
- Lifetime: 100
- Lifetime Random: 0.2
- Emission source:
- Emit From: Faces
- Distribution: Random
- Use Modifier Stack: Leave unchecked
Step 4: Configure velocity
- Velocity panel:
- Normal: 0.0 (no sideways emission)
- Normal Random: 0.0
- Tangent: 0.0
- Random: 0.1 (subtle variation)
Step 5: Physics setup
- Physics panel:
- Physics Type: Newtonian
- Integration: Verlet (default)
- Timestep: 0.04 (default)
- Field Weights:
- Gravity: 1.0
- All: 1.0
- Other weights: Default values
- Damping:
- Damping: 0.0 (rain doesn't slow)
Step 6: Test simulation
- Press Spacebar to play animation
- Particles should fall straight down
- Check viewport display shows particles
- If too slow: Reduce Display Amount (25-50%)
Part 2: Rain Rendering
💧 Making Rain Visible
Step 7: Create raindrop object
- Add sphere:
- Add → Mesh → UV Sphere
- Move away from origin: G, X, 5, Enter
- Scale small: S, 0.05, Enter
- Stretch into raindrop shape:
- S, Z, 3, Enter
- Creates elongated droplet
- Long axis = direction of fall
- Apply scale:
- Ctrl+A → Scale
- Important for proper instancing
- Rename: "Raindrop"
- Hide raindrop object:
- Object Properties → Visibility → Camera → Uncheck
- Only instances visible, not original
Step 8: Raindrop material
- Create material:
- Select Raindrop object
- Material Properties (sphere icon)
- Click "+" then "New"
- Rename: "Rain_Material"
- Configure Principled BSDF:
- Base Color: Light blue tint (RGB: 0.85, 0.92, 0.95)
- Metallic: 0.0
- Roughness: 0.05 (very shiny)
- IOR: 1.333 (water)
- Transmission: 0.9 (mostly transparent)
- Alpha: 0.5
- Enable transparency:
- Material Properties → Settings
- Blend Mode: Alpha Blend
- Shadow Mode: Alpha Clip or None
Step 9: Assign instance object
- Select Rain_Emitter
- Particle Properties → Render:
- Render As: Object
- Instance Object: Raindrop
- Scale: 1.0
- Scale Randomness: 0.2
- Rotation:
- Orientation: Velocity / Hair
- Raindrops point in direction of motion
- Creates proper streaks
- Test render:
- Press F12 (or Z → Rendered view)
- Rain should be visible as streaked droplets
Part 3: Ground Collision
💥 Rain Hits Ground
Step 10: Enable collision on ground
- Select ground plane
- Physics Properties (icon: bouncing ball)
- Click "Collision" (adds collision modifier)
- Checkbox should be enabled
- Collision settings:
- Damping: 0.0 (doesn't matter, rain will die)
- Friction: 0.0
- Permeability: 0.0 (solid)
- Defaults are fine
Step 11: Enable collision on particles
- Select Rain_Emitter
- Particle Properties → Physics:
- Expand "Collision" section
- Enable "Collision" checkbox
- Collision settings:
- Permeability: 0.0
- Stickiness: 0.0
- Kill Particles: ✓ Enable this!
- Rain disappears on ground contact
- Damping: 0.5 (not used since killing)
- Friction: 0.0
- Test collision:
- Play animation
- Rain should disappear when hitting ground
- No bouncing (killed on contact)
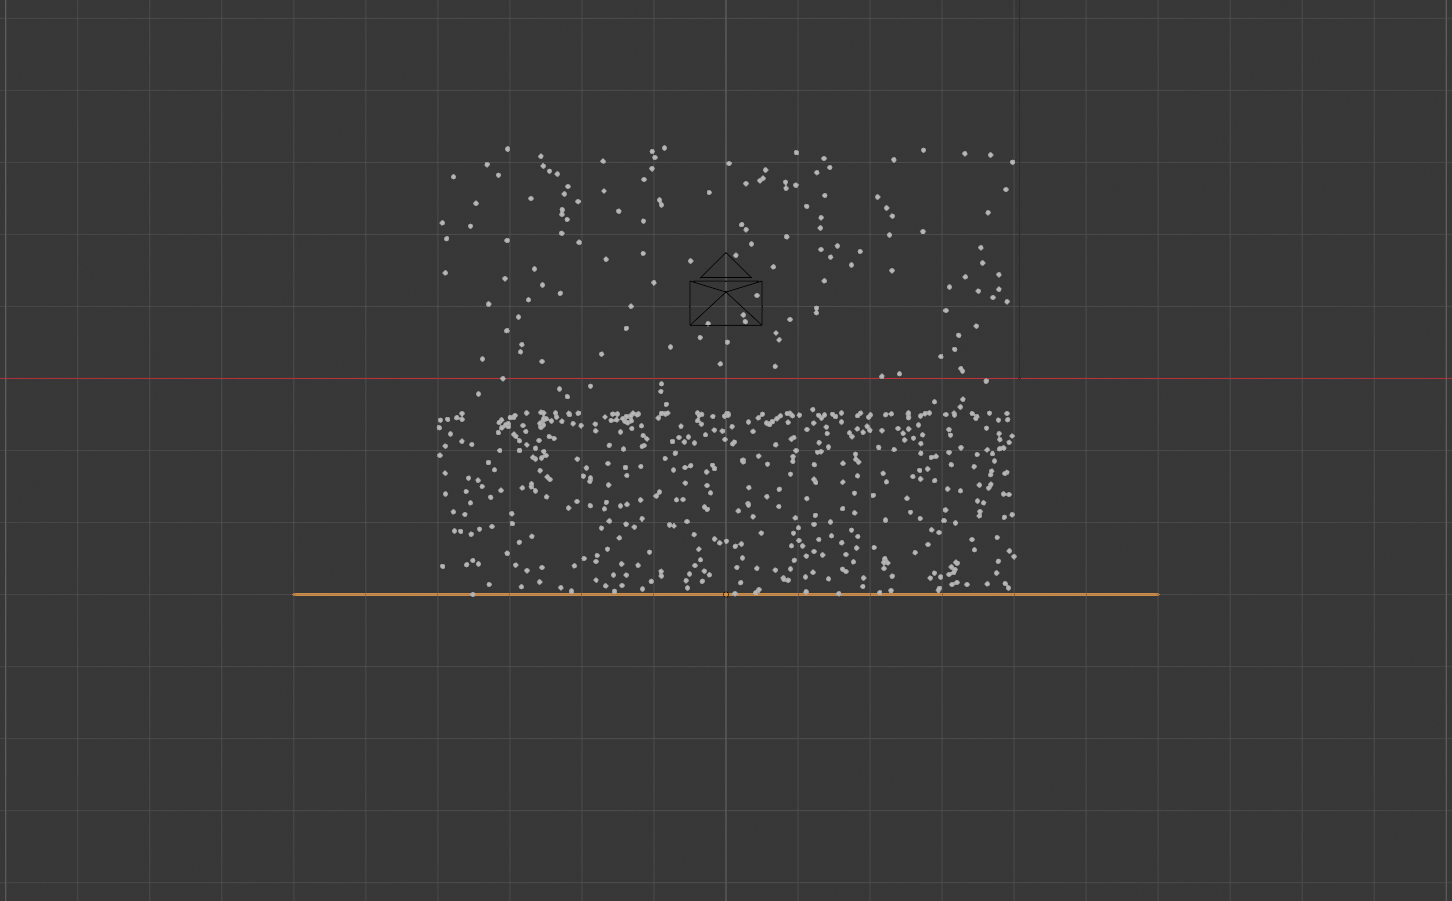
Part 4: Wind Force
💨 Adding Natural Motion
Step 12: Add wind field
- Add force field:
- Add → Force Field → Wind
- Position: Doesn't matter much for wind (affects wide area)
- Place to side of scene for organization
- Rotate wind direction:
- R, Y, -20, Enter
- Tilts wind slightly
- Rain falls at angle
- More dramatic: -30 to -45 degrees
- Wind settings:
- Select wind field object
- Physics Properties → Force Fields
- Strength: 1.5 (moderate wind)
- Flow: 0.0 (default)
- Noise: 0.0 (optional: add 0.5 for gusty wind)
- Test wind effect:
- Play animation
- Rain should fall at angle
- Adjust Strength to taste (0.5 = gentle, 3.0 = storm)
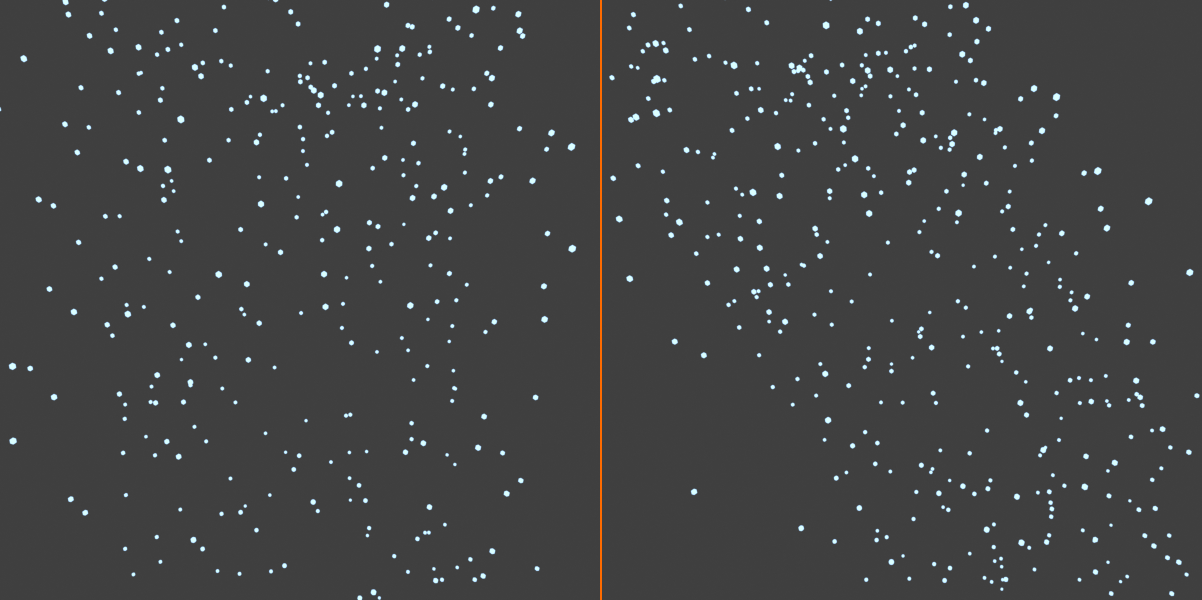
Part 5: Splash Particles (Advanced)
💦 Impact Splashes
This is advanced technique - optional but impressive!
Step 13: Create splash emitter
- Duplicate ground plane:
- Select ground plane
- Shift+D, Enter (duplicate in place)
- Rename: "Splash_Emitter"
- Move slightly up: G, Z, 0.01, Enter
- Add particle system to splash emitter:
- Particle Properties → "+"
- This will emit splashes where rain hits
Step 14: Configure splash emission
- Emission:
- Number: 5000 (lots of small splashes)
- Frame Start: 1
- Frame End: 250
- Lifetime: 15 (very short—splashes disappear fast)
- Lifetime Random: 0.5
- Emit From: Faces, Random
Step 15: Splash velocity
- Velocity:
- Normal: 2.0 (shoot up from surface)
- Random: 0.8 (very random)
- Splashes scatter in all directions
Step 16: Splash physics
- Physics:
- Type: Newtonian
- Gravity: 1.0
- Damping: 0.2
Step 17: Splash rendering
- Render:
- Render As: Object
- Instance Object: Raindrop (reuse same object)
- Scale: 0.3 (smaller than main rain)
- Scale Random: 0.5
Note: Basic splash setup emits continuously. For truly accurate splash-on-impact, you'd need to use particle instance modifier or dynamic paint (advanced topics). But continuous emission creates convincing effect when rain is steady.
⚠️ Splash System Simplification
True impact-based splashes require advanced techniques:
- Dynamic Paint to detect impacts
- Or particle instance modifier with collision detection
- Or animation nodes for per-particle events
- This project uses continuous splash emission as approximation
- Result looks good when rain is steady and dense
- Professional VFX uses more complex systems (future lessons)
Part 6: Polish and Refinement
✨ Making It Beautiful
Step 18: Optimize particle counts
- Test render quality:
- Render small region (Ctrl+B in camera view)
- Is rain dense enough? Increase Number
- Too dense/cluttered? Decrease Number
- Viewport performance:
- Particle Properties → Viewport Display
- Display Amount: 25-50% while working
- Doesn't affect render
Step 19: Motion blur (optional but recommended)
- Enable in render settings:
- Render Properties
- Motion Blur: ✓ Enable
- Shutter: 0.5 (default, good starting point)
- Effect:
- Rain streaks blur naturally
- More cinematic appearance
- Increases render time significantly
Step 20: Lighting adjustment
- Rainy day atmosphere:
- Cool color temperature (blue tint)
- Overcast = soft, diffused lighting
- Lower overall brightness
- Optional HDRI:
- Shading workspace → World
- Add Environment Texture with overcast sky HDRI
- Instant atmospheric lighting
Step 21: Camera animation (optional)
- Animate camera slowly moving through rain
- Reveals depth and motion
- Makes effect more dynamic
- Simple: I → Location at frame 1, move camera, I → Location at frame 250
Step 22: Final render
- Bake particle simulation:
- Particle Properties → Cache
- Click "Bake All Dynamics"
- Locks simulation for consistent render
- Essential before animation render
- Render settings:
- Engine: Cycles (for realism) or Eevee (for speed)
- Samples: Cycles: 128-256, Eevee: 64
- Resolution: 1920×1080 (Full HD)
- Render image: F12
- Render animation: Ctrl+F12 (if animated)
Success Checklist
✅ Project Completion Checklist
Your rain system should have:
- ☐ Rain falling from overhead emitter plane
- ☐ 2000-5000 rain particles visible
- ☐ Particles rendered as elongated droplets
- ☐ Droplets oriented along velocity (streaks)
- ☐ Rain affected by gravity (falls down)
- ☐ Wind force creates angled fall
- ☐ Ground collision enabled
- ☐ Rain particles killed on ground impact
- ☐ Transparent/translucent water material
- ☐ Smooth animation playback (baked)
- ☐ Optional: Splash particles on ground
- ☐ Optional: Motion blur enabled
- ☐ Optional: Atmospheric lighting
If something isn't working:
- Particles not visible: Check Render As setting, instance object assigned?
- Rain not falling: Check Gravity = 1.0, Normal velocity = 0.0
- No collision: Both particle and ground collision enabled?
- Slow viewport: Reduce Display Amount (25%)
- Weird streaks: Check Orientation = Velocity/Hair
Bonus Challenges
🚀 Take It Further
If you completed the basic project, try these enhancements:
- Puddle accumulation:
- Add third particle system (hair type)
- Emit from ground, very short length
- Creates appearance of water gathering
- Challenge: Make puddles grow over time
- Varied rain intensity:
- Animate particle emission rate (keyframe Number)
- Start light, build to downpour
- Or pulsing rain (lighter/heavier cycles)
- Lightning flash:
- Animate light strength (sudden bright spike)
- Synchronized with particle emission burst
- Creates storm atmosphere
- Multiple splash sizes:
- Create collection with 3-4 splash objects
- Different sizes and shapes
- More natural variation
- Rain on objects:
- Enable collision on cube/sphere in scene
- Rain collides with all surfaces
- Add splash emitters to object tops
- Mist/fog layer:
- Add volumetric fog (World → Volume)
- Subtle atmospheric scattering
- Rain visible in fog beams
💡 Learning from This Project
What you practiced:
- System coordination: Multiple particle systems working together
- Physics thinking: Gravity, forces, collision behavior
- Rendering decisions: Object instancing, materials, transparency
- Optimization: Balancing quality and performance
- Iteration: Testing, adjusting, refining settings
- Production workflow: Setup → Test → Polish → Bake → Render
These skills transfer to ANY particle effect. Rain, snow, sparks, smoke, explosions—all use same principles with different settings.
💡 Projects Build Intuition: Reading about particles teaches concepts. Building rain system teaches particle systems. Different knowledge. Reading = understanding. Doing = intuition. When you adjusted wind strength and saw rain angle change—that became intuition. When collision didn't work and you troubleshooted—that became experience. When render looked wrong and you tweaked material—that became judgment. Can't get these from reading. Only from doing. That's why projects matter. Theory provides map. Practice builds skill. This project wasn't about perfect rain. It was about experiencing particle workflow. Making decisions. Seeing results. Iterating toward quality. Next time you need particles—any particles—you'll have framework. Emission thinking. Physics intuition. Rendering experience. Won't start from zero. Will start from here. From working system you built and understand. That's how mastery develops. Project by project. Effect by effect. Each one building on last. Each one teaching new lessons. Keep building. Keep experimenting. Keep pushing further.
📚 Lesson Summary
Particle systems are no longer mystery. You understand emission, physics, forces, collision, rendering. You know how particles are born, how they behave, how they appear. You've seen common effects. You've built working rain system. Theory and practice combined. Foundation established. Time to consolidate that knowledge.
Key Concepts Review
🎯 Core Particle System Concepts
The particle lifecycle:
- Birth: Particles emit from source object (emitter)
- Life: Particles move, respond to forces, interact with world
- Death: Particles reach lifetime end or die on collision
Essential components of any particle system:
- Emitter: Object that spawns particles (plane, sphere, custom mesh)
- Emission settings: How many, when, from where (faces/volume/vertices)
- Velocity: Initial motion (normal, tangent, random)
- Physics: How particles move (Newtonian, Boids, Keyed, Fluid)
- Forces: External influences (gravity, wind, turbulence)
- Collision: Interaction with objects (bounce, stick, kill)
- Rendering: How particles appear (Object, Collection, Path, Halo)
- Materials: Color, transparency, emission, variation
Critical Settings by Category
⚙️ The Settings That Matter Most
Emission (determines particle birth):
- Number: Total particle count (balance quality vs. performance)
- Frame Start/End: When emission happens (continuous or burst)
- Lifetime: How long particles exist (affects density)
- Emit From: Faces (area), Volume (3D space), Vertices (points)
- Vertex Groups: Control emission density with painted weights
Velocity (determines initial motion):
- Normal: Speed perpendicular to surface (primary control)
- Random: Variation in velocity (natural unpredictability)
- Object Velocity: Inherit emitter motion (moving emitters)
Physics (determines behavior):
- Type: Newtonian (standard), Boids (flocking), Keyed (paths), Fluid (liquids)
- Gravity: 1.0 = Earth gravity, 0.0 = weightless, negative = rises
- Damping: Air resistance (slows particles over time)
- Mass: Weight affects force response (not gravity)
Forces (external influences):
- Wind: Directional push (weather, directional flow)
- Turbulence: Random swirling (essential for natural motion)
- Force: Radial push/pull (explosions, attraction)
- Vortex: Spiral motion (tornadoes, drains)
- Drag: Localized resistance (water, thick atmosphere)
Collision (interaction with objects):
- Enable on particles: Particle Properties → Physics → Collision
- Enable on objects: Physics Properties → Collision
- Kill Particles: Die on impact (rain on ground)
- Stickiness: Stick to surface (water droplets on window)
- Damping: Bounce energy loss (0.0 = perfect bounce, 1.0 = no bounce)
- Friction: Surface drag (sliding particles slow down)
Rendering (visual appearance):
- Object: Instance 3D mesh (most versatile)
- Collection: Random selection from objects (variation)
- Path: Motion trails (streaks, energy beams)
- Orientation: Velocity/Hair for motion-aligned particles
- Scale + Random: Size variation (natural effects)
Materials (color and appearance):
- Particle Info node: Per-particle data (Age, Random, Velocity, etc.)
- Age-based effects: Fade in/out, color changes over lifetime
- Random variation: Different colors/brightness per particle
- Emission shader: Glowing particles (sparks, magic)
- Transparency: Fade effects, semi-visible particles
Common Patterns and Recipes
📖 Effect Templates
Quick reference for common effects:
| Effect | Emission | Physics | Forces | Rendering | Key Setting |
|---|---|---|---|---|---|
| Rain | Continuous 3000+ Vel: 0 |
Gravity: 1.0 Damp: 0 |
Wind (optional) 1-3 strength |
Stretched sphere Velocity orient |
Kill on collision |
| Snow | Continuous 2000+ Vel: 0 |
Gravity: 0.3 Damp: 0.2 Mass: 0.3 |
Turbulence 10-20 strength Essential! |
Small planes Random rotation |
Angular velocity |
| Sparks | Burst 100-500 Vel: 5-15 |
Gravity: 0.5 Damp: 0.3 |
None typically | Small sphere Emission material |
Age-based brightness |
| Smoke | Continuous 1000+ Vel: 1 |
Gravity: -0.5 Damp: 0.5 Mass: 0.1 |
Turbulence 15-30 strength Essential! |
Large spheres Transparent |
Age-based alpha |
| Explosion | Burst 500+ Vel: 20+ |
Gravity: 1-2 Damp: 0.3 Mass: 1-3 |
None or Force (initial push) |
Collection 5-10 objects |
Random angular velocity |
| Magic | Trail 100-300 Vel: 1 |
Gravity: 0 Damp: 0.5 |
Turbulence 5-15 strength |
Path or sphere Emission material |
Bloom effect |
Troubleshooting Guide
🔧 Common Problems and Solutions
Particles not visible:
- ✓ Check Render As setting (not "None")
- ✓ Instance Object assigned (if using Object/Collection)
- ✓ Instance object has material
- ✓ Emitter camera visibility enabled (unless intentionally hidden)
- ✓ Particles within camera view
- ✓ Check render layer settings
Particles not moving correctly:
- ✓ Physics Type = Newtonian (unless specific reason)
- ✓ Gravity setting appropriate (1.0 for falling, -1.0 for rising, 0.0 for floating)
- ✓ Velocity Normal not accidentally zero (if want motion)
- ✓ Check Field Weights (forces enabled?)
- ✓ Force field strength high enough
- ✓ Animation playing (Spacebar), not just scrubbing timeline
Collision not working:
- ✓ Collision enabled on particles (Particle Properties → Physics → Collision)
- ✓ Collision enabled on object (Physics Properties → Collision)
- ✓ Both must be enabled
- ✓ Particles actually reaching collision object
- ✓ Integration timestep high enough (try 0.02 instead of 0.04)
- ✓ Particles not passing through due to high speed (increase substeps)
Performance too slow:
- ✓ Reduce Viewport Display Amount (25-50%)
- ✓ Reduce particle count (if quality acceptable)
- ✓ Simplify instance object geometry (lower poly count)
- ✓ Disable unnecessary forces
- ✓ Hide particle system when not editing (H)
- ✓ Bake simulation (Cache → Bake)
- ✓ Disable collision if not needed
Particles look artificial/uniform:
- ✓ Add randomness: Velocity Random, Lifetime Random, Scale Random
- ✓ Use Collection instead of Object (variation)
- ✓ Add turbulence force field
- ✓ Material randomness via Particle Info node
- ✓ Random angular velocity (rotation variation)
- ✓ Age-based effects (fade, color change)
Particles passing through objects:
- ✓ Increase Integration timestep quality (Physics → Integration)
- ✓ Lower timestep value = more accurate (0.02 or 0.01)
- ✓ Reduce particle velocity (slower = easier to calculate collision)
- ✓ Simplify collision object geometry
- ✓ Check collision object has proper collision type enabled
Render different from viewport:
- ✓ Viewport Display settings don't affect render
- ✓ Display Amount only affects viewport
- ✓ Check Render settings specifically
- ✓ Bake simulation before rendering animation
- ✓ Ensure render engine set correctly (Cycles/Eevee)
💡 Debugging Strategy
Systematic troubleshooting approach:
- Isolate the problem: Which specific aspect isn't working?
- Check basics first: Is system enabled? Playing animation?
- Simplify: Reduce to minimal setup, add complexity back
- Test in stages: Emission → Physics → Forces → Collision → Rendering
- Compare to working example: What's different?
- Read Blender messages: Console may show errors
Key Takeaways
💡 Essential Lessons from This Module
- Particle systems simulate life and motion
- Transform static scenes into dynamic worlds
- Represent chaos, randomness, organic unpredictability
- Essential tool for atmospheric effects and VFX
- Emission is foundation, physics is behavior
- Where particles born determines pattern
- How particles move determines realism
- Get emission right and half the work is done
- Forces create natural motion
- Turbulence is essential for most atmospheric effects
- Perfect motion looks artificial
- Nature is chaotic—simulate that chaos
- Rendering reveals or conceals
- Perfect physics with bad rendering = poor result
- Materials, variation, age-based effects matter
- Object instancing is most versatile approach
- Collection instancing adds crucial variation
- Optimization is ongoing process
- Balance quality vs. performance always
- Viewport display independent from render quality
- Bake before rendering animations
- Multiple smaller systems often better than one huge system
- Iteration builds quality
- First attempt rarely perfect
- Test, adjust, refine repeatedly
- Professional VFX is 90% iteration
- Templates are starting points, not final answers
- Understanding principles beats memorizing settings
- Know why settings work, not just what they are
- Transfer knowledge between effects
- Adapt to new situations confidently
- Build intuition through practice
What's Next?
🚀 Continuing Your Particle Journey
Upcoming lessons in Particles and Simulations module:
- Lesson 33: Hair and Fur
- Hair particle systems
- Grooming tools and techniques
- Strand dynamics and physics
- Character hair and animal fur
- Grass, vegetation, and surface coverage
- Lesson 34: Cloth Simulation
- Cloth physics fundamentals
- Fabric types and properties
- Collision and self-collision
- Pinning and constraints
- Character clothing workflow
- Lesson 35: Rigid Body Physics
- Rigid body dynamics
- Active vs. passive objects
- Constraints and connections
- Destruction simulations
- Domino effects and chains
Practice recommendations:
- Recreate the common effects: Rain, snow, sparks, smoke, explosion—build each one
- Experiment with variations: Heavy rain vs. light drizzle, gentle snow vs. blizzard
- Combine systems: Rain + lightning + wind, explosion + smoke + debris + sparks
- Add to existing scenes: Take previous projects, add atmospheric particles
- Study references: Watch real rain, snow, explosions—understand motion
- Push boundaries: Try fantasy effects, impossible physics, creative experiments
Advanced topics to explore (self-study):
- Dynamic Paint for impact-triggered particles
- Animation Nodes for complex particle behaviors
- Fluid simulation (FLIP) for liquid particles
- Molecular script for advanced physics
- Particle instance modifier for emission control
- Geometry Nodes integration with particles
🎉 Congratulations!
You've completed Lesson 32: Particle Systems Overview!
You now understand:
- ✓ Particle system fundamentals and lifecycle
- ✓ Emission settings and distribution methods
- ✓ Physics types and force fields
- ✓ Collision systems and interactions
- ✓ Rendering approaches and materials
- ✓ Common effect recipes and templates
- ✓ Hands-on rain system development
This is powerful knowledge. Particles bring scenes alive. Create atmosphere. Add drama. Enable effects impossible otherwise. You have foundation. Now build on it. Experiment. Iterate. Create. Every particle system you build teaches new lessons. Every effect you perfect adds to your skills. Keep practicing. Keep pushing. Keep creating amazing effects.
Ready for the next challenge? Onward to Lesson 33!