⚡ Lesson 31: Advanced Modifier Stack
Unlock the true power of non-destructive modeling with advanced modifier workflows. Learn to strategically combine modifiers, understand stack order, and create complex models that remain editable throughout the production process. This is professional-level Blender technique.
🎯 What You'll Learn
- Modifier stack theory: Understanding order, dependencies, and data flow
- Strategic modifier combinations: Best practices for common workflows
- Non-destructive workflows: Keeping models editable throughout production
- Performance optimization: Managing complex modifier stacks efficiently
- Advanced techniques: Mirror + Array + Boolean chains, Multiresolution workflows
- Production pipeline integration: Export, version control, team collaboration
- Project: Build a complex architectural element using 8+ modifiers
⏱️ Estimated time: 90-120 minutes
🎨 Project: Create procedural architecture with advanced modifier stack
In This Lesson
🔧 Understanding the Modifier Stack
You've used individual modifiers throughout this course—Subdivision Surface, Mirror, Array, Boolean. But the real power emerges when you combine multiple modifiers strategically. The modifier stack is Blender's secret weapon for non-destructive, procedural modeling. Understanding how it works transforms your workflow from destructive editing to intelligent, flexible creation.
What Is the Modifier Stack?
📚 Stack Fundamentals
The modifier stack concept:
- Sequential processing: Each modifier processes the mesh in order
- Data flows from top to bottom
- Each modifier sees result of previous modifier
- Order matters tremendously
- Think: assembly line for your mesh
- Non-destructive editing: Base mesh remains untouched
- Original geometry preserved
- Modifiers create visual result
- Can adjust or remove modifiers anytime
- Like Photoshop adjustment layers
- Layer-based workflow: Each modifier adds or changes something
- Mirror: Creates symmetry
- Array: Duplicates geometry
- Boolean: Combines shapes
- Subdivision: Smooths result
- All work together
Why stack order matters:
- Example 1: Mirror → Subdivision
- Mirror creates symmetrical geometry
- Subdivision smooths both sides
- Result: Smooth symmetrical model
- Example 2: Subdivision → Mirror
- Subdivision smooths one half
- Mirror duplicates smoothed half
- Result: Seam down middle (wrong!)
- Lesson: Same modifiers, different order, completely different result
Reading the Modifier Stack

📖 Stack Anatomy
Modifier panel elements:
- Modifier name and type: Top of each modifier section
- Icon shows modifier type
- Name can be customized (helpful for complex stacks)
- Click triangle to expand/collapse settings
- Visibility toggles (right side icons):
- Eye icon: Viewport visibility (shows/hides effect in 3D view)
- Camera icon: Render visibility (includes/excludes from renders)
- Arrow icon: Show in Edit Mode (see modifier result while editing base mesh)
- Stack position controls (arrows):
- Up arrow: Move modifier up in stack
- Down arrow: Move modifier down in stack
- Reordering changes result
- Additional controls:
- Copy icon: Duplicate modifier
- X icon: Remove modifier
- Dropdown: Additional options (Apply, Copy to Selected, etc.)
Modifier evaluation indicator:
- Blue outline: Modifier is actively calculating
- Shows which modifiers affect current view
- Heavy modifiers may slow viewport
- Warning icons: Indicate issues
- Red triangle: Error (modifier can't evaluate)
- Yellow triangle: Warning (modifier works but has issues)
- Hover for details
💡 Pro Tip: Naming Your Modifiers
With 5+ modifiers, default names get confusing. Click on modifier name to rename:
- "Subdivision Surface" → "Smooth Final"
- "Boolean" → "Window Cutout"
- "Array" → "Fence Posts"
- Descriptive names help you (and teammates) understand intent
- Future you will thank present you
Modifier Data Flow
🌊 How Data Moves Through Stack
The processing pipeline:
- Base mesh (Edit Mode geometry):
- Your actual editable vertices, edges, faces
- This is what you modify in Edit Mode
- Modifiers don't change this
- Foundation of everything
- First modifier processes base mesh:
- Takes base geometry as input
- Applies its transformation/generation
- Outputs modified geometry
- Temporary result (not saved to base mesh)
- Second modifier processes first modifier's output:
- Never sees original base mesh
- Only sees result of modifier above it
- Applies its own transformation
- Passes result down the stack
- Chain continues to bottom of stack:
- Each modifier sees result of previous
- Order creates final result
- Last modifier's output = what you see
Analogy: Assembly line manufacturing
- Base mesh = Raw material (steel ingot)
- First modifier = Shape it (forge into basic form)
- Second modifier = Refine it (machine smooth surfaces)
- Third modifier = Add features (drill holes)
- Fourth modifier = Finish it (polish)
- Final result = Finished product
- Each station receives output from previous station
- Order determines final product
Viewing stack at different stages:
- Disable modifiers (eye icon off) to see earlier stages
- Enable "Show in Edit Mode" to see modifier while editing base
- Helpful for understanding what each modifier contributes
- Debug problems by isolating each stage
Types of Modifiers
🗂️ Modifier Categories
Blender organizes modifiers into categories. Understanding these helps you choose the right tool:
Modify Category (transforms existing geometry):
- Data Transfer: Copies data from another object
- Mesh Cache: Uses external mesh animation
- Mesh Sequence Cache: Alembic file animation
- Normal Edit: Modifies normal directions
- Weighted Normal: Smart normal calculation
- UV Project: Projects UVs like camera
- UV Warp: Transforms UV coordinates
- Vertex Weight Edit/Mix/Proximity: Manages vertex groups
Generate Category (creates new geometry):
- Array: Duplicates geometry in pattern
- Bevel: Rounds edges
- Boolean: Combines objects with operations
- Build: Animates mesh construction
- Decimate: Reduces polygon count
- Edge Split: Splits edges for hard normals
- Geometry Nodes: Node-based geometry generation
- Mask: Hides geometry based on vertex group
- Mirror: Creates symmetry
- Multiresolution: Sculptable subdivision levels
- Remesh: Regenerates topology
- Screw: Rotates profile to create geometry
- Skin: Creates skin from edges
- Solidify: Adds thickness
- Subdivision Surface: Subdivides and smooths
- Triangulate: Converts quads to triangles
- Volume to Mesh: Converts volume to mesh
- Weld: Merges nearby vertices
- Wireframe: Turns edges into geometry
Deform Category (moves vertices without adding/removing):
- Armature: Bone-based deformation
- Cast: Projects to shape (sphere, cylinder, cube)
- Curve: Deforms along curve
- Displace: Moves vertices via texture
- Hook: Control with empty object
- Laplacian Deform: Preserves surface detail
- Lattice: Cage deformation
- Mesh Deform: Deforms with cage mesh
- Shrinkwrap: Projects onto surface
- Simple Deform: Twist, bend, taper, stretch
- Smooth: Smooths vertex positions
- Smooth Corrective: Maintains volume when deforming
- Surface Deform: Binds to deforming surface
- Warp: Deforms between two objects
- Wave: Creates wave deformation
Physics Category (simulations):
- Cloth: Fabric simulation
- Collision: Makes object block other simulations
- Dynamic Paint: Paint simulation
- Explode: Particle-based explosion
- Fluid: Liquid/gas simulation
- Ocean: Procedural ocean waves
- Particle Instance: Geometry on particles
- Particle System: Particle simulation
- Soft Body: Soft body physics
Most commonly used in stacks:
- Mirror (symmetry)
- Array (duplication)
- Subdivision Surface (smoothing)
- Boolean (combining shapes)
- Solidify (thickness)
- Bevel (edge rounding)
- Shrinkwrap (surface projection)
💡 The Stack Is Your Workshop: Think of the modifier stack as your workbench. Base mesh is raw material. Each modifier is a tool that transforms it. Order matters—you can't polish before you cut. You can't paint before you smooth. Each step builds on previous. But unlike real workshop, you can rearrange the process anytime. Try mirror before subdivision. Don't like it? Swap the order. Instant result. This is the power of non-destructive workflow. Your mesh stays flexible. Your options stay open. You can experiment without consequences. Because you can always undo, reorder, adjust. The stack is your safety net. Your creative sandbox. Your production powerhouse. Master the stack and you master procedural modeling. Everything becomes possible.
🔢 Stack Order and Dependencies
Stack order isn't just important—it's everything. The same modifiers in different orders produce completely different results. Understanding order logic, recognizing dependencies, and knowing optimal sequences transforms you from someone who "uses modifiers" to someone who "orchestrates workflows." Let's master the rules that govern the stack.
The Order Matters Principle
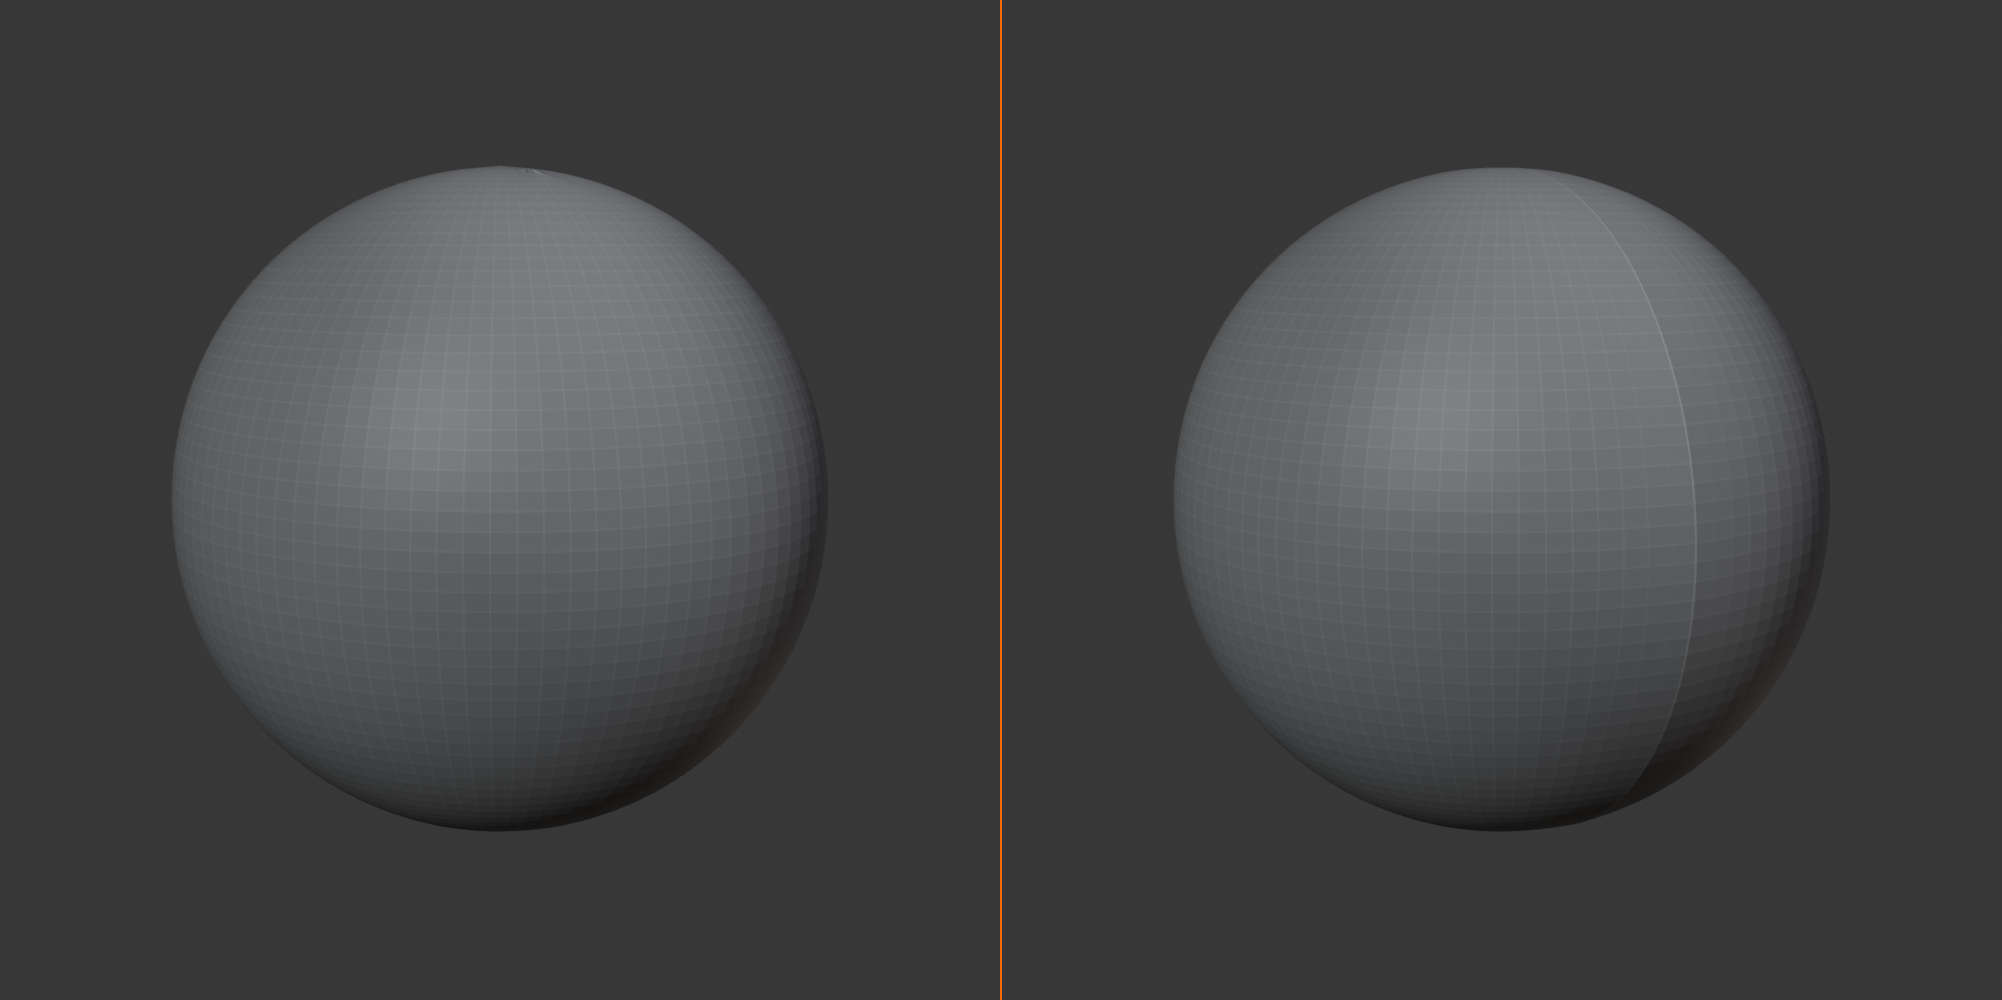
⚠️ Why Sequence Changes Everything
Classic example: Mirror and Subdivision
- Order A: Mirror → Subdivision Surface
- Mirror creates both halves first
- Subdivision smooths entire symmetrical mesh
- Center vertices merge correctly
- Result: Smooth, symmetrical model ✅
- Order B: Subdivision Surface → Mirror
- Subdivision smooths one half
- Mirror duplicates already-smoothed geometry
- Center line has duplicate vertices
- Result: Visible seam down middle ❌
- Lesson: Generation before refinement
Example 2: Boolean and Subdivision
- Order A: Boolean → Subdivision Surface
- Boolean combines shapes (creates intersections)
- Intersection edges often triangulated/messy
- Subdivision tries to smooth messy topology
- Result: Artifacts, pinching at Boolean seams ❌
- Order B: Subdivision Surface → Boolean
- Both objects subdivided to smooth state first
- Boolean combines already-smooth geometry
- Cleaner intersection topology
- Result: Better (though still may need Bevel after) ✅
- Better Order: Boolean → Bevel → Subdivision
- Boolean combines shapes
- Bevel adds geometry at edges (prevents pinching)
- Subdivision smooths the beveled result
- Result: Clean, smooth Boolean operations ✅✅
Example 3: Array and Mirror
- Order A: Mirror → Array
- Mirror creates symmetrical pair
- Array duplicates the pair
- Result: Mirrored rows/columns
- Good for: symmetrical patterns (fence sections)
- Order B: Array → Mirror
- Array creates row from one half
- Mirror duplicates entire row
- Result: Two mirrored rows
- Good for: different pattern types (columns)
- Lesson: Order determines pattern structure
General Stack Order Rules
📜 The Golden Sequence
Optimal modifier order (general guideline):
- Data preparation modifiers
- Vertex Weight Edit/Mix
- UV Project/Warp
- Data Transfer
- Reason: Prepare data before geometry changes
- Geometry generation (duplication/symmetry)
- Mirror (always early)
- Array
- Screw
- Reason: Create full geometry before modifying it
- Major shape changes
- Boolean operations
- Solidify
- Remesh
- Reason: Establish basic forms before refinement
- Edge refinement
- Bevel (almost always after Boolean)
- Weld (merge close vertices)
- Triangulate (if needed)
- Reason: Clean up edges before smoothing
- Deformation
- Curve, Lattice, Simple Deform
- Shrinkwrap
- Reason: Deform the refined geometry
- Surface refinement (smoothing)
- Subdivision Surface
- Smooth modifier
- Reason: Final smoothing after all geometry established
- Final details
- Decimate (optimization)
- Wireframe
- Edge Split
- Reason: Last-stage effects
- Simulation/animation
- Armature deformation
- Physics (Cloth, Soft Body)
- Reason: Animate the final model
Remember: "Generate → Modify → Refine → Smooth → Animate"
Modifier Dependencies
🔗 When Modifiers Rely on Each Other
Understanding dependencies:
- Boolean needs two objects:
- Base object (has Boolean modifier)
- Cutter object (referenced by Boolean)
- Cutter can also have modifiers
- Cutter's modifiers evaluate before Boolean uses it
- Shrinkwrap needs target:
- Projects onto another object
- Target object's modifiers affect projection
- Target modifier stack evaluates first
- Array can use object offset:
- Empty/object defines offset direction
- Transform of that object controls array
- Dependency: Array → Empty position
- Curve modifier needs curve:
- Deforms along curve path
- Curve's shape defines deformation
- Edit curve, mesh updates
Modifier chains across objects:
- Scenario: Boolean chain
- Object A has modifiers → feeds into Boolean on Object B
- Object B has modifiers → feeds into Boolean on Object C
- Entire chain updates when any part changes
- Order: A's stack → B's stack → C's stack
- Performance consideration:
- Long chains recalculate entire pipeline
- Can slow viewport significantly
- Consider applying modifiers in chains
- Or disable viewport visibility for heavy cutters
⚠️ Dependency Gotcha: Deleted Objects
Problem: Delete object that's referenced by modifier
- Boolean cutter deleted → Boolean modifier errors
- Array empty deleted → Array uses default offset
- Curve deleted → Curve modifier fails
Solution:
- Keep referenced objects in separate collection
- Name them clearly: "Cutter_WindowFrame"
- Hide collection (eye icon) but don't delete
- Or apply modifier before deleting dependencies
Common Stack Patterns
🎯 Proven Modifier Combinations
Pattern 1: Architectural column
- Curve → Screw: Profile becomes column
- Array: Multiple columns
- Bevel: Smooth edges
- Subdivision Surface: Final smoothing
Why this order: Create geometry (Screw), duplicate (Array), refine (Bevel), smooth (Subdivision)
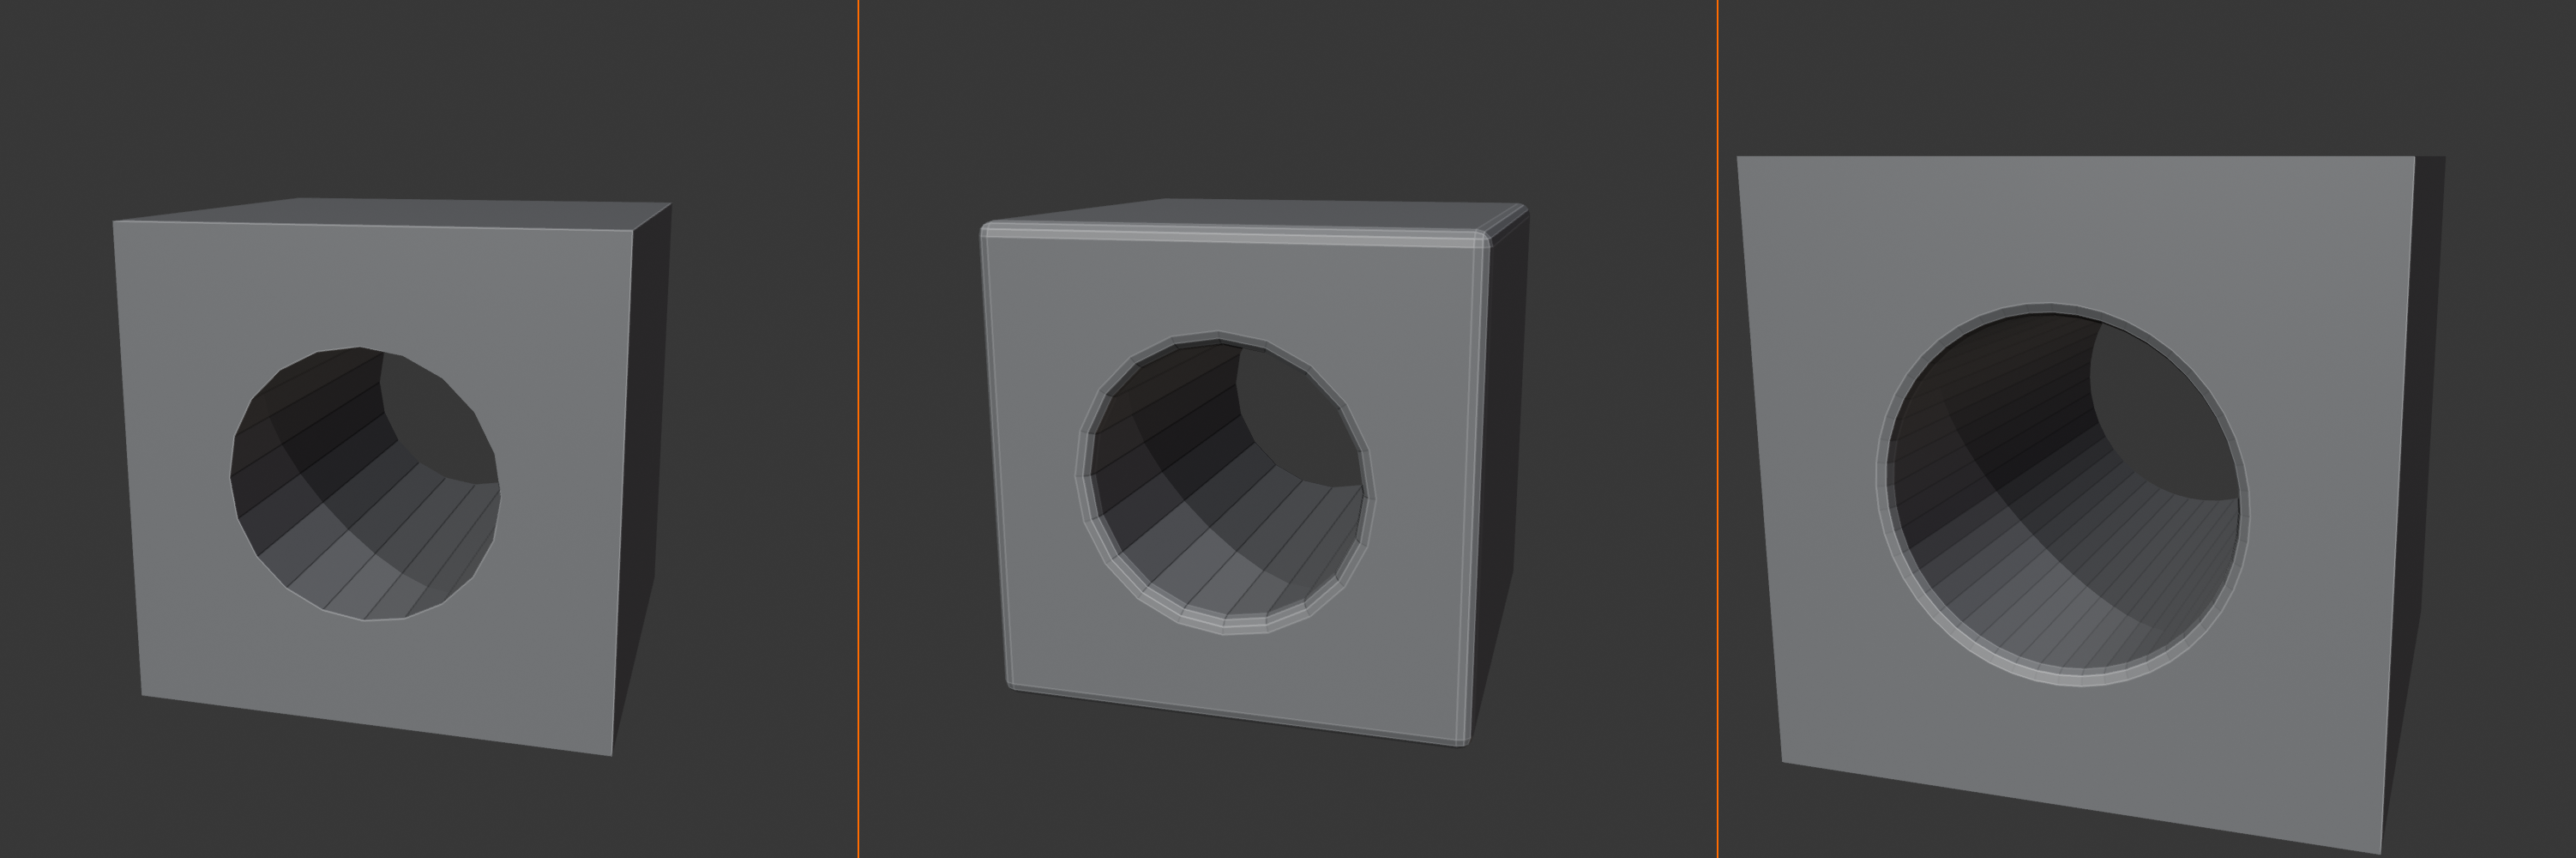
Pattern 2: Mechanical part with holes
- Mirror: Symmetry
- Boolean (cylinders for holes): Cut holes
- Bevel: Round edges (prevents pinching)
- Subdivision Surface: Smooth result
Why this order: Symmetry first, Boolean operations, edge cleanup, final smooth
Pattern 3: Organic character
- Mirror: Symmetrical modeling
- Multiresolution: Sculpting detail
- Shrinkwrap (for clothing): Conform to body
- Cloth/Soft Body: Dynamic simulation
- Armature: Rigging for animation
Why this order: Base form, sculpt, conform, simulate, animate
Pattern 4: Procedural fence
- Mirror: Symmetrical post
- Array (posts along line): Row of posts
- Array (horizontal rails): Rails between posts
- Curve modifier: Follow terrain curve
- Subdivision Surface: Smooth wood
Why this order: Create elements, duplicate pattern, deform to terrain, smooth
Pattern 5: Hard surface with panel cuts
- Mirror: Symmetry
- Array: Repeated panels
- Boolean (multiple cutters): Panel details
- Weighted Normal: Sharp/smooth shading control
- Bevel (small amount): Micro-bevels
Why this order: Generate, duplicate, cut details, shading, final polish
Troubleshooting Stack Order
🔧 When Things Go Wrong
Problem: Weird artifacts or pinching
- Check: Is Subdivision before or after Boolean?
- Fix: Move Subdivision below Boolean, add Bevel between them
- Pattern: Boolean → Bevel → Subdivision
Problem: Seam down middle of mirrored model
- Check: Is Mirror at the very top of stack?
- Fix: Move Mirror above Subdivision and other modifiers
- Enable: Mirror modifier's "Clipping" option
Problem: Array creates wrong pattern
- Check: Position relative to Mirror in stack
- Experiment: Swap Mirror and Array order
- Result: Different pattern types
Problem: Boolean doesn't work (no visible result)
- Check 1: Is cutter object in correct position?
- Check 2: Is cutter set to "Display as: Wire" or hidden?
- Check 3: Does cutter actually intersect base object?
- Check 4: Try different solver (Fast/Exact)
Problem: Modifier evaluation is extremely slow
- Check: Subdivision levels (try reducing temporarily)
- Check: Boolean solver (Fast vs. Exact)
- Fix: Disable viewport visibility (eye icon) on heavy modifiers while editing
- Fix: Use simplified mesh for cutter objects
Problem: Applying modifier fails with error
- Check: Dependencies still exist (cutter objects, curves, etc.)
- Fix: Keep dependency objects until after applying
- Alternative: Apply as shape key if geometry animation needed
Experimenting with Order
🧪 Learning Through Exploration
The reorder experiment:
- Create simple model with 3+ modifiers
- Note the current result
- Move one modifier up in stack (arrow icon)
- Observe how result changes
- Move it back down, try moving different modifier
- Continue experimenting
- Discover which orders work best
Safe experimentation tips:
- Duplicate your object first (Shift+D):
- Original preserved if experiment fails
- Can compare before/after
- Use eye icon to disable/enable modifiers:
- See contribution of each modifier
- Isolate problems
- Don't apply immediately:
- Keep modifiers unapplied during exploration
- Easy to undo/adjust
- Apply only when certain
✅ Practice Exercise: The Order Challenge
Task: Create cube with mirror, array, and subdivision
- Add Cube
- Add these three modifiers (any order):
- Mirror (X axis)
- Array (Count: 3)
- Subdivision Surface
- Try all 6 possible orders (3! = 6 permutations)
- Observe which orders produce which results
- Understand why each order creates different patterns
Goal: Internalize how stack order changes results
💡 Order Is Intent: Stack order isn't random. It's intentional. Professional modelers don't just pile modifiers randomly and hope. They think: "I need symmetry, then duplication, then smoothing. So: Mirror, Array, Subdivision." That order expresses workflow logic. Purpose drives sequence. When you understand the logic, order becomes obvious. Mirror before Array? Or Array before Mirror? Depends on pattern you want. Boolean before Bevel? Yes—bevel cleans Boolean artifacts. Subdivision at end? Usually—smooth the final result. Think assembly line. Raw material → shape → refine → smooth → finish. Each step prepares for the next. Master the logic and you'll intuitively know correct order. You won't guess. You'll know. Because order reflects process. And process reflects understanding.
🎯 Strategic Modifier Combinations
Individual modifiers are tools. Strategic combinations are techniques. Just as a chef combines ingredients to create dishes, you combine modifiers to create workflows. These proven patterns solve common modeling challenges efficiently and non-destructively. Let's explore the combinations that professional artists rely on daily.
Mirror + Array Workflows
🪞 Symmetry Meets Duplication
The power combination:
- Mirror: Creates symmetry (model one side, get both)
- Array: Duplicates geometry in patterns
- Together: Model one quarter, get entire pattern
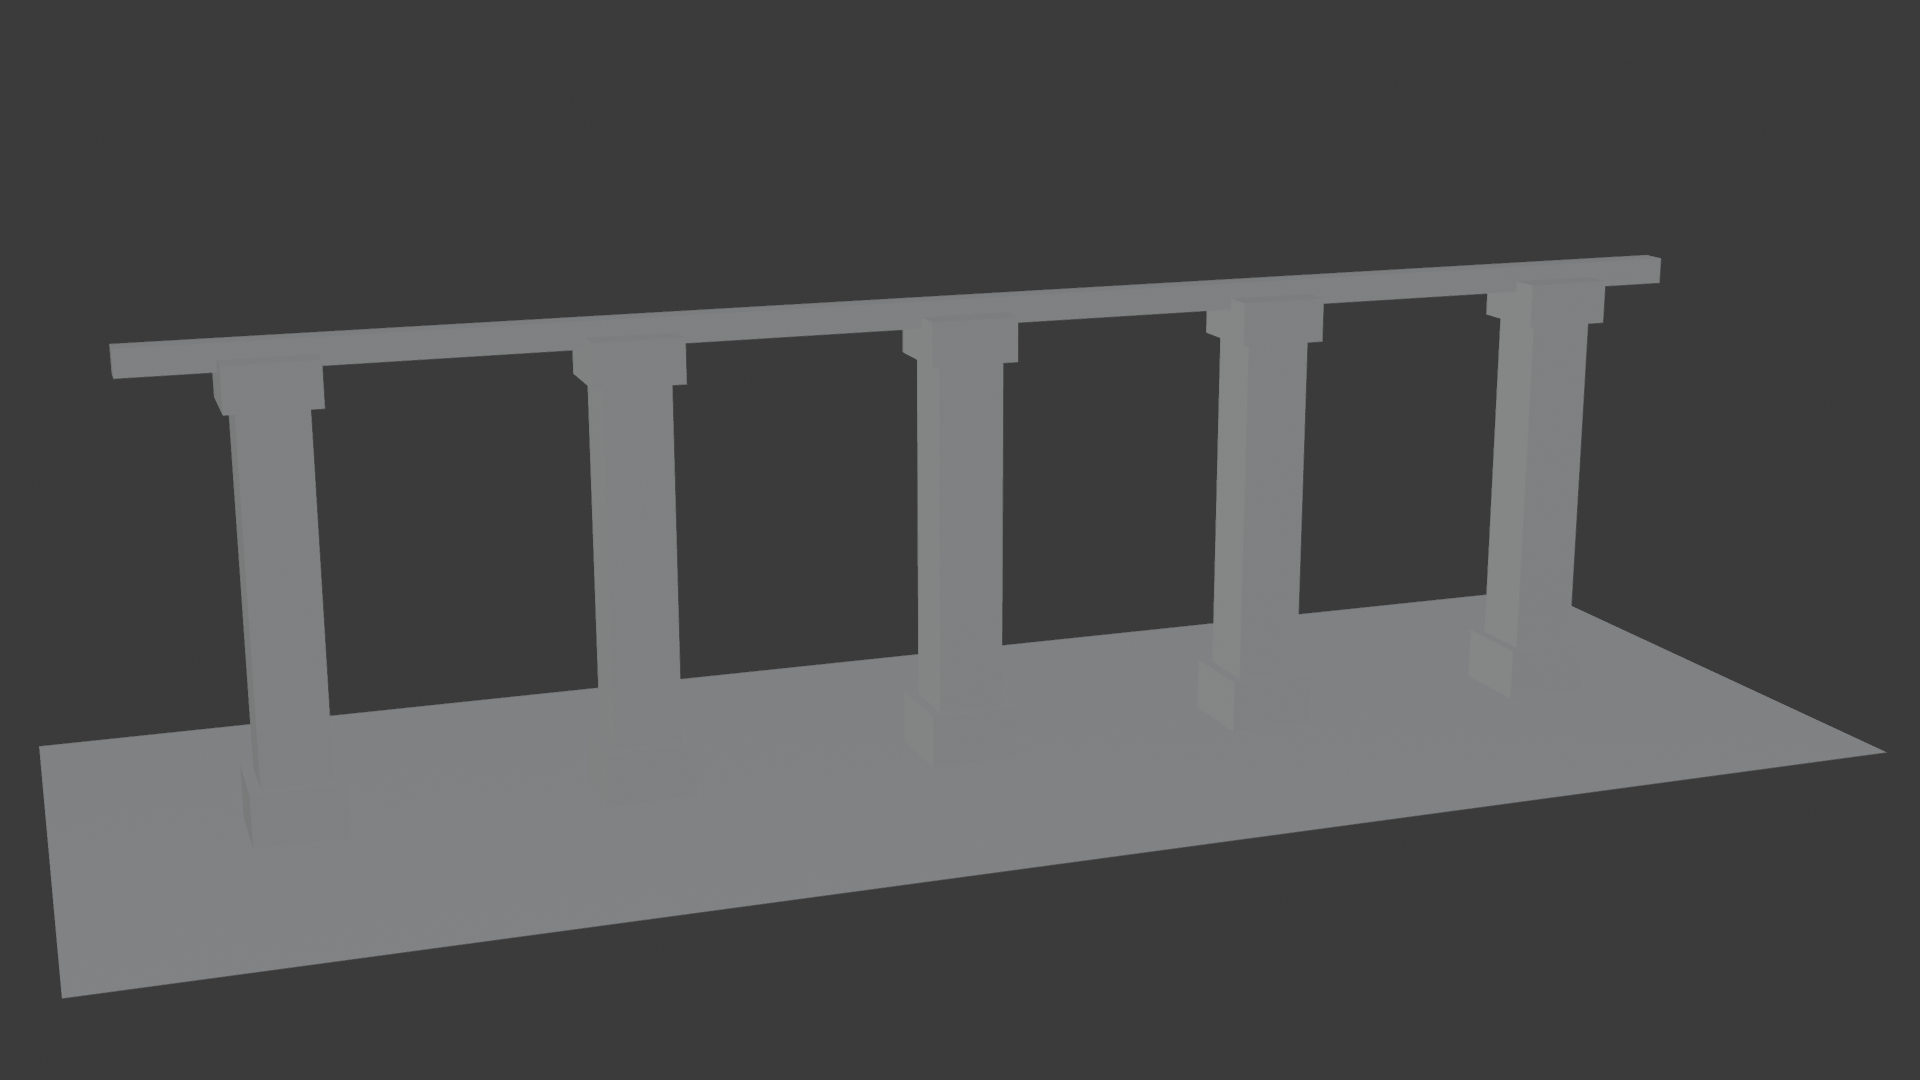
Pattern 1: Symmetrical rows
- Setup:
- Model one object (e.g., fence post)
- Add Mirror modifier (X axis)
- Add Array modifier (count: 5, offset Y axis)
- Result:
- 5 pairs of mirrored posts
- Edit one, all update symmetrically
- Total: 10 posts from one base object
- Use cases:
- Fences, railings
- Columns in architectural scenes
- Symmetrical prop arrays
Pattern 2: Grid patterns
- Setup:
- Model base element
- Add Mirror (X axis)
- Add Array #1 (Y axis, count: 3)
- Add Array #2 (Z axis, count: 4)
- Result:
- 3×4 grid, each element mirrored
- 2 × 3 × 4 = 24 objects from one base
- Use cases:
- Window grids
- Ceiling tiles
- Floor patterns
- Architectural details
Pattern 3: Radial symmetry with duplication
- Setup:
- Model one spoke/petal/element
- Position origin at center of rotation
- Add Array modifier:
- Relative Offset: disabled
- Object Offset: enabled
- Object: Empty (rotated 360°/count)
- Add Mirror (for each spoke if needed)
- Result:
- Circular pattern (flower petals, gears, wheels)
- Each element can be symmetrical
💡 Pro Tip: Array Empty Control
Use empty object for Array offset control:
- Create Empty (Shift+A → Empty → Arrows)
- Position/rotate empty to define offset
- Array → Object Offset → select empty
- Move/rotate empty = entire array updates
- Animate empty = animated array
- Non-destructive offset control!
Boolean + Bevel + Subdivision
✂️ The Boolean Workflow
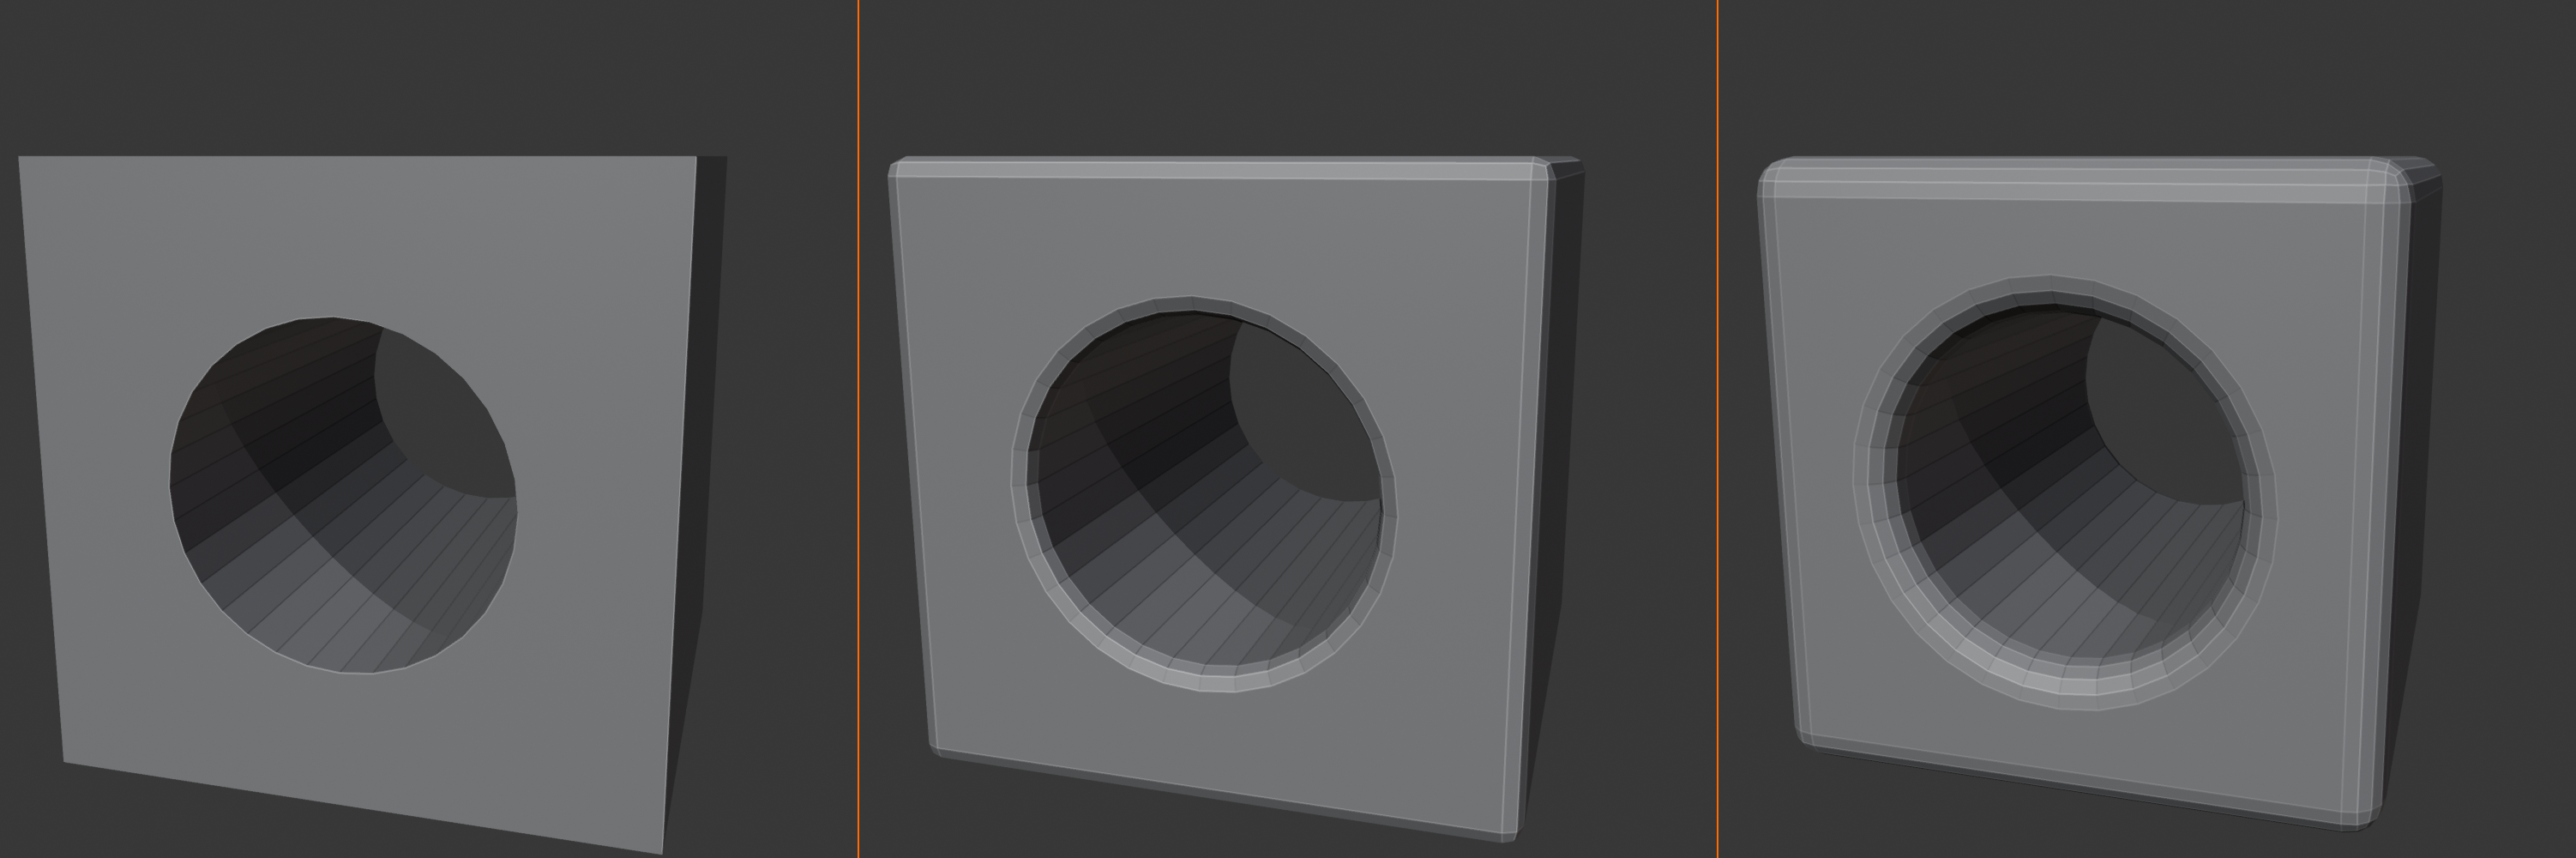
The challenge with Booleans:
- Boolean operations create mesh intersections
- Intersection geometry is often triangulated
- Triangulated areas don't subdivide smoothly
- Result: Pinching, artifacts, ugly edges
The solution: Boolean → Bevel → Subdivision
- Boolean modifier:
- Combines shapes (Union, Difference, Intersect)
- Creates the basic form
- Topology is messy but functional
- Bevel modifier:
- Adds geometry along edges
- Amount: 0.01-0.05 (small)
- Segments: 2-4
- Creates smooth transitions at Boolean seams
- Prevents pinching
- Subdivision Surface:
- Smooths the beveled result
- Now has enough geometry to subdivide cleanly
- Clean, smooth Boolean result
Advanced Boolean workflow:
- Multiple Boolean modifiers:
- Boolean #1: Window cutout (Difference)
- Boolean #2: Door cutout (Difference)
- Boolean #3: Balcony union (Union)
- Each Boolean references different cutter
- All stack before Bevel
- Then refinement:
- Bevel modifier (after all Booleans)
- Subdivision Surface (final smoothing)
Cutter object management:
- Create "Cutters" collection:
- Organize all Boolean cutter objects
- Set Display As: Wire (in Object Properties)
- Or hide collection (eye icon)
- Naming convention:
- "Cutter_Window_Front"
- "Cutter_Door_Main"
- "Cutter_VentHoles"
- Clear names prevent confusion
- Keep cutters simple:
- Fewer polygons = faster Boolean evaluation
- Basic cylinder for holes is fine
- Don't need subdivision on cutters
✅ Boolean Workflow Checklist
- ☐ Create base mesh
- ☐ Create cutter objects (simple geometry)
- ☐ Position cutters to intersect base
- ☐ Set cutters Display As: Wire
- ☐ Add Boolean modifier(s) to base object
- ☐ Choose operation: Difference, Union, or Intersect
- ☐ Select cutter object in Boolean modifier
- ☐ Try Fast solver first, Exact if problems
- ☐ Add Bevel modifier (after Booleans)
- ☐ Adjust Bevel: 0.01-0.05 amount, 2-4 segments
- ☐ Add Subdivision Surface modifier (last)
- ☐ Check result, adjust as needed
Solidify + Array Techniques
📏 Adding Thickness to Patterns
The thin-to-thick workflow:
- Start with 2D profile:
- Single plane or curve
- Easy to model and adjust
- Fast to work with
- Solidify adds volume:
- Converts thin surface to solid object
- Thickness parameter controls depth
- Offset controls which side thickens
- Array duplicates:
- Now have pattern of solid objects
- Modify base profile, entire pattern updates
Pattern: Procedural fence/railing
- Create profile:
- Add plane, scale to thin strip
- Or add curve, convert to mesh
- Model cross-section shape
- Add Solidify:
- Thickness: 0.05-0.2 (adjust for scale)
- Offset: 0.0 (centered) or adjust
- Even Thickness: enabled (usually)
- Add Array (posts):
- Count: 10
- Relative Offset: Y axis, factor 2.0
- Add second Array (horizontal rails):
- Count: 3
- Relative Offset: Z axis
- Now have full fence grid
- Optional additions:
- Curve modifier: Follow terrain
- Bevel: Round edges
- Subdivision: Smooth wood look
Pattern: Panel details
- Create thin decorative profile
- Add Solidify (small thickness)
- Add Array for pattern repetition
- Add Curve modifier (follow surface contour)
- Result: Panel lines that follow curved surfaces
Solidify modifier tips:
- Offset parameter:
- -1.0: Extrude inward
- 0.0: Extrude centered (both sides)
- +1.0: Extrude outward
- Rim settings:
- Fill Rim: Close open edges
- Useful for open profiles
- Materials:
- Rim Material Offset: Different material for rim
- Good for contrasting edge colors
Curve + Array + Deform
🌊 Following Paths and Surfaces
Curve modifier workflow:
- Purpose: Deform straight object along curved path
- Common uses:
- Roads following terrain
- Cables/wires along paths
- Decorative elements on curved surfaces
- Procedural paths and trails
Pattern: Road along terrain
- Create road segment:
- Plane, scaled to road dimensions
- Subdivide (for smooth deformation)
- Add Solidify if needs thickness
- Create curve path:
- Add Bezier Curve
- Edit curve to follow terrain contour
- Adjust handles for smooth flow
- Orient road segment:
- Rotate road so length aligns with Y axis
- Curve modifier expects Y as forward direction
- Position at curve start
- Add Curve modifier:
- Object: Select the curve
- Deformation Axis: Y (usually)
- Road now follows curve
- Optional: Array for tiled road texture:
- Add Array before Curve modifier
- Extends road along entire curve length
- Adjust count to cover curve
Pattern: Cable/wire management
- Create cable cross-section:
- Circle (low vertices: 8-12)
- Scale small
- Create path curve:
- Bezier curve from connection point to destination
- Adjust for natural cable droop
- Convert to mesh or use Curve modifier:
- Option A: Curve bevel (curve settings → Bevel)
- Option B: Curve modifier on circle mesh
- Both work, curve bevel is faster
- Add Subdivision for smooth cable:
- Final smoothing
- Realistic round cables
⚠️ Curve Modifier Gotcha: Orientation
Problem: Object deforms in wrong direction
- Cause: Object's axis doesn't match Curve modifier's expected axis
- Solution: Rotate object so its length aligns with Y axis (in top view)
- Or: Change Deformation Axis in Curve modifier settings
- Test: Object should stretch along curve when modifier applied
Multiresolution + Mirror Workflow
🎨 Sculpting with Symmetry
The character/organic workflow:
- Challenge: Want to sculpt with symmetry but keep base mesh clean
- Solution: Mirror modifier + Multiresolution
- Result: Sculpt one side, detail appears on both
Setup process:
- Model base mesh (low poly):
- Model only one half
- Keep geometry clean and simple
- Good topology (quads, edge loops)
- Add Mirror modifier:
- Choose axis (usually X)
- Enable Clipping
- Mirror creates other half
- Add Multiresolution modifier:
- After Mirror in stack
- Subdivide 2-4 levels
- Creates high-res sculpting surface
- Enter Sculpt Mode:
- Enable Symmetry in Sculpt Mode (X axis)
- Sculpt one side, other side updates
- Mirror modifier + sculpt symmetry = double symmetry (extra clean)
- Benefits:
- Base mesh stays editable (can change proportions)
- Sculpt detail at higher subdivision levels
- Perfect symmetry maintained
- Can apply Mirror later if asymmetry needed
Why this order (Mirror → Multiresolution)?
- Mirror creates symmetrical base first
- Multiresolution subdivides entire symmetrical mesh
- Sculpting affects both sides equally
- If reversed: Multiresolution subdivides half, Mirror duplicates already-subdivided geometry (wrong!)
Workflow variations:
- Character modeling: Mirror → Multiresolution → sculpt → retopology (Lesson 30)
- Organic props: Mirror → Subdivision Surface → export
- Creatures: Mirror body, asymmetrical details later
Lattice + Subdivision
📦 Cage Deformation
Lattice modifier concept:
- Lattice = 3D grid cage around object
- Move lattice points = deform object inside
- Smooth, proportional deformation
- Great for bending, twisting, tapering
Basic Lattice workflow:
- Add Lattice object:
- Shift+A → Lattice
- Scale to encompass object
- Object Properties: Set resolution (U, V, W: 3-8)
- Add Lattice modifier to mesh:
- Select mesh
- Add Modifier → Lattice
- Object: Select the Lattice object
- Deform with lattice:
- Select Lattice object
- Enter Edit Mode (Tab)
- Move lattice points
- Mesh deforms proportionally
Lattice + Subdivision pattern:
- Create base mesh (low poly)
- Add Lattice modifier (deform basic shape)
- Add Subdivision Surface (smooth the deformed result)
- Result: Complex organic forms from simple base
Advanced: Multiple Lattices
- Lattice #1: Overall bend/twist
- Lattice #2: Local bulge/deformation
- Lattice #3: Fine detail adjustments
- Each lattice = separate deformation layer
- Stack them for complex organic shapes
Use cases:
- Character posing: Quick pose adjustments
- Organic objects: Bending plants, tentacles
- Architectural: Curved walls, arches
- Animation: Animated lattice = procedural deformation
💡 Combinations Are Techniques: You've learned individual modifiers throughout this course. Mirror. Array. Boolean. Subdivision. Each is a tool. But professionals don't think in tools. They think in techniques. "Boolean workflow" isn't just Boolean. It's Boolean + Bevel + Subdivision. One modifier solves one problem. Combination solves workflow. Mirror + Array? That's "procedural duplication with symmetry." Not two modifiers. One technique. Learn combinations and you'll model faster. More efficiently. More professionally. Because you're not combining modifiers randomly. You're applying proven techniques. Workflows that work. Patterns that professionals use daily. Master these combinations and you're not just using modifiers anymore. You're orchestrating workflows. That's the difference between beginner and professional. Tools vs. techniques. Modifiers vs. workflows. Single actions vs. strategic combinations.
🚀 Advanced Modifier Techniques
You've mastered basic combinations. Now let's explore advanced techniques that push modifiers to their limits. These workflows create complex results that would be nearly impossible through manual modeling. They're the tricks that make viewers ask "how did you do that?"—procedural magic that separates good artists from great ones.
Nested Array Patterns
🔄 Arrays of Arrays
The concept:
- Multiple Array modifiers stack
- Each array duplicates previous array's result
- Creates exponential complexity from simple base
- 1 object → 10 → 100 → 1000 with three arrays
Pattern: 3D grid (building windows)
- Create single window:
- Simple window frame geometry
- Keep low poly
- Array #1 - Horizontal row:
- X axis offset
- Count: 5 (5 windows wide)
- Array #2 - Vertical columns:
- Z axis offset
- Count: 8 (8 floors high)
- Result: 5×8 = 40 windows
- Array #3 - Depth (optional):
- Y axis offset
- Count: 2 (front and back)
- Result: 5×8×2 = 80 windows
- Add Boolean to building:
- Window object as Boolean cutter (Difference)
- Cuts all 80 windows at once
- Procedural building with cutouts
Pattern: Honeycomb/hexagonal patterns
- Create hexagon:
- Circle with 6 vertices, convert to mesh
- Or model hexagon manually
- Array #1 - First row:
- X offset: hexagon width + small gap
- Count: 10
- Array #2 - Staggered rows:
- Y offset: hexagon height × 0.866 (hex math)
- X offset: half hexagon width (stagger)
- Count: 10
- Result: Honeycomb pattern
- Applications:
- Sci-fi panels
- Architectural screens
- Surface details
Pattern: Radial + linear (flower/mandala)
- Create petal/element
- Array #1 - Circles of petals:
- Object offset (empty rotated for radial)
- Count: 8 (8 petals in circle)
- Array #2 - Concentric rings:
- Object offset (empty moved radially outward + rotated)
- Count: 3 (3 rings of petals)
- Result: Mandala pattern
💡 Pro Tip: Empty Objects for Complex Offsets
For complex array patterns:
- Create Empty at array origin
- Array → Object Offset → select Empty
- Transform Empty (move, rotate, scale)
- Array follows Empty's transform
- Multiple empties = multiple array controls
- Animate empties = animated patterns
Boolean Chains
🔗 Multi-Level Boolean Operations
Advanced Boolean technique:
- Object A has modifiers → Boolean on Object B
- Object B (now modified) → Boolean on Object C
- Object C (now modified) → Boolean on Object D
- Entire chain updates when A changes
Example: Procedural architectural details
- Window Frame (Object A):
- Simple rectangle
- Mirror modifier (X and Y for symmetry)
- Array modifier (multiple windows)
- Result: Grid of window frames
- Window Mullions (Object B):
- Thin rectangles (dividers)
- Boolean modifier → references Object A (Difference)
- Cuts mullions from frames
- Result: Detailed window grid
- Building Wall (Object C):
- Large cube (wall)
- Boolean modifier → references Object B (Difference)
- Cuts entire detailed window system from wall
- Result: Wall with complex window cutouts
- Final refinement:
- Bevel modifier on Wall (smooths Boolean edges)
- Subdivision Surface (optional smoothing)
- Result: Production-ready architecture
Performance considerations:
- Boolean chains are expensive:
- Each Boolean recalculates when dependencies change
- Long chains = slow viewport
- Optimization strategies:
- Keep cutter objects simple (low poly)
- Use Fast solver when possible
- Disable viewport visibility (eye icon) on cutters
- Apply modifiers when design finalized
- Use simplified display for cutters (Display As: Bounds)
- When to apply:
- If no more changes needed
- Before final export
- When performance becomes unworkable
- But lose procedural flexibility!
⚠️ Boolean Chain Debugging
When Boolean chain breaks:
- Check each level: Disable modifiers one by one from top to find problem
- Verify intersections: Cutters must actually intersect targets
- Check solver: Switch between Fast and Exact
- Simplify cutters: Too much detail can cause failures
- Check for non-manifold: Holes or loose geometry break Booleans
Geometry Nodes Integration
🎨 Nodes Meet Modifiers
Geometry Nodes as modifier:
- Geometry Nodes modifier appears in modifier stack
- Can be combined with other modifiers
- Position in stack matters (just like other modifiers)
- Most powerful modifier in Blender
Pattern: Geometry Nodes + traditional modifiers
- Base mesh with Mirror:
- Simple half-model
- Mirror creates symmetry
- Geometry Nodes modifier:
- Processes mirrored geometry
- Adds procedural details (instance cubes, scatter elements)
- Node-based complexity
- Subdivision Surface:
- Smooths the result
- Final refinement
Use cases:
- Procedural details on symmetrical objects:
- Mirror base form
- Geometry Nodes adds surface details
- Details appear on both sides
- Instance scattering on arrayed objects:
- Array creates pattern
- Geometry Nodes scatters rocks/grass/details
- Subdivision smooths base
- Boolean preparation with nodes:
- Geometry Nodes creates cutter geometry
- Boolean uses node output
- Parametric Boolean cutters
Stack position considerations:
- Before deformation: Geometry Nodes → Curve modifier
- Add details, then deform
- After generation: Array → Geometry Nodes
- Duplicate, then add variation
- Before smoothing: Geometry Nodes → Subdivision
- Add geometry, then smooth
Note: Full Geometry Nodes covered in Lesson 40-41. Here we focus on stack integration.
Animated Modifier Stacks
🎬 Procedural Animation
Keyframing modifier parameters:
- Most modifier settings can be keyframed
- Hover over parameter → I to insert keyframe
- Creates procedural animation without mesh deformation
Common animated parameters:
- Array Count:
- Animate from 1 to 20
- Pattern grows over time
- Good for: Building construction, procedural growth
- Array Offset:
- Animate relative offset values
- Pattern spreads or contracts
- Or animate Empty for object offset
- Boolean visibility:
- Enable/disable Boolean cutters over time
- Objects appear to be cut progressively
- Good for: Reveal animations
- Solidify Thickness:
- Animate from 0 to full thickness
- Objects inflate/deflate
- Good for: Growth, expansion effects
- Subdivision Level:
- Animate viewport level
- Object becomes smoother over time
- Performance warning: Can be heavy
- Bevel Amount:
- Edges round over time
- Good for: Wear/erosion effects
Animated Empty controls:
- Array Empty:
- Animate Empty transform
- Array pattern follows animation
- Creates complex motion graphics
- Boolean cutter animation:
- Animate cutter object position
- Cutout moves through object
- Good for: Slicing effects, progressive cuts
- Curve deformation:
- Animate curve shape
- Object deforms following curve
- Good for: Tentacles, cables, organic motion
Build Modifier technique:
- Purpose: Animates mesh appearing over time
- Setup:
- Add Build modifier
- Start frame: 1
- Length: 100 frames
- Mesh draws in progressively
- Combined with other modifiers:
- Array → Build → Subdivision
- Pattern appears smoothly
✅ Animated Stack Example: Growing Fence
- Base post: Simple cylinder
- Solidify: Keyframe thickness 0 → 0.1 (frames 1-20)
- Array: Keyframe count 1 → 10 (frames 20-60)
- Subdivision: Smooth throughout
- Result: Post thickens, then fence grows
All procedural. All keyframed parameters. No mesh editing.
Displacement + Subdivision
🏔️ Texture-Driven Geometry
Displace modifier concept:
- Uses texture (grayscale) to move vertices
- White = maximum displacement
- Black = no displacement
- Gray = partial displacement
- Creates terrain, surface detail from images
Pattern: Terrain from heightmap
- Create base plane:
- Add Plane
- Edit Mode: Subdivide many times (100×100 or more)
- Need lots of geometry for displacement
- Or use Subdivision first:
- Simple plane
- Subdivision Surface (4-5 levels)
- Creates dense geometry automatically
- Add Displace modifier:
- Direction: Z (up)
- Strength: 2-10 (adjust for scale)
- Texture → New (creates texture)
- Configure texture:
- Texture Properties panel
- Type: Image or Movie (load heightmap)
- Or Type: Clouds/Noise for procedural terrain
- Result:
- Flat plane becomes terrain
- Matches heightmap darkness/lightness
- Fully procedural and adjustable
Stack order: Subdivision → Displace
- Why this order:
- Subdivision creates dense mesh
- Displace moves the subdivided vertices
- Smooth, detailed displacement
- If reversed (Displace → Subdivision):
- Displace moves few vertices
- Subdivision smooths displaced result
- Often not desired (smooths away detail)
Advanced: Multi-level displacement
- Subdivision Surface (2 levels): Base density
- Displace #1 (large noise): Major terrain features
- Subdivision Surface (1 more level): More density
- Displace #2 (small noise): Fine detail, pebbles
- Result: Multi-scale terrain detail
Other displacement uses:
- Surface details: Fabric wrinkles, skin pores
- Damage/wear: Dented metal, eroded stone
- Organic patterns: Bark texture, scales
- Stylized effects: Low-poly to high-detail with texture
Shrinkwrap Projection Workflows
📐 Surface Conforming
Shrinkwrap advanced uses:
- You know Shrinkwrap from retopology (Lesson 30)
- But it's also powerful in modifier stacks
- Projects one mesh onto another
- Creates conforming geometry
Pattern: Clothing over character
- Create clothing mesh:
- Model near character but not fitted
- Can be loose approximation
- Add Shrinkwrap modifier:
- Target: Character body
- Wrap Method: Project
- Offset: 0.01-0.05 (slightly above skin)
- Clothing conforms to body:
- Follows body shape automatically
- Floats at offset distance
- Add Cloth simulation (optional):
- After Shrinkwrap
- Adds realistic draping
- Shrinkwrap prevents interpenetration
Pattern: Surface decals/labels
- Create flat decal plane:
- Position near target surface
- Scale to desired size
- Add Shrinkwrap:
- Target: Object to receive decal
- Wrap Method: Project
- Offset: 0.001 (just above surface)
- Decal conforms to surface curvature:
- Flat plane wraps around curves
- Follows bumps and indentations
- Perfect for labels, text, details
Combining with other modifiers:
- Array → Shrinkwrap: Pattern that conforms to surface
- Subdivision → Shrinkwrap: Smooth conforming geometry
- Shrinkwrap → Solidify: Add thickness after projection
💡 Advanced Techniques Are Leverage: Basic modifiers are arithmetic. Mirror, array, subdivision—straightforward. But advanced techniques? They're geometry multiplication. Boolean chains turn one object into architectural complexity. Nested arrays turn one element into thousands. Displacement turns flat plane into mountain range. Animated stacks turn static models into motion graphics. These aren't just "more modifiers." They're force multipliers. Techniques that create exponential results from linear effort. One base object becomes procedural system. Edit once, update everywhere. Animate parameter, affect entire structure. This is why professionals use modifier stacks religiously. Not because they're lazy. Because they're smart. Work smarter, not harder. Create systems, not objects. Build procedures, not static meshes. Master these techniques and you don't model anymore. You design systems that model themselves.
⚡ Performance and Optimization
Modifier stacks are powerful, but they can also be performance bottlenecks. A complex stack might recalculate millions of polygons every time you move the viewport. Understanding performance implications and optimization strategies keeps your workflow smooth and responsive, even with heavy stacks.

Understanding Performance Impact
🎯 What Slows You Down
Modifier cost hierarchy (expensive to cheap):
- Simulation modifiers (most expensive):
- Cloth, Fluid, Soft Body
- Physics calculations every frame
- Exponential cost with polygon count
- Cache results when possible
- Boolean operations (expensive):
- Especially with Exact solver
- Complex intersections = slow calculation
- Multiple Booleans = multiplicative cost
- Cutters with high poly count = worse
- Subdivision Surface (moderate-expensive):
- Cost increases exponentially with level
- Level 1: 4× polygons
- Level 2: 16× polygons
- Level 3: 64× polygons
- Level 4: 256× polygons (avoid in viewport!)
- Remesh/Voxel operations (moderate):
- Regenerates entire mesh topology
- Fine voxel size = expensive
- Geometry Nodes (variable):
- Depends entirely on node setup
- Can be very cheap or very expensive
- Instancing = cheap, geometry generation = expensive
- Array, Mirror (cheap):
- Simple duplication/symmetry
- Linear cost increase
- Usually not a problem
- Bevel, Solidify (cheap-moderate):
- Adds geometry predictably
- Generally fast
- Data modifiers (very cheap):
- UV Project, Data Transfer, etc.
- Minimal performance impact
Stack depth considerations:
- Each modifier adds overhead:
- 10 cheap modifiers can be slower than 3 expensive ones
- Data must flow through entire stack
- Each modifier recalculates when geometry changes
- Dependencies multiply cost:
- Boolean referencing object with 5 modifiers
- That object's stack calculates first
- Then Boolean uses result
- Entire chain recalculates on changes
⚠️ The Subdivision Trap
Common mistake: Subdivision level too high in viewport
- Viewport level 4 = 256× geometry
- Even modest mesh becomes millions of polygons
- Viewport crawls to unusable speed
- Solution: Viewport level 1-2 max, render level 3-4
- Use display level vs. render level settings
Optimization Strategies
🚀 Speed Up Your Stack
Strategy 1: Viewport vs. Render settings
- Most modifiers have separate display settings:
- Viewport (what you see while working)
- Render (what appears in final output)
- Subdivision Surface example:
- Levels Viewport: 1-2 (fast, lower quality)
- Render: 3-4 (slow, high quality)
- Only pay render cost when actually rendering
- Boolean solver choice:
- Fast solver: Viewport (quick but can have artifacts)
- Exact solver: Render (slower but cleaner)
- Or use Fast for both if acceptable
Strategy 2: Disable viewport visibility
- Eye icon on each modifier:
- Disables modifier in viewport
- Still evaluates in render
- Great for expensive modifiers you don't need to see constantly
- When to disable viewport:
- High-level Subdivision (keep low level visible)
- Boolean operations while modeling base mesh
- Complex Geometry Nodes setups
- Cloth/physics (work with base mesh, enable for checking)
- Workflow:
- Model with expensive modifiers disabled
- Periodically enable to check result
- Disable again to continue working
- Fast iteration cycle
Strategy 3: Simplify cutter objects
- Boolean cutters don't need detail:
- Simple cylinder for holes works fine
- Don't need subdivision on cutters
- Fewer polygons = faster Boolean calculation
- Display cutter objects efficiently:
- Object Properties → Viewport Display
- Display As: Bounds or Wire
- Or hide cutter collection entirely
- Boolean still works, viewport is faster
Strategy 4: Apply modifiers strategically
- When to apply:
- Modifier no longer needs adjustment
- Stack is slowing down workflow
- Before export (clean up stack)
- What to apply first:
- Mirror (if symmetry complete)
- Array (if duplication finalized)
- Keep Subdivision unapplied (usually)
- Warning:
- Applying is destructive (can't easily undo)
- Save version before applying
- Or duplicate object first
Strategy 5: Use instancing when possible
- For repeated elements:
- Don't duplicate object with modifiers 100 times
- Use Array modifier or Geometry Nodes instances
- One evaluation, many copies
- Collection instances:
- Create complex object once
- Put in collection
- Instance collection multiple times
- All instances share modifier calculations
✅ Performance Optimization Checklist
- ☐ Subdivision viewport level ≤ 2
- ☐ Boolean cutters are simple geometry
- ☐ Cutter objects set to Wire/Bounds display
- ☐ Expensive modifiers disabled in viewport while modeling
- ☐ Boolean solver set to Fast (try first, Exact if necessary)
- ☐ No more than 8-10 modifiers in stack (combine when possible)
- ☐ Applied modifiers that won't change
- ☐ Instances used for repeated elements
- ☐ Physics simulations cached
- ☐ Regular saves (performance testing can crash)
Working with Heavy Stacks
💪 Managing Complexity
Progressive reveal technique:
- Start simple:
- Build with minimal modifiers
- Mirror only, low subdivision
- Add complexity gradually:
- Enable one modifier at a time
- Test performance impact
- Adjust settings before adding next
- Identify bottlenecks:
- Disable modifiers one by one from bottom
- Find which one causes slowdown
- Optimize that specific modifier
Level of Detail (LOD) approach:
- Create multiple versions:
- LOD0 (high detail): Full modifier stack
- LOD1 (medium): Some modifiers applied
- LOD2 (low): Most modifiers applied, simple
- Switch between them:
- Model with LOD2 (fast)
- Check with LOD0 periodically
- Render with LOD0
- Or use Simplify settings:
- Scene Properties → Simplify
- Viewport → Max Subdivision
- Global subdivision limit for entire scene
Modular approach:
- Break complex object into parts:
- Each part has simpler stack
- Easier to manage
- Can disable visibility on parts not being edited
- Example: Building
- Separate objects: walls, windows, roof, details
- Each with own modifier stack
- Hide parts not being worked on
- Performance stays manageable
Viewport optimization settings:
- Edit → Preferences → Viewport:
- Decrease Undo Steps (less memory for heavy meshes)
- Enable VBO (faster display)
- Enable GPU Subdivision (offload to GPU)
- Viewport Shading:
- Solid mode faster than Material Preview
- Wireframe fastest for topology checking
- Switch modes based on task
Profiling and Debugging
🔍 Finding the Problem
Identifying slow modifiers:
- Disable all modifiers (eye icons off)
- Enable one at a time from top to bottom
- Note viewport responsiveness after each
- Identify which modifier(s) cause lag
- Optimize those specific modifiers
Boolean debugging:
- If Boolean fails or is slow:
- Check for non-manifold geometry (Select → Select All by Trait → Non-Manifold)
- Ensure cutter actually intersects target
- Try switching solver (Fast ↔ Exact)
- Simplify cutter object
- Check for overlapping faces in cutter
Subdivision artifacts:
- Pinching or weird shapes:
- Check base mesh topology (ngons? triangles?)
- Add edge loops to control subdivision
- Use Crease (Shift+E) to sharpen specific edges
- Consider Bevel before Subdivision
Array issues:
- Objects not duplicating correctly:
- Check offset values (negative flips direction)
- Verify Object Offset target exists
- Reset object origin if pattern is offset
⚠️ Emergency Performance Recovery
If Blender becomes unresponsive:
- Don't close Blender (might lose work)
- Wait for auto-save (default: every 2 minutes)
- If must close: Force quit, recover from auto-save
- After recovery: Immediately reduce Subdivision levels
- Disable expensive modifiers before continuing
- Save new version with safer settings
Prevention: Test modifier settings incrementally, save before big changes
Baking and Finalizing
🔒 Converting to Geometry
When to apply modifiers:
- Before export:
- Game engines don't understand Blender modifiers
- Apply all (or convert to shape keys if animated)
- Clean, frozen geometry
- When design finalized:
- No more changes needed
- Apply to reduce overhead
- Easier to texture/UV unwrap applied mesh
- For heavy rendering:
- Animation with complex stacks
- Apply modifiers, cache geometry
- Faster rendering (no recalculation)
Applying workflow:
- Duplicate object first (safety):
- Shift+D, move to side
- Hide duplicate (in case need to revert)
- Apply from top to bottom:
- Each modifier's dropdown → Apply
- Or Ctrl+A when modifier is top of stack
- Modifier converts to geometry, disappears from stack
- Or apply all at once:
- Object Mode: Object → Convert to → Mesh
- Creates new object with all modifiers applied
- Original object with modifiers preserved
What NOT to apply (usually):
- Armature deformation: Keep for animation
- Subdivision Surface: Keep unapplied (easier to adjust)
- Physics simulations: Bake simulation instead of applying modifier
Alternative: Shape Keys from modifiers
- For deformation modifiers:
- Apply as Shape Key (modifier dropdown)
- Preserves deformation as keyable state
- Allows blending between deformed/undeformed
- Use case:
- Morphing effects
- Alternative states
- Animation between modifier states
💡 Optimization Is Professional Practice: Beginners add modifiers until Blender crawls, then complain it's slow. Professionals manage stacks proactively. They know costs. They optimize early. They use viewport/render splits. They disable what they don't need. They apply what won't change. Performance isn't accidental. It's managed. Complex stacks are possible—professionals use 10+ modifiers routinely. But they do it smartly. Strategic visibility toggling. Simplified cutters. Reasonable subdivision levels. The stack is tool, not tyrant. You control it. Optimize ruthlessly. Your workflow speed directly impacts productivity. Slow viewport = slow work. Fast viewport = fast work. Simple math. Master optimization and you can push modifiers further. Create more complex systems. Work faster despite complexity. Because you're not fighting performance. You're managing it.
🏭 Production Workflows
Understanding modifier stacks in isolation is one thing. Using them in real production environments—with teams, version control, export requirements, and client demands—is another. Let's explore how professional studios integrate modifier stacks into production pipelines.
Team Collaboration
👥 Working with Others
Naming conventions:
- Objects:
- Clear, descriptive names: "Building_Main", "Cutter_Windows_Floor2"
- Prefix system: "MESH_", "CUTTER_", "EMPTY_"
- Version numbers: "Character_v03"
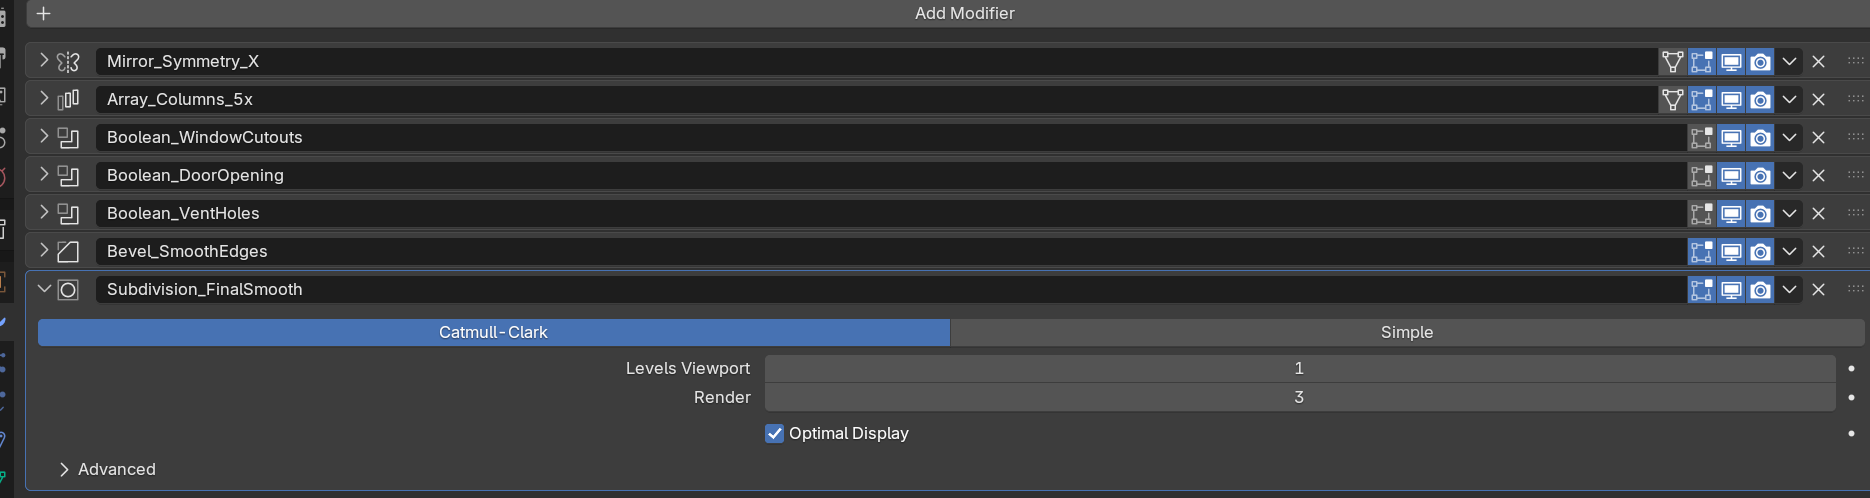
- Modifiers:
- Rename default names to descriptive ones
- "Mirror" → "Mirror_Symmetry_X"
- "Boolean" → "Boolean_WindowCutouts"
- "Array" → "Array_Columns_Horizontal"
- Collections:
- Organize by purpose: "Cutters", "References", "LODs"
- Hide collections appropriately
Documentation in blend files:
- Text blocks:
- Scripting workspace → Text Editor
- Create text document: "README_ModifierStack.txt"
- Document modifier purposes, dependencies, settings
- Included in .blend file
- Custom properties:
- Object Properties → Custom Properties
- Add notes: "Purpose", "Artist", "DateModified"
- Visible to anyone opening file
Handoff best practices:
- Before passing to teammate:
- Name everything clearly
- Remove unused modifiers
- Organize in logical collection structure
- Document any unusual setups
- Save file with descriptive name
- Mark problematic areas:
- Add Empty at problem spots
- Name: "TODO_FixBooleanHere"
- Or use custom property notes
💡 Pro Tip: Modifier Templates
Create template objects with standard modifier setups:
- Save object with modifier stack to asset library
- Append from asset library when needed
- Consistent setups across team
- Example templates: "Character_Base_Stack", "Building_Window_System"
Export and Interchange
📦 Getting Assets Out of Blender
Export requirements by target:
- Game engines (Unity, Unreal, Godot):
- Apply ALL modifiers (engines don't understand Blender modifiers)
- Exception: Keep Armature for animation
- Export format: FBX or glTF/GLB
- Optimization: Decimate if over polygon budget
- Other 3D software (Maya, Max, C4D):
- Apply modifiers (no direct translation)
- Export format: FBX, OBJ, or Alembic
- Alembic preserves animation better
- Rendering engines (V-Ray, Arnold):
- Can keep Subdivision unapplied (they understand it)
- Apply everything else
- Export with materials
- 3D printing:
- Apply ALL modifiers
- Ensure watertight (no holes)
- Export format: STL or OBJ
- High subdivision for smooth curves
Export workflow:
- Duplicate object for export:
- Shift+D, rename to "ObjectName_Export"
- Preserves working version with modifiers
- Apply modifiers strategically:
- Apply from top to bottom
- Or: Object → Convert to → Mesh
- Check geometry:
- Face count acceptable?
- No errors (non-manifold, loose geometry)?
- UVs present if needed?
- Export with correct settings:
- File → Export → [Format]
- Enable "Selected Objects Only"
- Configure format-specific options
Maintaining both versions:
- Working file: Modifiers intact, easy to adjust
- Export file: Modifiers applied, production-ready
- Update workflow:
- Make changes in working file
- Re-export when changes finalized
- Versioning: filename_v01, filename_v02, etc.
Version Control
📁 Managing Changes
File versioning strategy:
- Manual versioning:
- Building_v01.blend (initial)
- Building_v02.blend (added windows)
- Building_v03.blend (refined details)
- Keep previous versions as backup
- Date-based:
- Building_2024-11-08.blend
- Good for tracking when changes made
- Feature-based:
- Building_BaseStructure.blend
- Building_WithWindows.blend
- Building_Detailed.blend
- Describes what's in version
Modifier stack versioning:
- Before major stack changes:
- Save new version
- Experiment in new file
- Can revert if experiment fails
- Or: Duplicate object within file:
- Object_ModifierTest_01
- Object_ModifierTest_02
- Hide working tests, keep best version visible
Git/SVN for Blender files (advanced):
- Challenges:
- .blend files are binary (hard to merge)
- Large file sizes
- Can't see diff easily
- Solutions:
- Use Git LFS for large files
- Avoid simultaneous editing of same file
- Coordinate through task management
- Or use specialized tools (Blender Cloud, Anchorpoint)
Asset Libraries
📚 Reusable Modifier Setups
Creating modifier templates:
- Build object with perfect modifier stack:
- Example: Window frame with Mirror, Array, Boolean-ready
- Test thoroughly
- Optimize settings
- Save to asset library:
- Select object → Asset Browser
- Mark as Asset (shield icon)
- Add description, tags
- File → Defaults → Save Startup File (if in startup file)
- Or: Save to dedicated asset file:
- Create file: "ModifierTemplates.blend"
- Add all template objects
- Mark as assets
- Append from this file in new projects
Using templates:
- From Asset Browser:
- Asset Browser → Browse asset library
- Drag asset into viewport
- Modifier stack comes with it
- Adjust base geometry, modifiers update
- From external file:
- File → Append
- Navigate to template file → Object
- Select template object
- Appears in scene with modifiers intact
Common template examples:
- Character_SymmetrySetup (Mirror + Multiresolution ready)
- Building_WindowSystem (Boolean-ready window grid)
- Props_ArrayPattern (Mirror + Array + Bevel + Subdivision)
- Mechanical_HardSurface (Boolean + Weighted Normal + Bevel)
- Organic_SmoothBase (Subdivision + Shrinkwrap-ready)
Quality Control
✅ Final Checks
Pre-delivery checklist:
- Modifier stack health:
- ☐ All modifiers evaluating without errors
- ☐ No dependency warnings (red triangles)
- ☐ Referenced objects exist (cutters, curves, targets)
- ☐ Modifiers named descriptively
- Geometry quality:
- ☐ No non-manifold edges (unless intentional)
- ☐ No loose vertices/edges
- ☐ Normals facing correct direction
- ☐ Scale applied (Object → Apply → Scale)
- Performance:
- ☐ Viewport responsive
- ☐ Subdivision levels reasonable
- ☐ No unnecessarily heavy modifiers
- Organization:
- ☐ Objects named clearly
- ☐ Collections organized logically
- ☐ Cutter/reference objects in separate collections
- ☐ Unused objects deleted
Testing different scenarios:
- Render test:
- Does it render correctly?
- All modifiers visible in render?
- No artifacts or errors?
- Export test:
- Apply modifiers, export
- Import to target software/engine
- Verify it works as expected
- Edit test:
- Can base mesh be edited easily?
- Do modifiers update correctly?
- No unexpected behavior?
💡 Production Is About Systems: In personal projects, you can be messy. Name objects "Cube.047". Stack 15 modifiers randomly. It's your file. But production requires discipline. Clear naming. Logical organization. Documented setups. Because others will work with your files. Or you'll work with your own file six months later. And "Cube.047" with random modifier stack won't make sense. Production isn't about being artistic. It's about being professional. Repeatable workflows. Maintainable files. Exportable assets. The modifier stack that works once isn't enough. You need stacks that work consistently. That teammates understand. That export cleanly. That hold up under iteration. Master production workflows and you're not just a 3D artist. You're a production artist. Pipeline-ready. Team-compatible. Professional-grade. That's what studios hire. That's what pays bills. Technical excellence meets organizational discipline. Modifier mastery meets production professionalism.
🎯 Hands-On Project: Procedural Architecture
Time to apply everything you've learned! This project will guide you through creating a complex architectural element using advanced modifier stacks. You'll build a procedural colonnade (row of columns with arches) that's completely editable and demonstrates professional modifier stack techniques.
📋 Project Brief
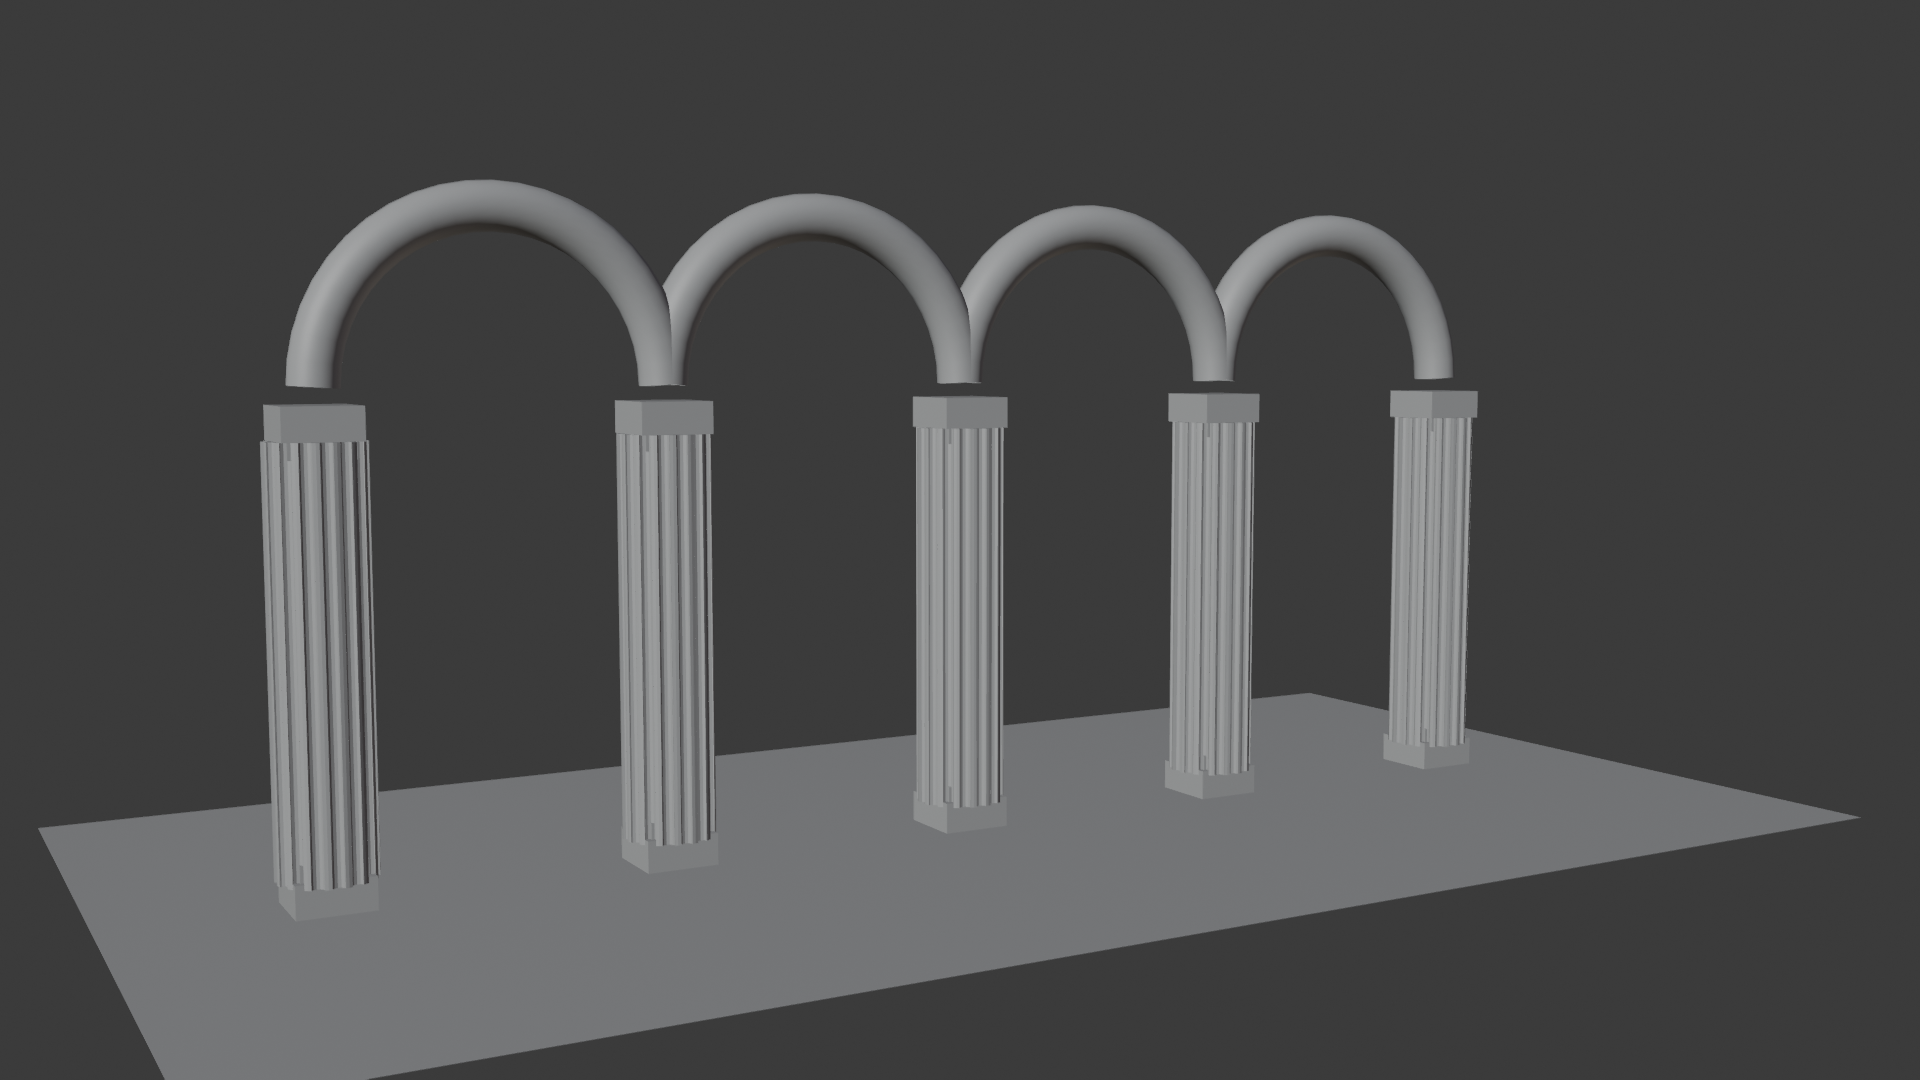
Goal: Create procedural architectural colonnade using 8+ modifiers
Requirements:
- Symmetrical columns with capital details
- Array of columns creating colonnade
- Connecting arches between columns
- Decorative panel cuts (Boolean)
- All elements procedural (editable via modifiers)
- At least 8 modifiers in stack
- Clean organization and naming
Time estimate: 60-90 minutes
Phase 1: Create Base Column
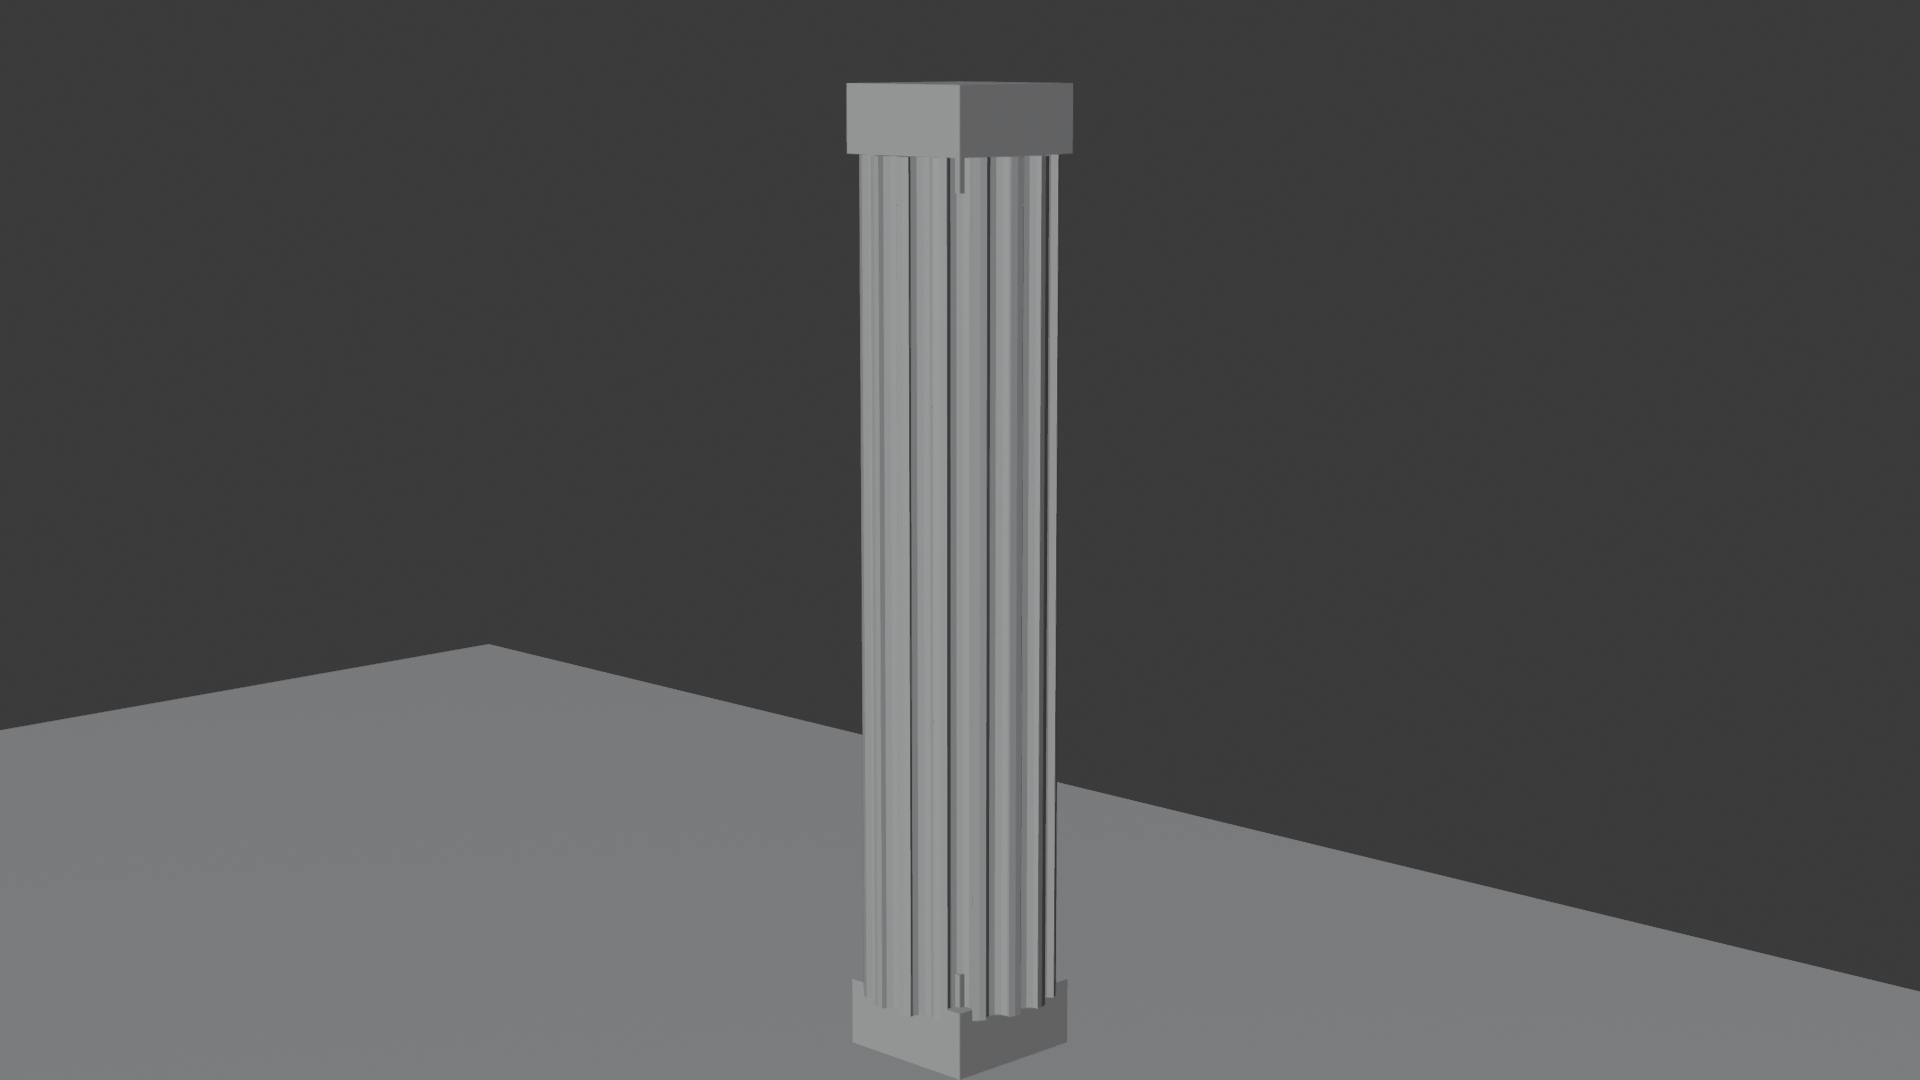
🏛️ Foundation Element
- Create column shaft profile:
- Add Cube, scale to tall thin rectangle (0.3 × 0.3 × 3 units)
- Or add Cylinder (12 vertices), scale vertically
- Position at origin
- Name: "Column_Base"
- Add Mirror modifier:
- X axis (for future detail work)
- Enable Clipping
- Rename modifier: "Mirror_Symmetry"
- Add capital detail (top of column):
- Edit Mode: Add edge loops near top
- Scale outward to create capital shape
- Simple beveled top is fine
- Add base detail (bottom):
- Similar treatment at bottom
- Scale outward slightly for base
Phase 2: Add Column Details
✨ Decorative Elements
- Create fluting (vertical grooves):
- Add Cube, scale thin and tall
- Position on column surface
- Name: "Cutter_Fluting"
- Add Array modifier to cutter:
- Count: 8-12 (around column)
- Use Object Offset with Empty (rotated 360°/count)
- Add Boolean to column:
- Select Column_Base
- Add Modifier → Boolean
- Operation: Difference
- Object: Cutter_Fluting
- Rename: "Boolean_FlutingCuts"
- Hide cutter:
- Select Cutter_Fluting
- Object Properties → Viewport Display → Display As: Wire
- Or move to "Cutters" collection and hide
- Add Bevel modifier to column:
- After Boolean
- Amount: 0.01-0.02
- Segments: 2-3
- Smooths Boolean edges
- Rename: "Bevel_SmoothEdges"
- Add Subdivision Surface:
- Viewport: 1
- Render: 2
- Final smoothing
- Rename: "Subdivision_Final"
Phase 3: Create Colonnade
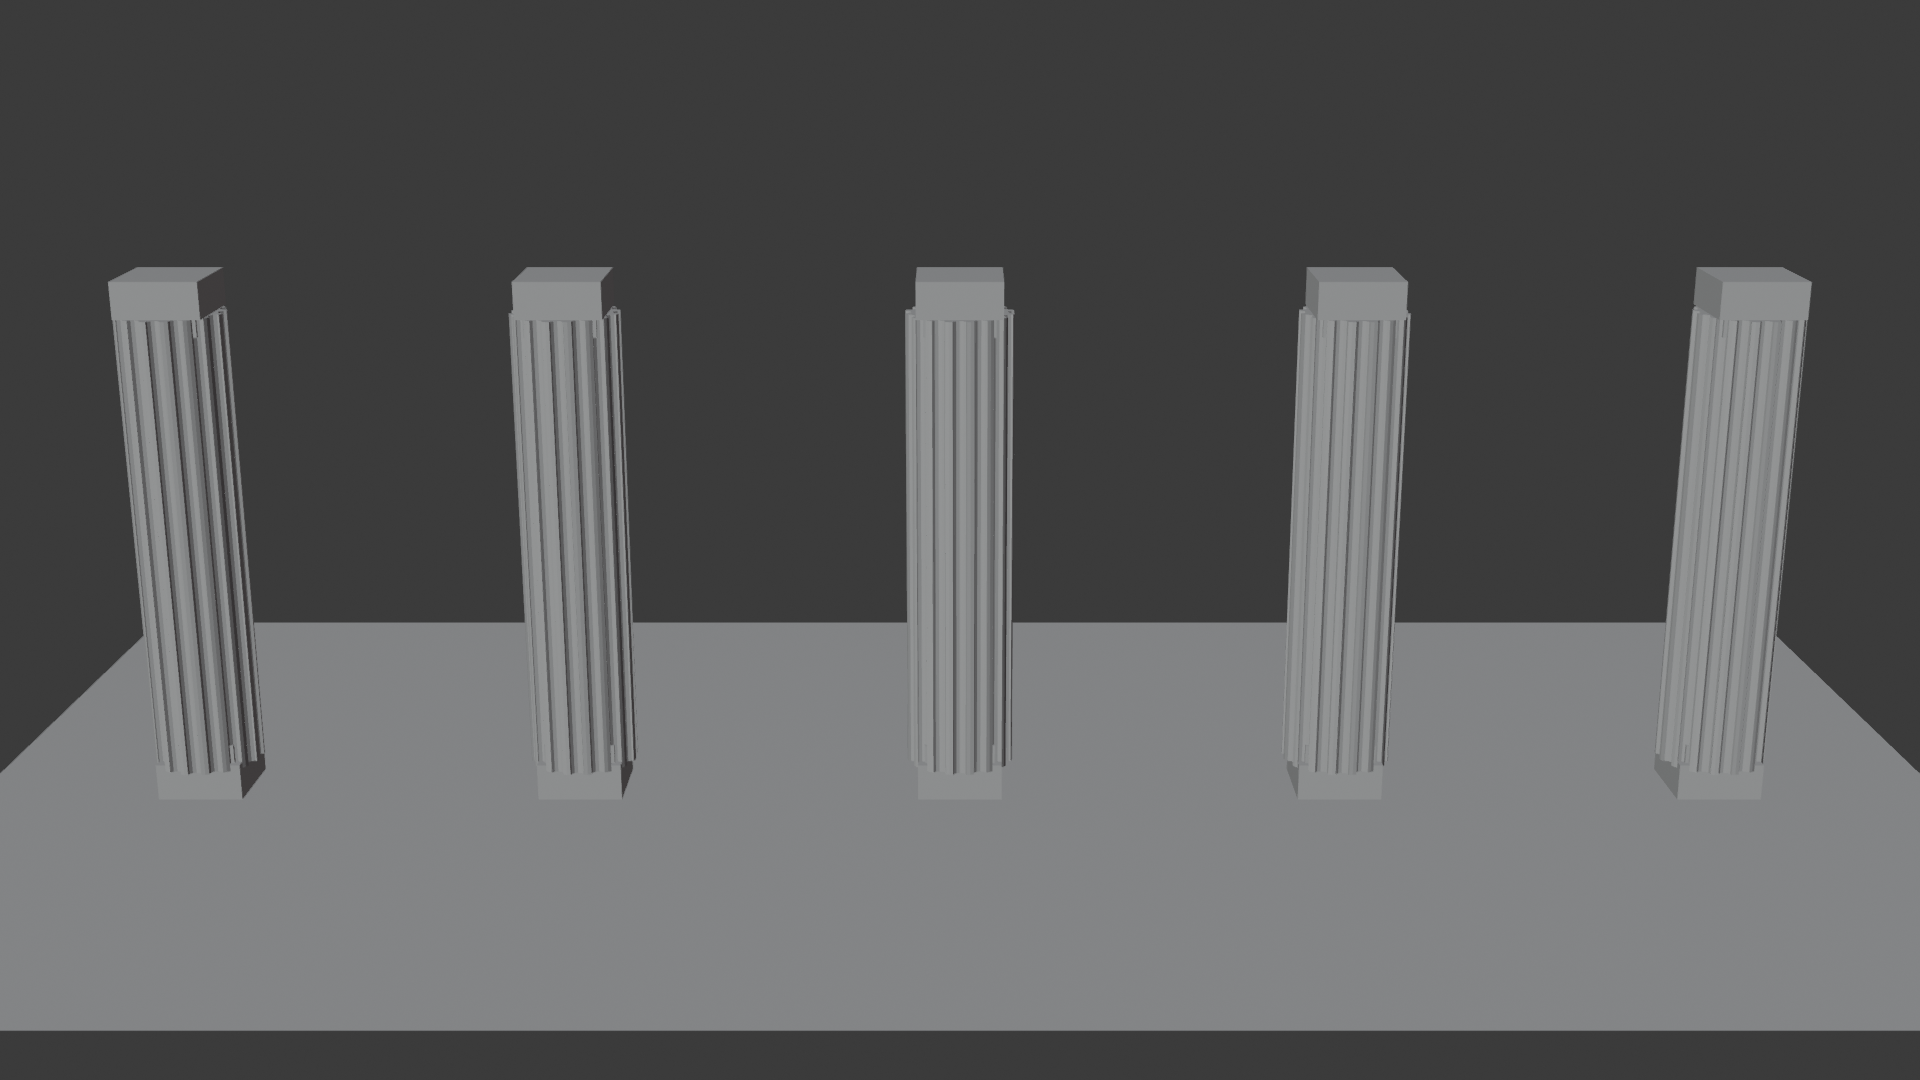
🏛️ Row of Columns
- Add Array modifier to column:
- After Subdivision
- Count: 5 (5 columns)
- Relative Offset: Y axis
- Factor: 2.5 (spacing between columns)
- Rename: "Array_Colonnade"
- Check result:
- Should see 5 columns in a row
- All with fluting details
- Evenly spaced
- Adjust spacing if needed:
- Change Array Factor value
- Entire row updates
Phase 4: Add Connecting Arches
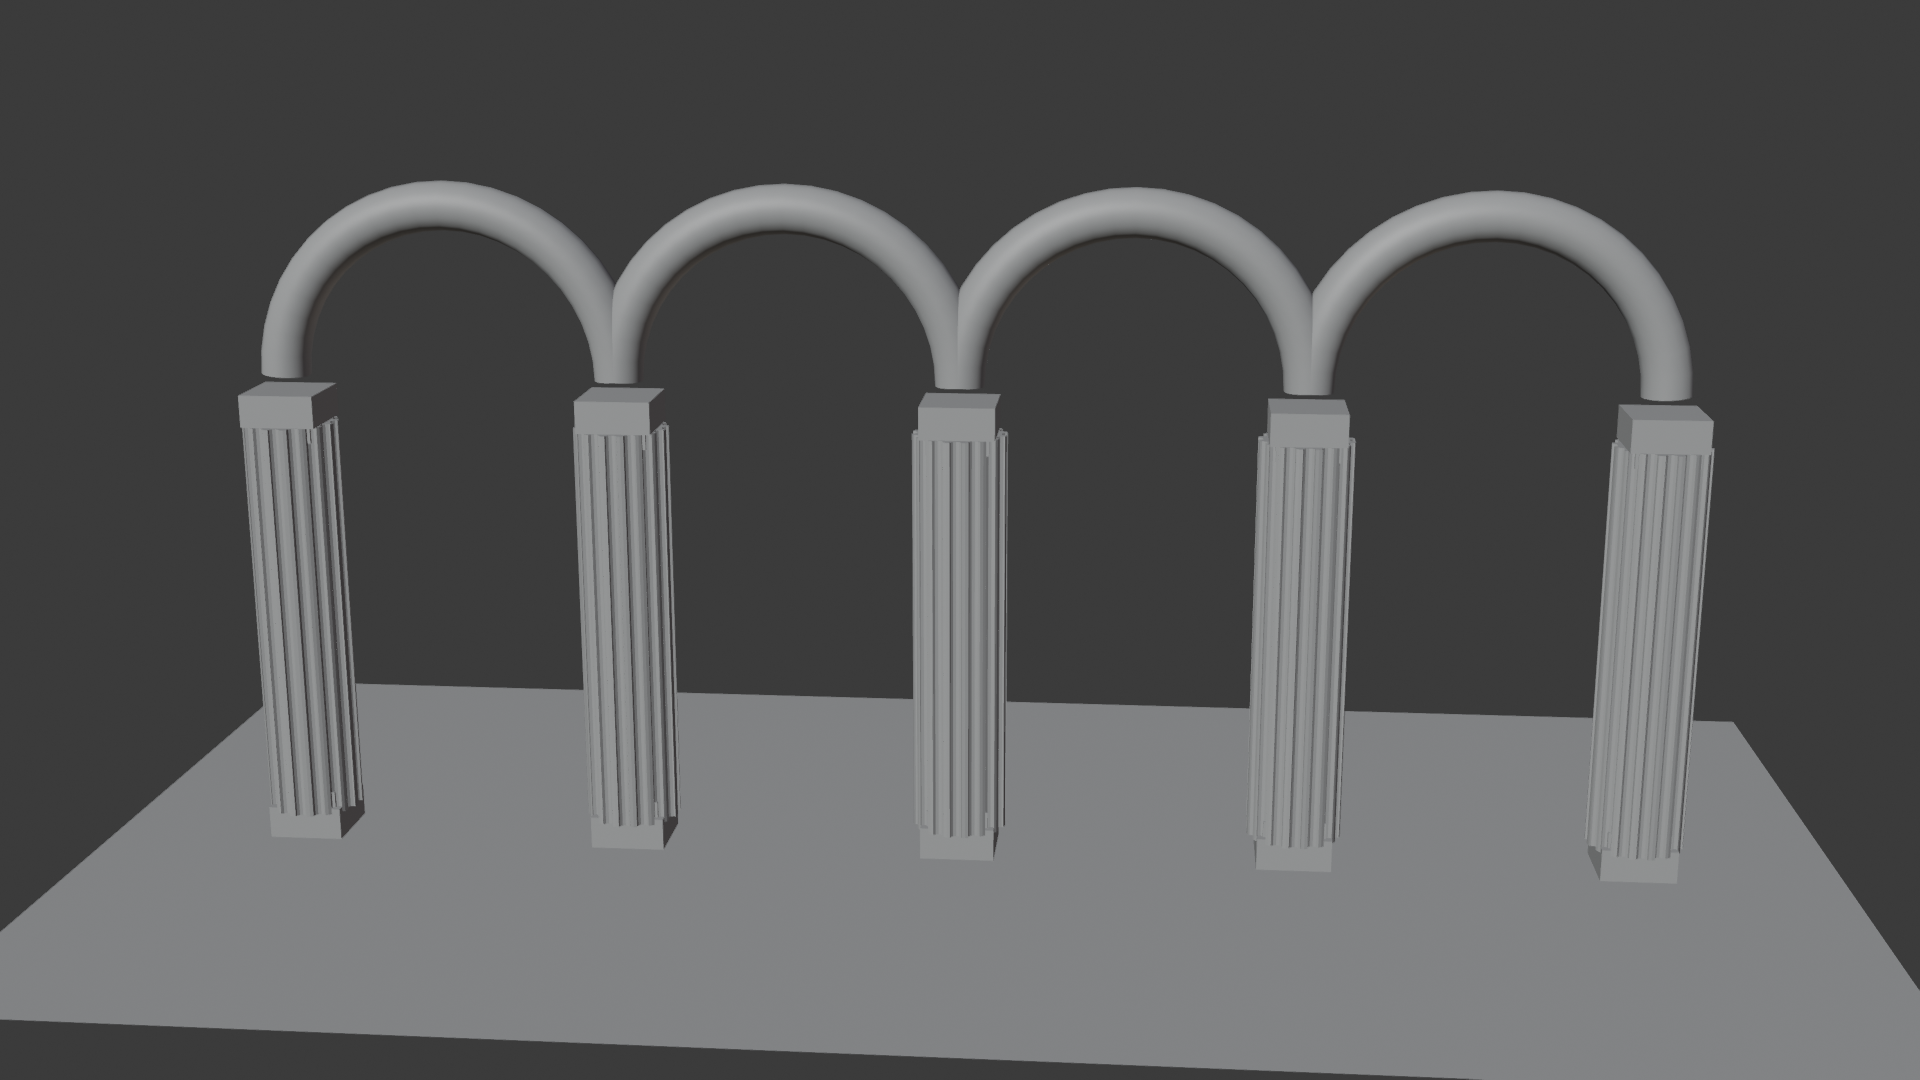
🌉 Arch Between Columns
- Create arch profile:
- Add Curve → Bezier Curve
- Edit curve to create arch shape
- Position between two columns (at top)
- Name: "Arch_Profile"
- Give arch thickness:
- Curve Properties → Bevel → Depth: 0.1-0.2
- Resolution: 4-8
- Arch becomes 3D
- Convert to mesh:
- Select arch, Object → Convert to → Mesh
- Or keep as curve (your choice)
- Add Array to arch:
- Count: 4 (one fewer than columns)
- Offset: Match column spacing
- Arches now connect all columns
- Add Subdivision to arch (if mesh):
- Smooth the arch geometry
Phase 5: Add Decorative Panels
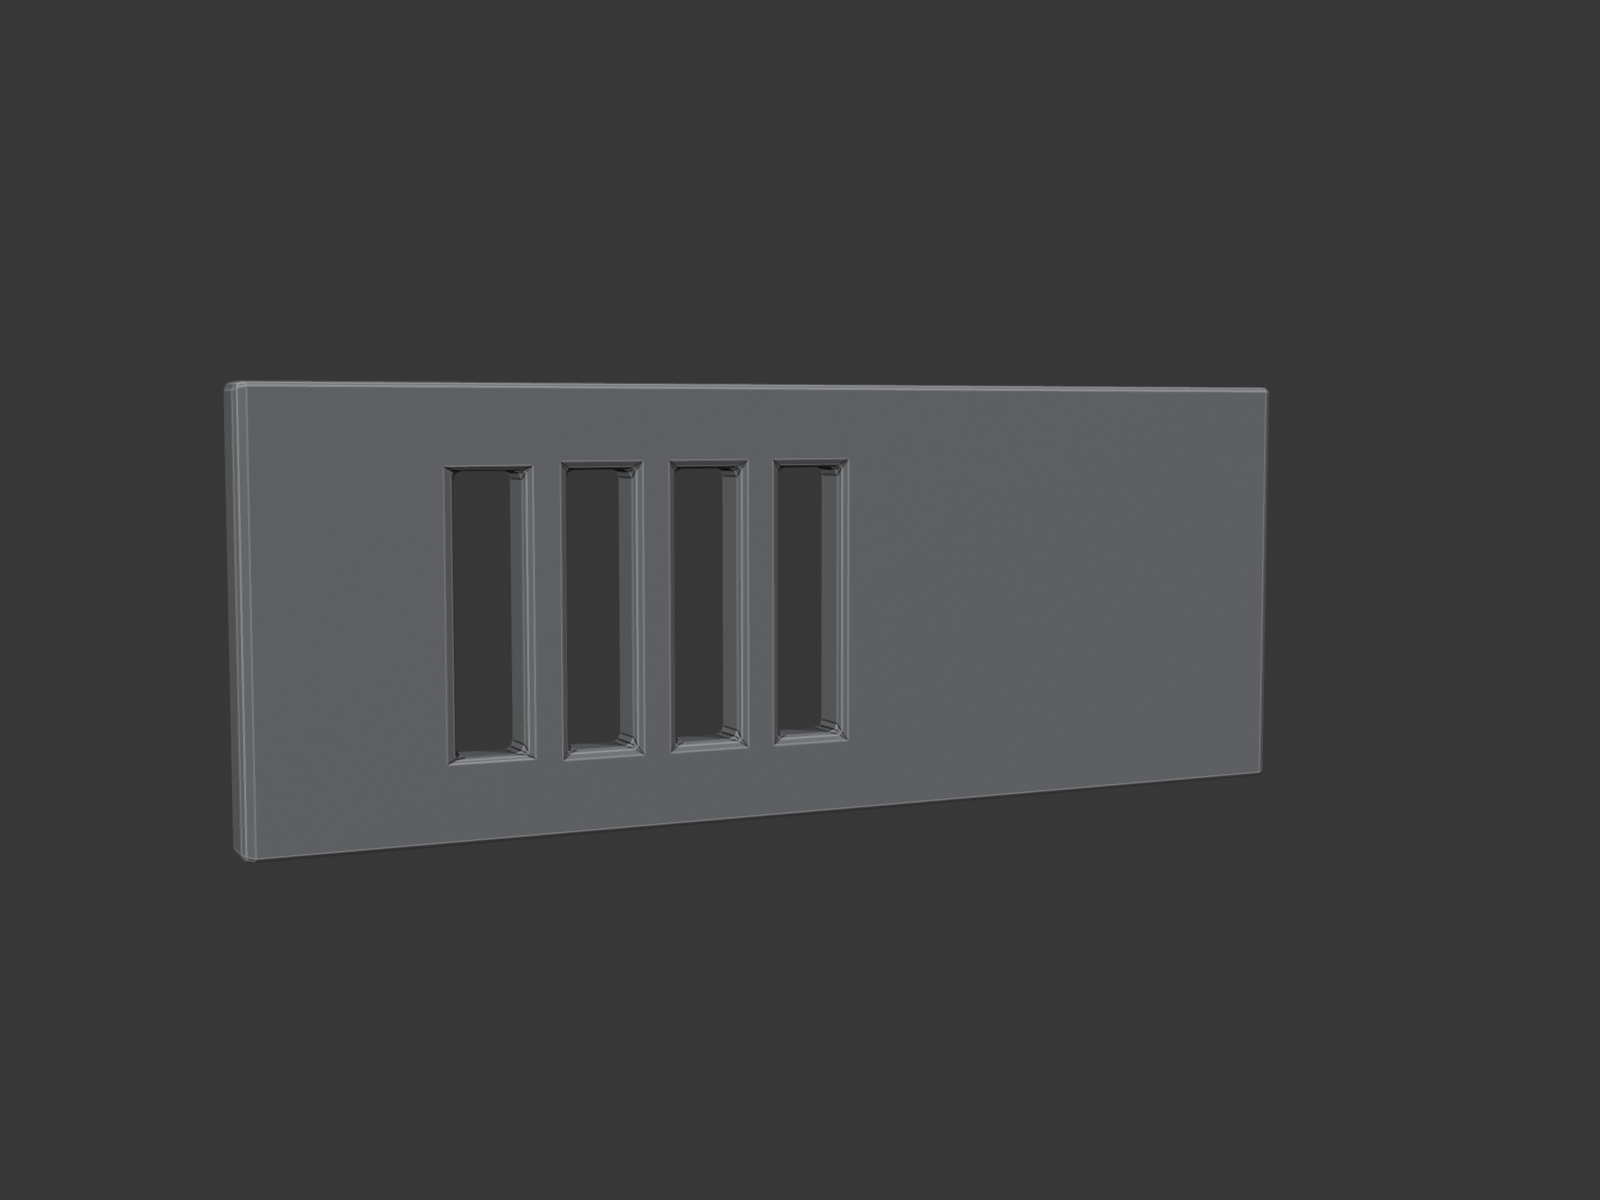
🎨 Surface Details
- Create panel cutter:
- Add Cube, scale to decorative panel shape
- Position on arch or column
- Name: "Cutter_DecorativePanel"
- Add Array to cutter:
- Duplicate pattern along arch
- Match arch array spacing
- Boolean panels into arch:
- Select arch, add Boolean modifier
- Operation: Difference
- Object: Cutter_DecorativePanel
- Creates repeating panel cuts
- Add Bevel after Boolean:
- Smooths panel edges
- Small amount: 0.005-0.01
Phase 6: Organization and Refinement
🗂️ Clean Up
- Create collections:
- "Colonnade_Main" (column and arch)
- "Cutters" (all Boolean cutters)
- Organize objects appropriately
- Rename all modifiers descriptively:
- No default "Array" or "Boolean" names
- Clear purpose for each
- Set cutter display:
- All cutters: Display As: Wire or Bounds
- Or hide Cutters collection
- Test editability:
- Change column base mesh → entire colonnade updates
- Change Array count → more/fewer columns
- Change Boolean cutters → pattern changes
- Everything is procedural!
Success Checklist
✅ Project Complete When...
- ☐ Column has at least 6 modifiers (Mirror, Boolean, Bevel, Subdivision, Array, etc.)
- ☐ Arch/connecting element added with modifiers
- ☐ Boolean cutters create decorative details
- ☐ All cutters hidden or set to wire display
- ☐ Everything organized in collections
- ☐ All modifiers renamed descriptively
- ☐ Base geometry is editable (changes propagate through stack)
- ☐ Array counts adjustable (adds/removes columns)
- ☐ Viewport performance acceptable
- ☐ Renders correctly
Bonus Challenges
🚀 Take It Further
Challenge 1: Add animated growth
- Keyframe Array count from 1 to 5
- Colonnade appears to build over time
- Procedural animation
Challenge 2: Create second story
- Duplicate entire colonnade
- Move above, scale smaller
- Two-story arcade structure
Challenge 3: Curve deformation
- Add Bezier Curve
- Add Curve modifier to colonnade
- Colonnade follows curved path
- Circular colonnades, curved galleries
Challenge 4: Export for game engine
- Duplicate colonnade
- Apply all modifiers
- Check polygon count
- Export as FBX
- Import to Unity/Unreal/Godot
💡 You Just Built a System: Look at what you created. Not just a colonnade. A procedural architectural system. Change one value, entire structure updates. Add column detail, appears on all columns. Adjust spacing, colonnade expands. This is the power of modifier stacks. You didn't model 5 columns. You modeled one, then used modifiers to create 5. You didn't model 4 arches. One arch, procedurally duplicated. And it's all editable. Client wants 10 columns instead of 5? One parameter. Different spacing? One value. This is professional workflow. This is production thinking. Build systems, not objects. Create procedures, not fixed meshes. And now you can. Because you understand modifier stacks. Not just individual modifiers. Complete workflows. Strategic combinations. Professional techniques. This is what separates you from beginners. They model objects. You design systems.
📚 Lesson Summary
You've completed the final lesson of Module 7: Advanced Modeling. The modifier stack represents the culmination of everything you've learned about non-destructive, procedural modeling in Blender. It's not just a feature—it's a philosophy. A way of thinking about 3D creation that emphasizes flexibility, editability, and systematic workflows.
🎯 Key Takeaways
Fundamental Concepts:
- Sequential processing: Modifiers execute top to bottom, each processing previous result
- Non-destructive workflow: Base mesh preserved, modifiers create visual result
- Order matters profoundly: Same modifiers in different orders = different results
- Dependencies affect performance: Modifier chains recalculate entire pipeline
- Combinations are techniques: Strategic modifier pairs solve common challenges
Technical Skills:
- ✅ Read and understand modifier stack flow
- ✅ Apply optimal stack order (Generate → Modify → Refine → Smooth)
- ✅ Combine modifiers strategically (Mirror+Array, Boolean+Bevel+Subdivision)
- ✅ Use advanced techniques (nested arrays, Boolean chains, animated stacks)
- ✅ Optimize performance (viewport/render splits, visibility management)
- ✅ Integrate into production pipelines (naming, organization, export)
- ✅ Debug and troubleshoot stack issues
- ✅ Create reusable modifier templates
Professional Workflows:
- 🏭 Team collaboration: Clear naming, documentation, handoff practices
- 📦 Export preparation: Apply modifiers, check geometry, format conversion
- 📁 Version control: File versioning, iterative refinement
- 📚 Asset library: Reusable templates, consistent setups
- ✅ Quality control: Pre-delivery checks, testing workflows
The Modifier Stack Philosophy
🎨 Systems Over Objects
Traditional modeling approach:
- Model object directly
- Every change requires manual remodeling
- Iterations are slow and destructive
- Final result is fixed geometry
- Changes late in process = major rework
Modifier stack approach:
- Build procedural system
- Changes propagate through stack automatically
- Iterations are instant and non-destructive
- Final result remains editable
- Changes anytime = parameter adjustment
The paradigm shift:
- From: "Model this object"
- To: "Design system that generates this object"
- From direct manipulation to systematic construction
- From fixed assets to procedural workflows
- From modeling to systems design
Direct Modeling] --> B[Fixed Geometry] C[Modifier Stack:
System Design] --> D[Procedural System] D --> E[Editable Forever] style C fill:#FF6B00,stroke:#333,stroke-width:2px,color:#fff style E fill:#4CAF50,stroke:#333,stroke-width:2px,color:#fff
Essential Modifier Patterns
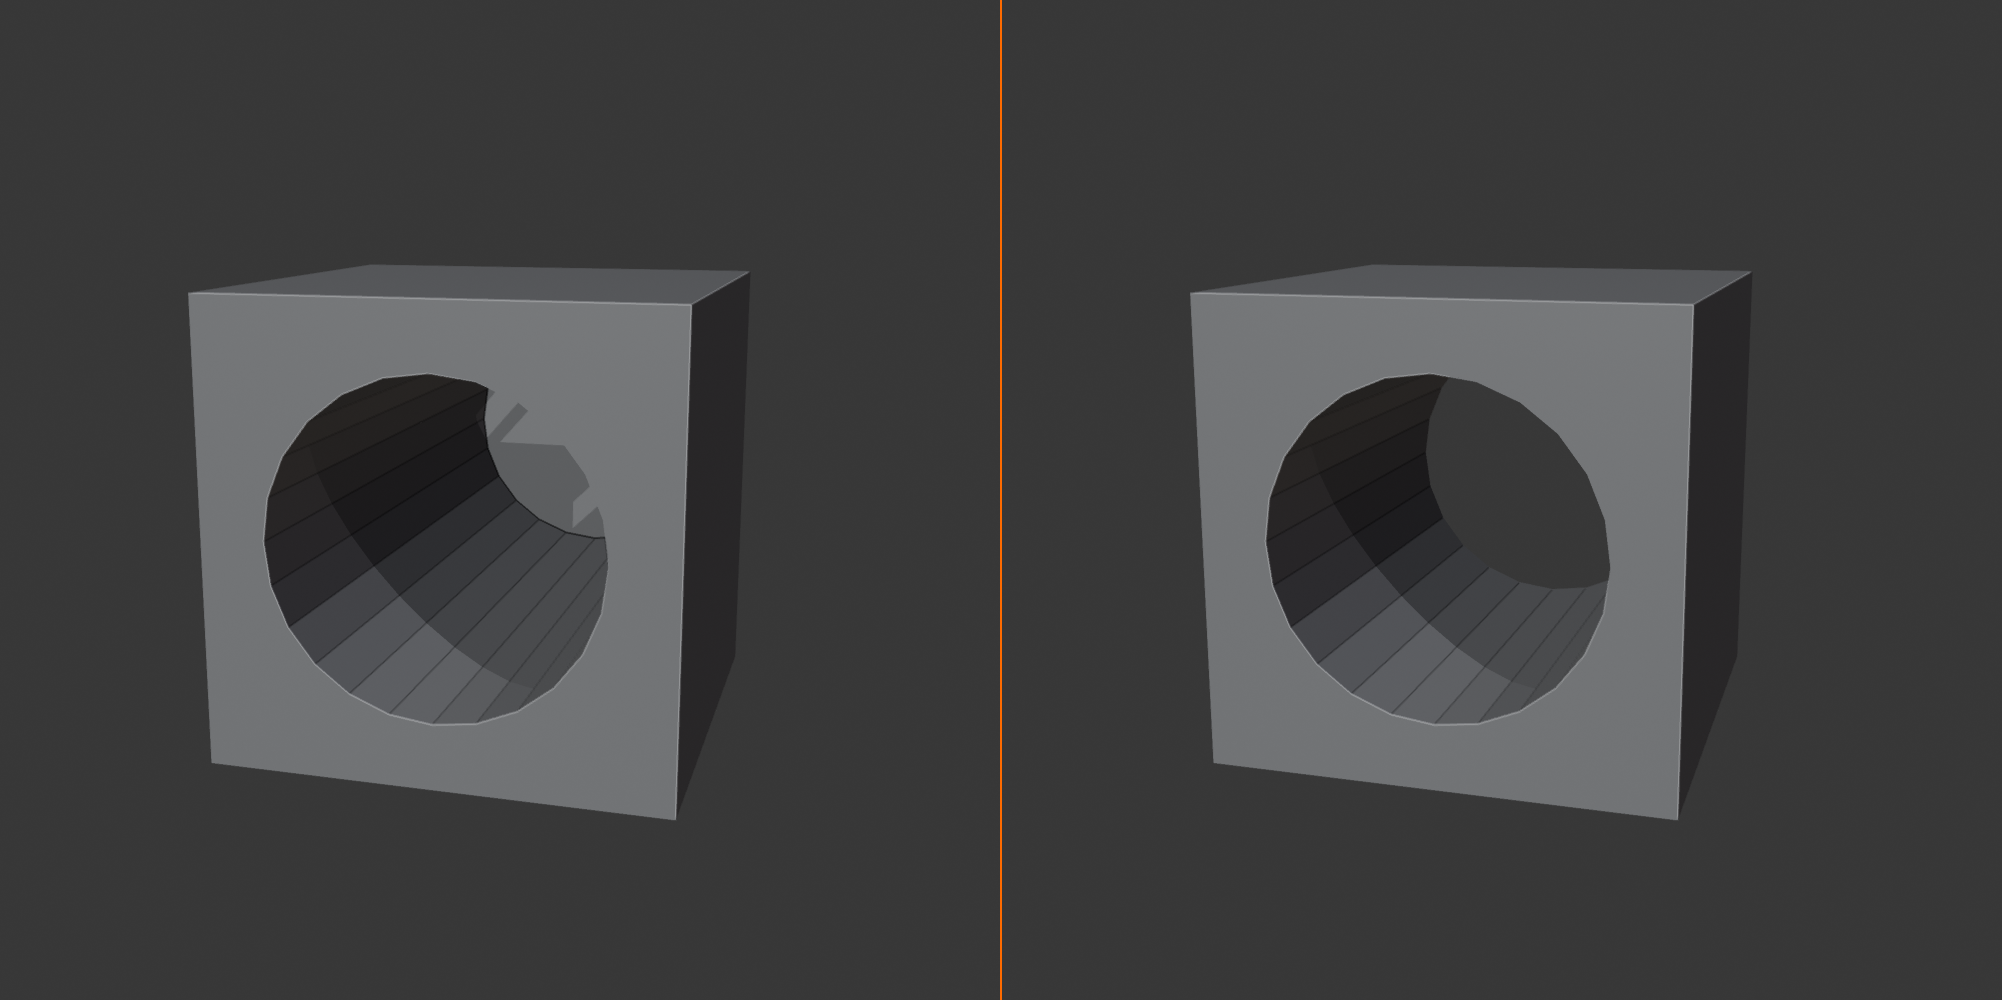
🔧 The Workflows You'll Use Most
| Pattern | Stack Order | Use Case |
|---|---|---|
| Symmetrical Duplication | Mirror → Array → Subdivision | Fences, patterns, repeated elements |
| Clean Boolean | Boolean → Bevel → Subdivision | Cutouts, holes, combined shapes |
| Sculpting Symmetry | Mirror → Multiresolution | Characters, organic models |
| Procedural Details | Array → Boolean → Bevel | Repeated cutouts, patterns |
| Curved Deformation | Array → Curve → Subdivision | Roads, cables, following paths |
| Terrain Generation | Subdivision → Displace | Landscapes, texture-driven geometry |
| Surface Conforming | Shrinkwrap → Solidify | Clothing, decals, labels |
Memorize these patterns. They solve 80% of modeling challenges you'll face. When stuck, ask: "Which pattern applies here?"
Common Mistakes to Avoid
⚠️ Lessons from Experience
Mistake 1: Too many modifiers too soon
- Problem: Add 10 modifiers before testing, viewport slows to crawl
- Solution: Add incrementally, test after each, optimize as you go
Mistake 2: Ignoring stack order
- Problem: Random order creates artifacts, doesn't understand why
- Solution: Follow Generate → Modify → Refine → Smooth principle
Mistake 3: Not naming modifiers/objects
- Problem: Return to file later, can't understand setup
- Solution: Name everything clearly, document complex setups
Mistake 4: Applying modifiers too early
- Problem: Apply Mirror, realize need to edit other half
- Solution: Keep modifiers unapplied as long as possible, only apply when certain
Mistake 5: High subdivision in viewport
- Problem: Level 4 subdivision destroys performance
- Solution: Viewport level 1-2 max, render level 3-4
Mistake 6: Complex cutters in Booleans
- Problem: Boolean cutter has subdivision, modifiers, slows everything
- Solution: Keep cutters simple, low poly, no modifiers on cutters
Mistake 7: Not using viewport visibility
- Problem: Heavy modifiers always calculate, even when not needed
- Solution: Disable eye icon while modeling, enable to check
Next Steps
🚀 Continuing Your Journey
Immediate practice:
- Create 5 different objects using modifier stacks:
- Each must use different modifier combinations
- At least 5 modifiers per object
- Focus on different patterns: architectural, organic, mechanical, decorative, functional
- Revisit previous projects:
- Find objects you modeled destructively
- Rebuild using modifier stacks
- Compare workflow efficiency
- Experiment with stack order:
- Take existing modifier stack
- Try every possible order
- Understand how order changes results
- Internalize the logic
Advanced exploration:
- Geometry Nodes (Lessons 40-41): Most powerful "modifier" in Blender
- Simulation modifiers (Lessons 32-35): Physics, cloth, fluids in modifier stacks
- Character rigging (Lessons 37-39): Armature modifier, weight painting
- Animation with modifiers: Keyframe parameters, procedural animation
Portfolio development:
- Create complex architectural scene (all procedural)
- Document modifier stacks in breakdown videos
- Show wireframes demonstrating clean topology
- Employers value technical skill: modifiers prove it
Related lessons to review:
- Lesson 8: Modifiers Introduction - Foundation concepts
- Lesson 28: Sculpting Basics - High-poly source for Multiresolution
- Lesson 29: Hard Surface Modeling - Boolean workflows
- Lesson 30: Retopology Fundamentals - Clean topology principles
The Power of Non-Destructive Workflow
💪 Why This Matters
Client scenario:
- Traditional workflow:
- Client: "Make building taller"
- You: "Need to remodel entire thing, 4 hours"
- Client: "Also add more windows"
- You: "Another 3 hours"
- Client: "Actually, original height was better"
- You: "Have to rebuild again..."
- Modifier stack workflow:
- Client: "Make building taller"
- You: "Done" (scale base mesh, 30 seconds)
- Client: "Also add more windows"
- You: "Done" (increase Array count, 10 seconds)
- Client: "Actually, original height was better"
- You: "Done" (revert scale, 5 seconds)
The difference:
- Traditional: 8+ hours of rework
- Modifier stack: 1 minute of adjustments
- That's the power of non-destructive workflow
- That's why professionals use modifier stacks religiously
Production implications:
- Faster iterations: Test ideas quickly
- Client flexibility: Changes are cheap
- A/B testing: Try variations instantly
- Version control: Easy to revert or branch
- Team efficiency: Others can adjust your work
- Future-proofing: Assets remain editable months later
🎓 Final Thoughts: Module 7 Complete
You've completed Module 7: Advanced Modeling. From sculpting to hard surface to retopology to modifier stacks—you've learned professional-level modeling techniques. These aren't beginner skills. These are production workflows. Industry-standard practices.
The modifier stack, in particular, represents a fundamental shift in thinking. From "make object" to "design system." From direct manipulation to procedural generation. From fixed assets to flexible workflows. This is how professionals think. This is how studios work. This is how you'll work now.
Every lesson built on the previous. Sculpting created high-poly detail. Hard surface taught Boolean operations. Retopology optimized for production. Modifier stacks unified everything into systematic workflows. You can now:
- Sculpt organic forms with millions of polygons
- Model precise mechanical objects with clean topology
- Retopologize sculpts into production-ready assets
- Orchestrate complex modifier stacks for procedural modeling
These skills compound. Sculpt character. Retopologize it. Use modifier stack for clothing. Boolean cutters for armor details. Mirror for symmetry. Everything works together. That's mastery. Not individual techniques. Integrated workflows.
You're ready for professional production. You've earned advanced status.