👤 Lesson 36: Character Modeling Workflow
Creating a 3D character is one of the most rewarding challenges in Blender! Whether you're building a heroic protagonist, a quirky sidekick, or a terrifying monster, character modeling requires a unique blend of artistic vision and technical skill. In this lesson, you'll learn the professional workflow for creating believable characters—from understanding human proportions and anatomy to building clean, animation-ready topology. This isn't just about pushing vertices around; it's about breathing life into digital clay and creating characters that can move, emote, and tell stories.
🎯 What You'll Learn
- Character Modeling Pipeline: Understand the complete workflow from concept to finished model
- Proportions and Anatomy: Learn human body ratios and how to maintain believable proportions
- Reference Setup: Use reference images effectively for accurate modeling
- Topology Principles: Create clean edge loops that deform properly for animation
- Box Modeling Technique: Build characters from simple shapes with proper flow
- Mirror Workflow: Model efficiently using symmetry
- Detail Levels: Know when to add detail and when to keep it simple
- Common Pitfalls: Avoid beginner mistakes that cause problems later
⏱️ Estimated Time: 90-120 minutes
🎯 Project: Model a basic character torso with proper topology
In This Lesson
🔄 Understanding Character Workflow
Before we start modeling, it's crucial to understand the bigger picture. Character creation isn't a single task—it's a pipeline with distinct stages. Knowing where you are in the process and what comes next will help you make smart decisions along the way.
The Complete Character Pipeline
This lesson focuses on stages 2-5: reference setup through topology verification. Let's break down each stage of the modeling phase.
📋 Character Modeling Stages
1. Concept & Design (Before Blender)
- Sketches, mood boards, character sheets
- Define personality, role, style
- Decide on proportions (realistic, stylized, cartoony)
- Output: Clear vision of what you're building
2. Reference Gathering
- Collect front, side, and back view images
- Gather anatomy references
- Study similar characters for inspiration
- Output: Reference image pack
3. Base Modeling (Blocking Out)
- Create basic shapes and proportions
- Focus on silhouette and major forms
- No details yet—just the foundation
- Output: Low-poly base mesh with correct proportions
4. Refinement & Details
- Add subdivision for smoother surfaces
- Model muscles, clothing details, features
- Maintain clean topology throughout
- Output: Detailed character model
5. Topology Check
- Verify edge loops flow correctly
- Ensure model will deform well when animated
- Fix any bad topology (n-gons, problematic triangles)
- Output: Animation-ready mesh
💭 Think of It Like Building a House: You wouldn't start decorating before laying the foundation, right? Same with characters! The base model is your foundation (structure and proportions), refinement is framing (major features), and details are the finishing touches (paint and furniture). Rush the foundation and everything built on top will be shaky.
Different Approaches to Character Modeling
There are several techniques for creating characters. Each has its place depending on your needs and skill level.
🛠️ Modeling Techniques Compared
Box Modeling (What We'll Learn)
- Start with: Simple primitives (cube, cylinder)
- Process: Extrude and shape into character form
- Pros: Great topology control, beginner-friendly, predictable workflow
- Cons: Can be slower for organic shapes
- Best for: Learning fundamentals, stylized characters
Sculpting + Retopology
- Start with: High-poly sculpt
- Process: Sculpt freely, then create clean topology over it
- Pros: Very artistic, great for complex organic forms
- Cons: Requires retopology skill, two-stage process
- Best for: Realistic characters, creatures
Poly Modeling (Advanced)
- Start with: Individual faces/vertices
- Process: Build topology point by point
- Pros: Ultimate control, perfect topology
- Cons: Very technical, steep learning curve
- Best for: Production models, extreme detail control
💡 Why Start with Box Modeling?
For this lesson, we're using box modeling because:
- Teaches fundamentals: You learn topology by building it yourself
- Immediate results: See progress quickly without complex tools
- Clean workflow: Topology is good from the start
- Foundation for everything: Skills transfer to all other techniques
Once you master box modeling, you'll understand why topology matters. Then sculpting and other techniques become much easier!
What Makes Good Character Topology?
Before we build anything, you need to understand what "good topology" means in character modeling.
✅ Good Topology Characteristics
- Mostly quads: Four-sided faces that subdivide cleanly
- Edge loops follow muscle/bone: Circular loops around limbs, following natural form
- Deformation areas: Extra density at joints (elbows, knees, shoulders)
- Face loops: Concentric loops around eyes, mouth for expression
- Even distribution: No sudden jumps in polygon density
- Minimal triangles: Only where necessary, never at deformation points
- Clean poles: Where edge loops meet (3, 5, or 6 edges acceptable)
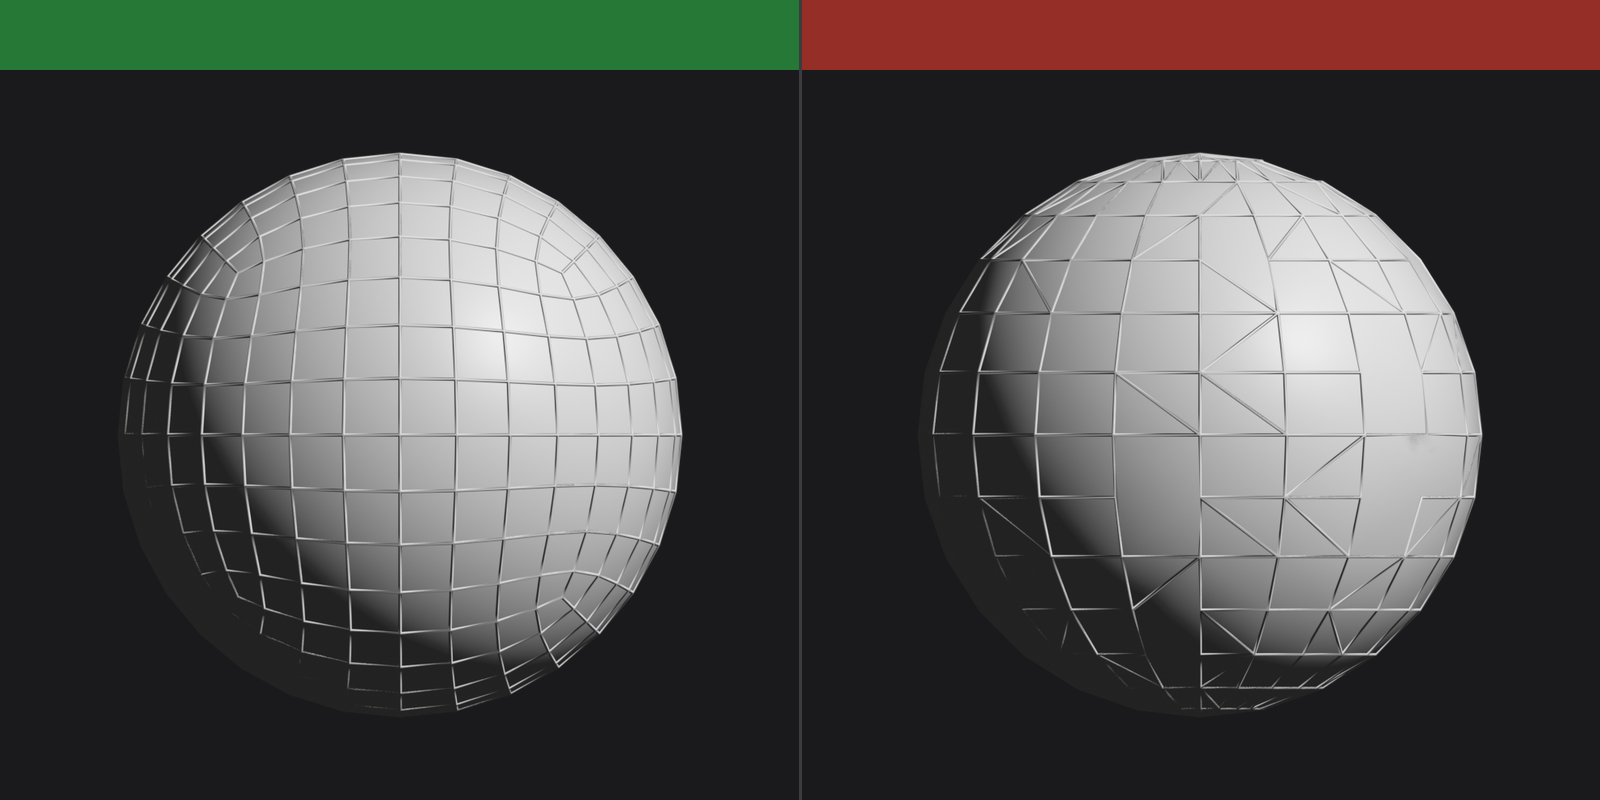
Don't worry if this doesn't make sense yet—we'll see concrete examples throughout the lesson!
🖼️ Setting Up Reference Images
Reference images are your roadmap to success in character modeling. Even experienced artists use references—not because they can't create from imagination, but because references ensure accuracy, save time, and help maintain consistent proportions. Think of them as architectural blueprints for your character!
Why References Matter
🎨 Professional Secret: Every great character you've ever seen—from Pixar films to AAA video games—was built with extensive reference materials. References aren't "cheating"; they're how professionals ensure quality and consistency across large teams and long production timelines.
🎯 What References Give You
- Accurate Proportions: Maintain correct ratios between body parts
- Symmetry Guide: Keep left and right sides aligned
- Real-time Checking: Constantly verify your model against the reference
- Confidence: Know what you're building instead of guessing
- Consistency: Ensure front, side, and back views match
- Speed: Model faster when you're not constantly problem-solving proportions
Types of Reference Images
Different reference types serve different purposes in your workflow.
📸 Reference Image Types
1. Orthographic Views (Primary References)
- Front View: Essential for facial features and body symmetry
- Side View: Critical for depth and profile accuracy
- Back View: Useful for completing the character
- Top View: Occasionally helpful for head/shoulder width
- Characteristics: No perspective distortion, perfectly aligned
2. Concept Art
- Drawings or paintings of your character design
- Shows personality, style, colors, details
- May not be perfectly proportioned (artistic license)
- Use for creative direction, not technical accuracy
3. Anatomy References
- Photos of real people in similar poses
- Muscle anatomy diagrams
- Skeletal structure images
- Use alongside your character references
4. Style References
- Similar characters from games/films
- Examples of the aesthetic you're targeting
- Topology reference from similar models
- Use for inspiration and technical guidance
⚠️ Orthographic vs. Perspective
Critical Difference: Regular photos have perspective distortion (things farther away look smaller). For 3D modeling references, you need orthographic views where all parallel lines stay parallel.
- Good Reference: Character sheet with flat, aligned front/side views
- Bad Reference: Photo taken with wide-angle lens from close up
- Why It Matters: Perspective distortion makes it impossible to maintain accurate proportions
If using photos: Take them from far away with a telephoto lens (or zoom), or create orthographic character sheets in illustration software.
Creating or Finding Good References
Where do you get quality reference images? It depends on your project type.
✅ Reference Sources
For Original Characters:
- Draw Character Sheets: Create front/side views in Photoshop, Krita, or on paper
- Use Base Templates: Find generic human templates and customize them
- Photo Manipulation: Edit photos to create aligned orthographic views
- 3D Poser/DAZ: Pose a stock character model and render ortho views
For Learning/Practice:
- Free Character Sheets: Many artists share reference sheets online
- Stock Photo Sites: Anatomy reference photos (check licenses!)
- Art Books: Figure drawing books often have proportion guides
- Making Films: Behind-the-scenes concept art and turnarounds
Pro Tips:
- Use high-resolution images (at least 1920x1080 or larger)
- Ensure front and side views have matching proportions
- Align key landmarks (eyes, shoulders, hips, knees)
- Save references in a dedicated project folder
Importing References into Blender
Blender has built-in reference image support that's perfect for character modeling. Let's set it up!
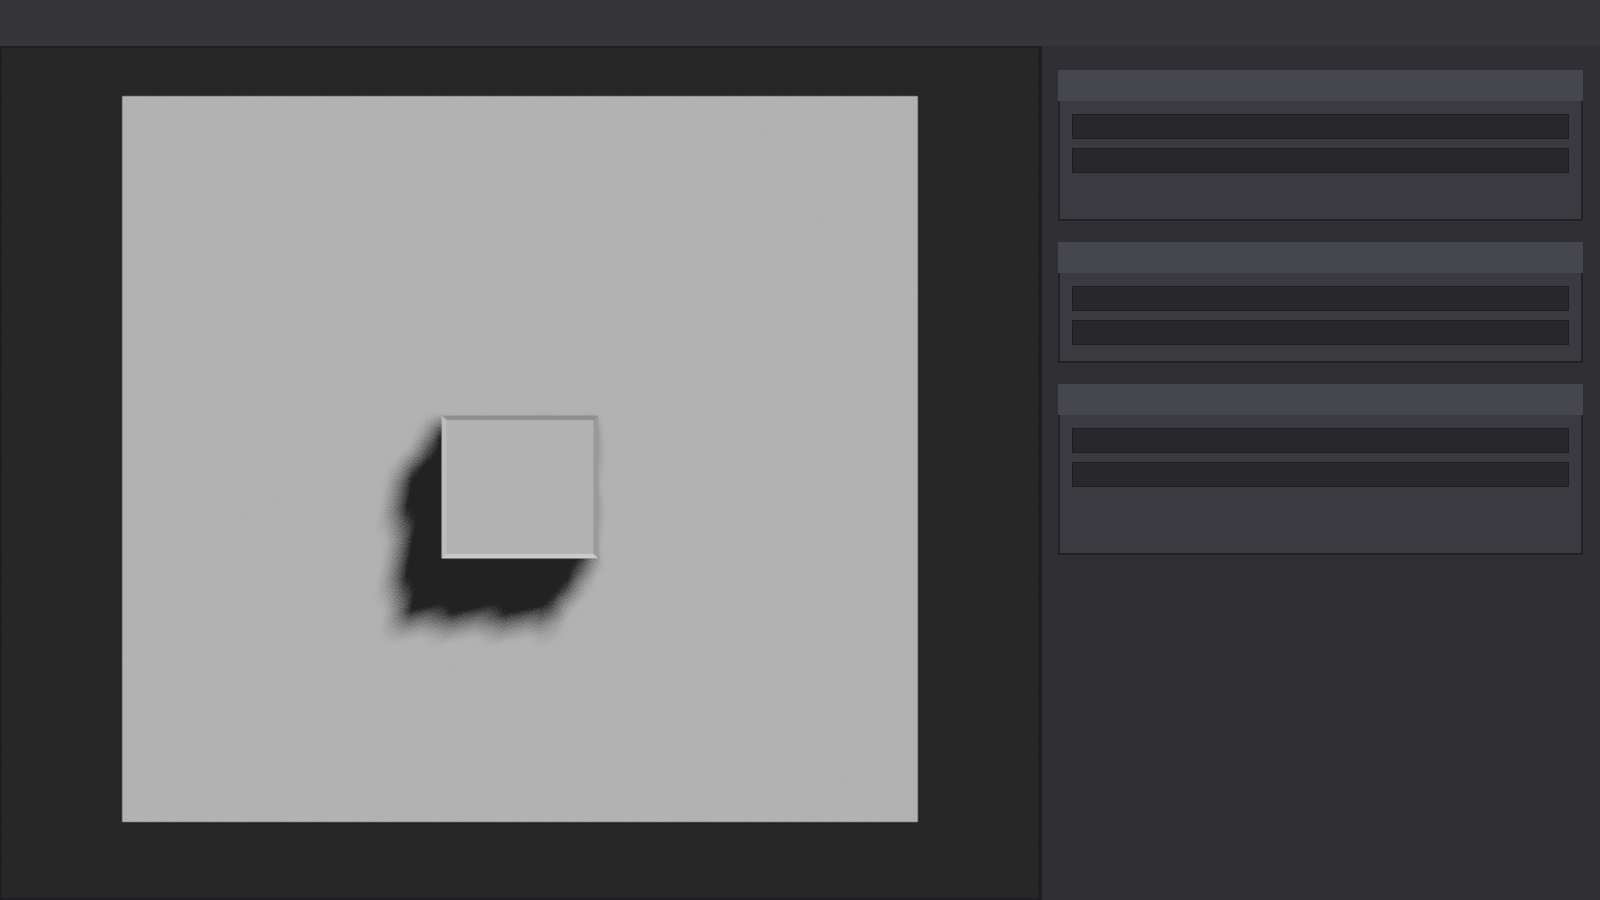
🔧 Setting Up Reference Images in Blender
Method 1: Background Images (Recommended for Ortho Views)
Step 1 - Access Camera View Settings:
- Press
Nto open the side panel in the 3D Viewport - Click the "View" tab in the side panel
- Scroll down to find "Background Images" section
Step 2 - Add Front Reference:
- Check the "Background Images" checkbox to enable
- Click "Add Image" button
- Click "Open" and select your front view reference
- Expand the image settings
- Set "Display In" to "Front Orthographic"
- Adjust Opacity (0.5 is usually good)
- Use X/Y Offset to position the image
- Use Scale to resize the reference
Step 3 - Add Side Reference:
- Click "Add Image" again
- Load your side view reference
- Set "Display In" to "Right Orthographic"
- Adjust opacity and position to match the front view scale
Step 4 - View Your References:
- Press
Numpad 1for front view - see front reference - Press
Numpad 3for right side view - see side reference - References only show in orthographic view (not perspective)
- If references don't appear, ensure you're in ortho mode (
Numpad 5)
💡 Method 2: Reference Objects (Alternative)
You can also add references as image planes in your scene:
- In the 3D Viewport, go to Add > Image > Reference
- Select your reference image file
- An image plane appears in your scene
- Rotate and position it (R, Y, 90 for side view orientation)
- Scale to match your character's size
- Use Object Properties > Viewport Display > Display As: Textured
Pros: Always visible, can be moved/scaled easily, see in perspective view
Cons: Takes up scene space, can clutter viewport, might accidentally select it
Aligning Multiple References
The trickiest part of reference setup is making sure your front and side views align correctly. Misaligned references will give you wonky proportions!
🎯 Reference Alignment Checklist
Key Alignment Points:
- Top of head: Must be at same height in front and side
- Eye line: Should align perfectly in both views
- Nose tip / chin: Must match in position
- Shoulders: Should be at same vertical position
- Nipples / belly button: Alignment markers
- Crotch / hips: Critical alignment point
- Knees: Must align or walk cycle will look wrong
- Feet / ground plane: Character should stand level
How to Check Alignment:
- Switch to front view (
Numpad 1) - Note the vertical position of the eyes (for example)
- Switch to side view (
Numpad 3) - Eyes should be at the exact same height
- If not aligned, adjust reference image Y offset or scale
- Repeat for all key landmarks
⚠️ Common Reference Problems
Problem: References don't align
- Cause: Different scales or drawing errors in original art
- Solution: Pick one view as "master" (usually front) and adjust the other to match
Problem: Reference doesn't show in viewport
- Cause: Not in orthographic view
- Solution: Press
Numpad 5to toggle ortho/perspective
Problem: Reference is too bright/dark
- Cause: Opacity or viewport shading
- Solution: Adjust opacity in View tab, or change Viewport Shading mode
Problem: Can't see reference while modeling
- Cause: Mesh is blocking view
- Solution: Make mesh semi-transparent (X-ray mode:
Alt + Z)
Working with References Effectively
Now that your references are set up, here's how to use them like a pro!
✅ Reference Workflow Best Practices
1. Constant Switching Between Views
- Model in front view, check in side view
- Use
Numpad 1(front),Numpad 3(side) constantly - Don't spend too long in one view—proportions drift!
- Press
Numpad 7for top view to check shoulder/hip width
2. Use X-Ray Mode for Visibility
- Press
Alt + Zto toggle X-ray view - Lets you see reference through your mesh
- Essential when mesh starts blocking the reference
- Can also adjust in viewport shading options
3. Adjust Reference Opacity
- Start with ~50% opacity (0.5) for clear viewing
- Lower it (0.3) when mesh is mostly done
- Raise it (0.7) when you need to see fine details
- Don't go 100%—you won't see your mesh clearly!
4. Don't Trace Exactly
- References are guides, not pixel-perfect templates
- Use them for proportions and placement, not exact shapes
- Your 3D model needs to work in ALL angles, not just front/side
- Trust your artistic judgment when views conflict
5. Verify in Perspective
- Regularly check your model in perspective view
- Ortho views can hide issues that perspective reveals
- Rotate around (
Middle Mouse) to see all angles - References only show in ortho, so toggle between modes
Reference Image Tips for Different Character Types
🎭 Character-Specific Reference Advice
Realistic Human Characters:
- Use actual photo references for anatomy accuracy
- Collect references of people with similar builds
- Study muscle definition under skin
- Pay extra attention to face topology
Stylized/Cartoon Characters:
- Draw clean character sheets yourself (or hire artist)
- Proportions can break reality—embrace your style!
- Keep references simple (less anatomical detail needed)
- Focus on silhouette and shape language
Creatures/Monsters:
- Mix animal references for anatomy inspiration
- Concept art is more important than perfect ortho views
- Use real animal skeleton/muscle references
- Freedom to interpret—fantasy has flexibility!
Mechanical/Robot Characters:
- Engineering drawings or blueprints work great
- Precision matters more—orthographic is essential
- Real machine parts make excellent references
- Hard surface techniques apply (we'll cover later)
🎯 Pro Tip: Create a Blender startup file with your reference images already loaded and aligned! Save it as your "Character Modeling Template." This saves 10-15 minutes of setup time on every new character project. Go to File > Defaults > Save Startup File after setting up your perfect reference configuration.
✅ Reference Setup Checklist
Before you start modeling, verify:
- ✓ Front and side reference images imported
- ✓ References display in correct orthographic views
- ✓ Key landmarks (eyes, shoulders, hips, knees) align between views
- ✓ Opacity set to ~50% for clear visibility
- ✓ Can toggle between front (Numpad 1), side (Numpad 3), and perspective (Numpad 0) smoothly
- ✓ X-ray mode tested (Alt + Z) to see through mesh
- ✓ Reference scale feels right (character should fill viewport nicely)
When all items are checked, you're ready to start modeling!
🔗 Topology Principles
Topology is the arrangement of edges, vertices, and faces that make up your 3D mesh. It's the invisible structure beneath the surface—and for character models, it's everything. Good topology makes characters animate beautifully. Bad topology creates ugly deformations, rendering artifacts, and hours of frustration. Let's learn what makes topology great!
What Is Topology (and Why Should You Care)?
🎨 Think of Topology Like Fabric: Imagine your character's skin as a stretchy fabric. The way you cut and stitch that fabric determines how well it moves and bends. Cut against the natural stretch? It bunches weirdly. Follow the natural grain? It flows perfectly. Topology is the "grain" of your 3D mesh.
🎯 Why Topology Matters for Characters
Animation & Deformation:
- Characters need to bend at joints (elbows, knees, shoulders)
- Faces need to express emotions (smile, frown, surprise)
- Good topology follows the natural flow of muscles and skin
- Bad topology creates creases, pinching, and weird distortions
Subdivision Surface:
- Characters are usually modeled with Subdivision Surface modifier
- This smooths your mesh by adding more polygons
- Clean topology subdivides predictably and beautifully
- Bad topology creates lumps, artifacts, and shading issues
Efficiency:
- Good topology uses polygons where needed, saves them where not
- Optimized for both performance and visual quality
- Easier to UV unwrap and texture
- Easier to edit and modify later
The Golden Rules of Character Topology
These aren't just guidelines—they're the principles that separate amateur models from professional-quality characters.
✅ Rule 1: Quads, Quads, Quads!
The Principle: 90-95% of your mesh should be four-sided faces (quadrilaterals).
Why Quads?
- Subdivision friendly: Quads subdivide into perfect quads
- Predictable behavior: No surprises when smoothing
- Easy to edit: Loop selections work perfectly
- Professional standard: Industry expects quad-based models
When Triangles Are OK:
- In flat areas that never deform (like hard surfaces)
- At the very ends of limbs (fingers, toes)
- Hidden areas that won't be seen
- Never at joints or in the face!
N-gons (5+ sided faces):
- Avoid completely in character models
- Subdivide unpredictably
- Cause shading artifacts
- Break deformation
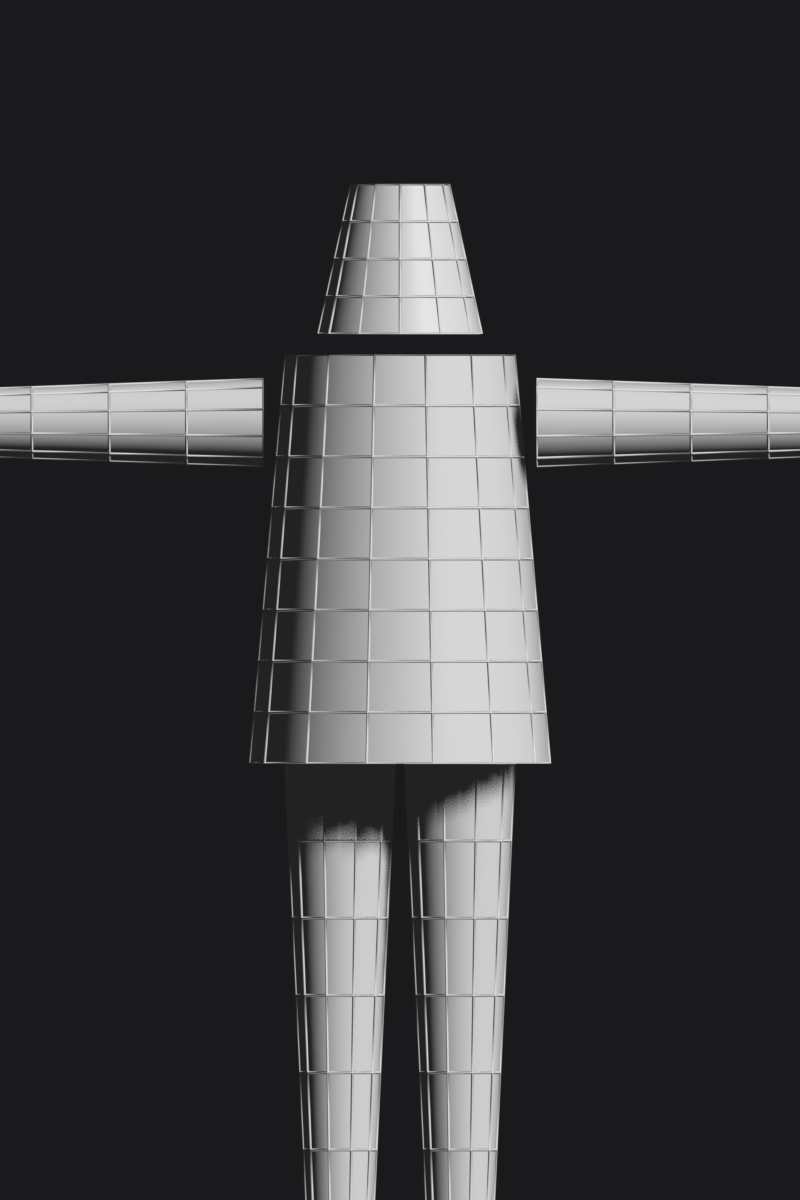
✅ Rule 2: Edge Loops Follow Form
The Principle: Edge loops should flow around the body's natural forms like muscles and bones.
Key Edge Loop Locations:
- Limbs: Circular loops around arms and legs (like rings)
- Torso: Horizontal loops following ribcage and muscle groups
- Shoulders: Loops radiating from armpit in all directions
- Hips: Loops supporting leg connection and pelvis
- Neck: Clean circular loops for head rotation
Why This Matters:
- When joints bend, loops compress on one side, stretch on other
- Following anatomical flow prevents unnatural deformation
- Makes rigging and weight painting much easier
- Creates natural-looking muscle definition
✅ Rule 3: Face Loops Are Sacred
The Principle: Facial topology must have concentric loops around eyes and mouth.
Eye Loops:
- Circular loops radiate outward from eye socket
- Allow eyelids to open/close naturally
- Minimum 3-4 loops around each eye
- Connect smoothly to nose bridge and cheeks
Mouth Loops:
- Loops circle the lips concentrically
- Enable smiling, frowning, talking
- Minimum 3-4 loops for basic expressions
- More loops = more expression control
Connecting Face Loops:
- Eye loops connect to mouth loops via cheeks
- Creates a "mask" topology flow
- This pattern appears in every professional character face
- Master this once, use it forever!
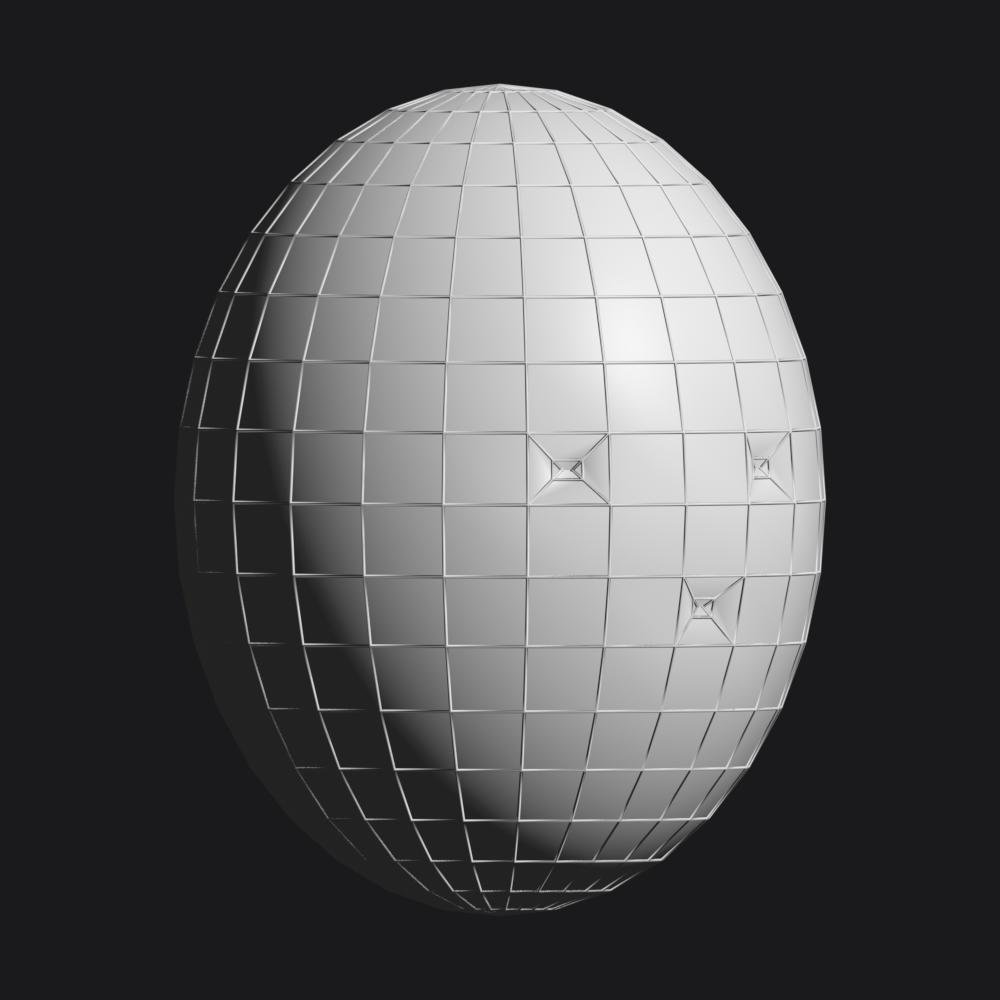
✅ Rule 4: Poles Are Strategic
The Principle: A "pole" is where multiple edges meet (3, 5, or more). They're sometimes necessary but must be placed carefully.
Good Poles:
- 3-pole (triangles): Acceptable in flat areas
- 5-pole: Used to redirect edge flow
- 6-pole: Used to terminate edge flow
- Place in low-stress areas (middle of flat surfaces)
Bad Pole Placement:
- Never at major joints (elbow, knee, shoulder)
- Never directly on edge loops
- Avoid on areas that deform significantly
- Don't cluster multiple poles together
Pole Management:
- You can't avoid poles entirely—they're necessary
- Skilled placement makes them invisible
- Space poles apart when possible
- Hide them in areas that won't be seen or deform
Density and Edge Flow
Not all areas of your character need the same amount of detail. Strategic polygon density is key to efficient, professional models.
📊 Polygon Density Guidelines
High Density Areas (More Polygons):
- Face: Eyes, mouth, nose need lots of detail for expressions
- Hands: Fingers bend a lot, need multiple loops per finger
- Joints: Elbows, knees, shoulders need extra loops to bend smoothly
- Areas with details: Ears, feet, anywhere with complex form
Medium Density Areas:
- Limbs: Arms and legs need steady loops but not excessive
- Torso: Enough to show form but not overdone
- Neck: Supports head movement
Low Density Areas (Fewer Polygons):
- Flat surfaces: Back, chest, thighs (if simple character)
- Covered areas: Parts hidden by clothing or hair
- Stylized characters: Can use less overall density
💡 Edge Flow Visualization
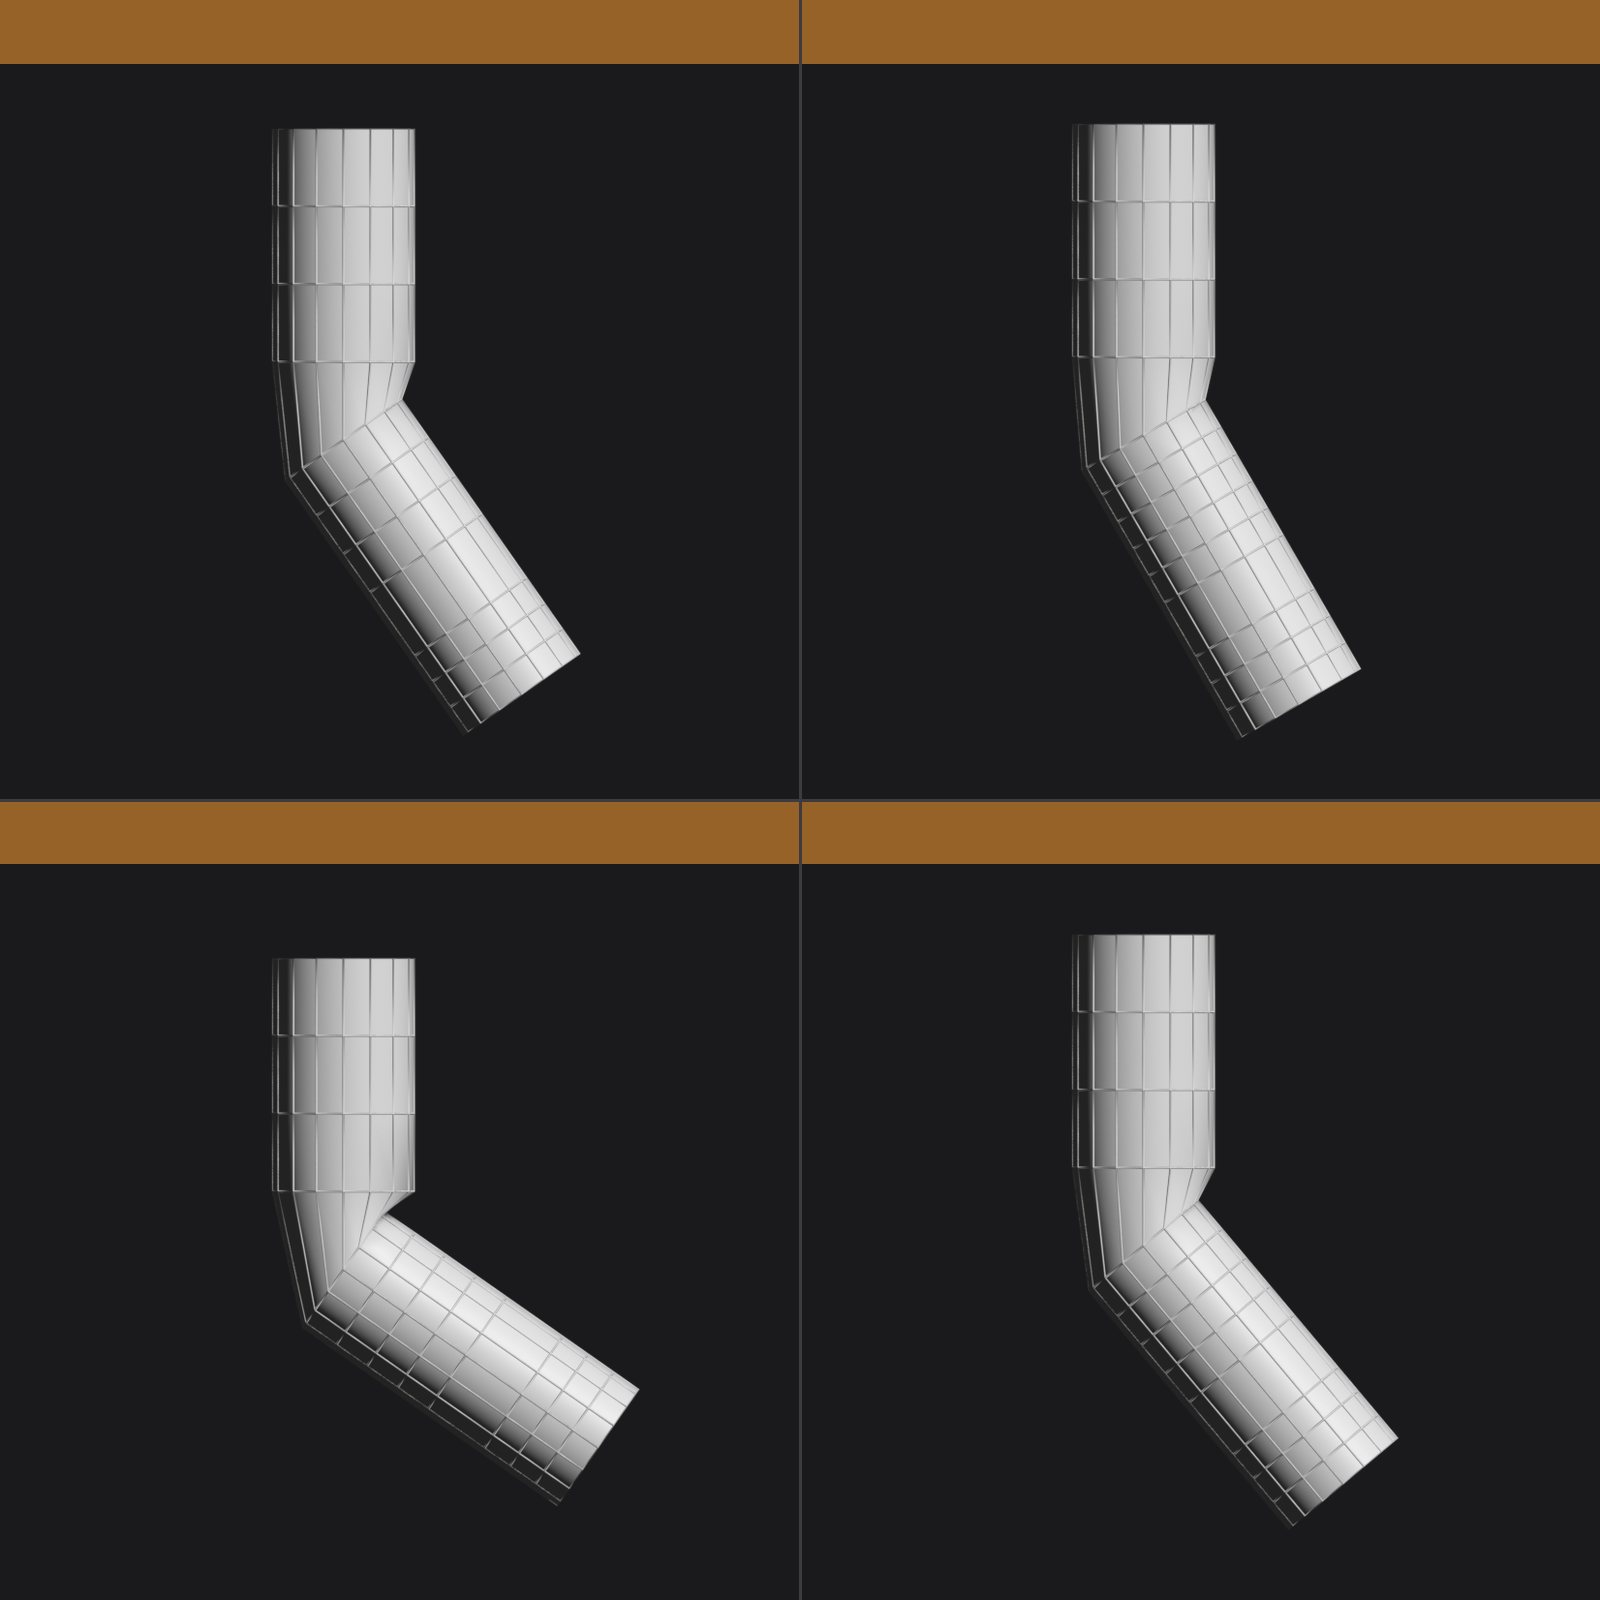
Think of edge flow like water flowing around a rock:
Good Edge Flow:
- Edges curve smoothly around forms
- No sudden direction changes
- Loops maintain consistent spacing
- Natural, organic feeling
- Visual test: Can you trace an edge loop all the way around a limb?
Bad Edge Flow:
- Edges zigzag or cross awkwardly
- Loops terminate abruptly
- Uneven spacing between loops
- Fighting against the natural form
Common Topology Patterns
Certain body parts have standard topology patterns that professionals use. Learn these patterns and you'll speed up your workflow dramatically!
🎨 Standard Topology Patterns
Arm Cylinder Pattern:
- 8-12 vertical loops running length of arm
- Horizontal loops every inch or so
- Extra loops at elbow (3-5 loops for smooth bend)
- Loops tighten at wrist
- Pattern repeats for legs (but thicker)
Shoulder Connection:
- Loops radiate from armpit in star pattern
- One set connects to torso (chest/back)
- Another set connects to arm cylinder
- Third set wraps over top of shoulder
- This "shoulder pole" is strategically placed
Hip/Leg Connection:
- Similar to shoulder but upside-down
- Loops from torso meet loops from leg
- Crotch area has specific loop patterns
- Butt muscles defined by loop flow
Face Mask Pattern:
- Concentric loops around eyes (3-5 minimum)
- Concentric loops around mouth (3-5 minimum)
- Loops connect via cheeks and nose bridge
- Forms a "figure-8" or mask shape on face
- Universal pattern used in film and games
Hand Topology:
- 5 loops per finger (one per knuckle/joint)
- Palm has loops following natural creases
- Thumb connects at angle to hand
- Knuckles have extra loops for bending
Checking Your Topology
How do you know if your topology is good? Here are practical tests you can perform!
✅ Topology Quality Checks
Visual Inspection:
- Wireframe View: Press
Zand select "Wireframe" - Look for:
- Smooth, flowing edge loops (not zigzagging)
- Consistent quad faces
- No triangles at joints
- Loops that follow muscle/bone anatomy
Subdivision Test:
- Add Subdivision Surface modifier (level 2)
- Does the mesh smooth nicely without weird lumps?
- Check for "pinching" at poles
- Verify no shading artifacts
Deformation Test:
- Select edge loops at a joint (like elbow)
- Rotate them to simulate bending
- Does it bend smoothly or create weird creases?
- Good topology maintains volume and smooth curves
Loop Selection Test:
Alt + Clickon an edge to select loop- Does the loop go cleanly around the limb?
- Or does it terminate unexpectedly?
- Clean loops = good topology
Common Topology Mistakes
❌ Beginner Topology Mistakes to Avoid
Mistake 1: Triangle at Joint
- Problem: Creates ugly pinching when joint bends
- Why it happens: Merging vertices carelessly
- Solution: Reroute edges to create quads, move triangles to flat areas
Mistake 2: Uneven Density
- Problem: Some areas super detailed, others bare minimum
- Why it happens: Adding detail inconsistently
- Solution: Plan density zones, subdivide whole regions together
Mistake 3: Edge Flow Fighting Anatomy
- Problem: Loops run against muscle/bone direction
- Why it happens: Not understanding anatomical flow
- Solution: Study anatomy references, follow natural forms
Mistake 4: Too Much Detail Too Soon
- Problem: Adding details before basic form is correct
- Why it happens: Impatience, wanting to see "finished" look
- Solution: Perfect proportions in low-poly first, subdivide later
Mistake 5: N-gons Everywhere
- Problem: Faces with 5, 6, 7+ edges
- Why it happens: Deleting edges without filling properly
- Solution: Always fill with quads, use
Fkey carefully
Mistake 6: No Face Loops
- Problem: Face can't make expressions
- Why it happens: Not knowing face loop patterns
- Solution: Study face topology examples, follow mask pattern
💭 Remember: Topology is like handwriting—messy handwriting still communicates, but clean handwriting is professional. Similarly, bad topology can still render an image, but good topology is what separates amateur work from professional-quality characters. The extra effort you put into topology early saves hours of pain during animation!
🎯 Topology Golden Rules Summary
- Use quads everywhere possible (90-95% of model)
- Edge loops follow muscles and bones (circular around limbs)
- Face needs concentric loops around eyes and mouth
- Place poles strategically (flat areas, not joints)
- Vary density by need (high at face/hands/joints, lower on flat areas)
- Test with subdivision (should smooth beautifully)
- Think ahead to animation (will this bend well?)
Master these principles and your characters will be animation-ready from day one!
📦 Box Modeling Technique
Box modeling is the foundation of character creation. It's called "box modeling" because you literally start with a box (or cube) and gradually transform it into a character through extrusion, loop cuts, and shaping. This technique gives you complete control over topology from the very beginning, making it perfect for learning and for creating animation-ready characters.
Why Box Modeling for Characters?
🎨 Think of It Like Origami: You start with a simple square of paper (or in our case, a cube) and through careful folding and shaping (extrusions and edge loops), you create something complex and beautiful. The paper never tears, just transforms—same with box modeling!
🎯 Box Modeling Advantages
For Beginners:
- Intuitive progression: Simple shapes → complex forms
- Built-in topology control: Start with quads, stay with quads
- Immediate visual feedback: See results as you work
- Forgiving: Easy to step back and adjust
- Teaches fundamentals: Understand every vertex placement
For Production:
- Clean topology guaranteed: No retopology needed
- Animation-ready: Edge loops placed correctly from start
- Efficient polygon count: Only add detail where needed
- Predictable workflow: Follows repeatable process
- Professional standard: Used in film and game industries
The Box Modeling Workflow
Box modeling follows a specific sequence. Understanding this workflow prevents confusion and keeps you moving forward efficiently.
✅ Box Modeling Step-by-Step
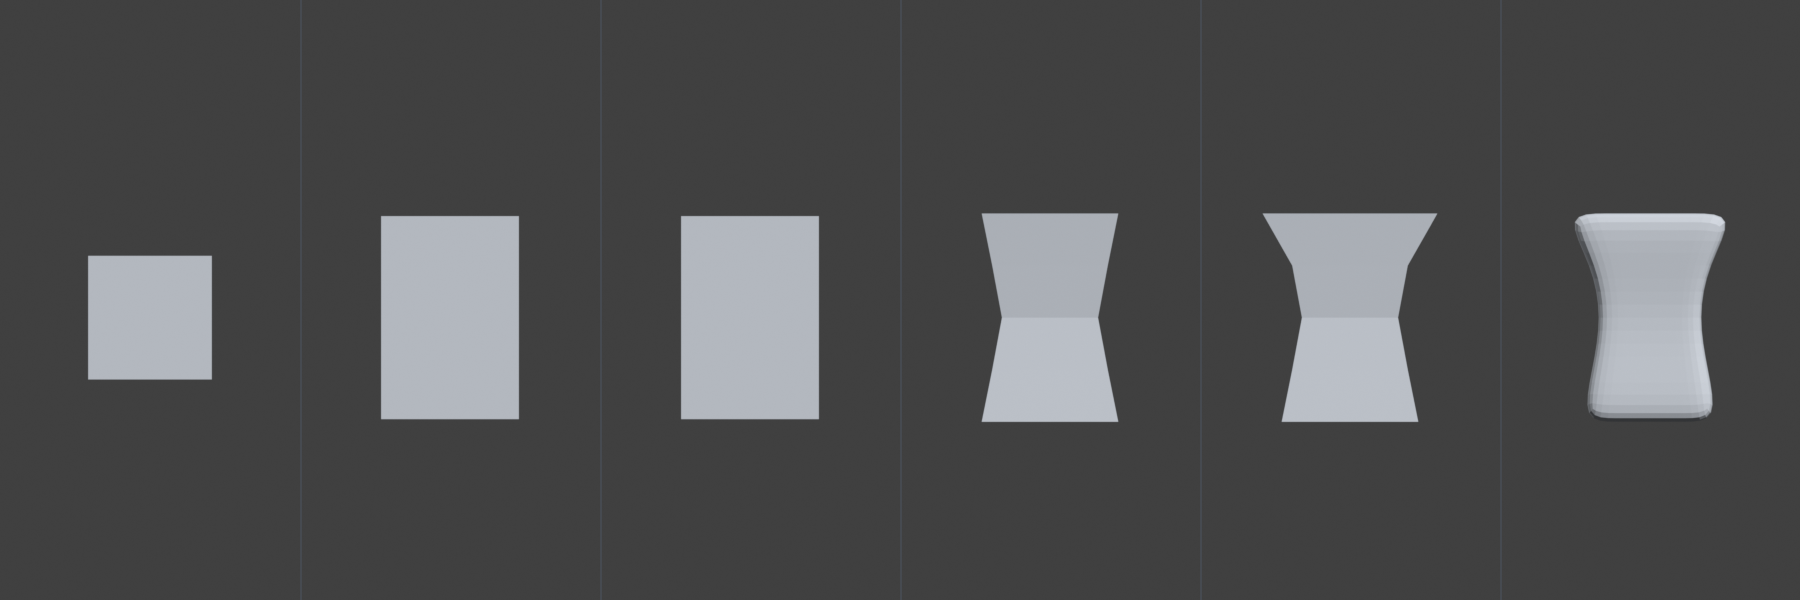
Phase 1: The Foundation (Start Simple)
- Add a cube (
Shift + A> Mesh > Cube) - Scale to rough torso proportions (make it vertical, wider at shoulders)
- Apply scale (
Ctrl + A> Scale) - critical step! - Enable mirror modifier (model one half, mirror creates other half)
- Delete half the cube (select right side faces,
X> Faces)
Phase 2: Blocking Out (Establish Major Forms)
- Add loop cuts (
Ctrl + R) to define torso sections:- Shoulders, chest, waist, hips
- Keep it simple - maybe 4-6 horizontal loops total
- Shape the torso using proportional editing (
O):- Pull vertices to match reference images
- Create natural body curves
- Don't worry about smoothness yet!
- Verify in both views (front and side):
Numpad 1for front viewNumpad 3for side view- Make sure proportions match references
Phase 3: Extrusion (Add Limbs and Features)
- Select arm socket faces (where shoulder meets torso)
- Extrude (
E) outward to create arm cylinder - Scale (
S) to narrow the arm - Extrude again multiple times:
- Once for upper arm
- Once for elbow area
- Once for forearm
- Once for wrist
- Repeat for legs from hip area
- Extrude head from top of torso (simple cylinder for now)
Phase 4: Refinement (Add Detail Loops)
- Add edge loops at joints:
- 3-5 loops at elbow (allows smooth bending)
- 3-5 loops at knee
- 2-3 loops at shoulder
- 2-3 loops at wrist/ankle
- Adjust vertex positions to match anatomy
- Check edge loop flow - should be smooth and anatomical
Essential Box Modeling Tools
These are the core tools you'll use 90% of the time when box modeling. Master these and you can create anything!
🛠️ Your Box Modeling Toolkit
1. Extrude (E)
- What it does: Creates new geometry by pulling faces/edges/vertices outward
- How to use: Select face(s), press
E, move mouse, click to confirm - Pro tip:
EthenSto extrude and scale in one motion - Used for: Creating limbs, adding detail, building outward from base form
2. Loop Cut (Ctrl + R)
- What it does: Adds edge loops around your mesh
- How to use:
Ctrl + R, hover over edge, scroll to add multiple loops, click to place - Pro tip: After placing, can slide loop position before confirming
- Used for: Adding detail, defining body sections, preparing for extrusion
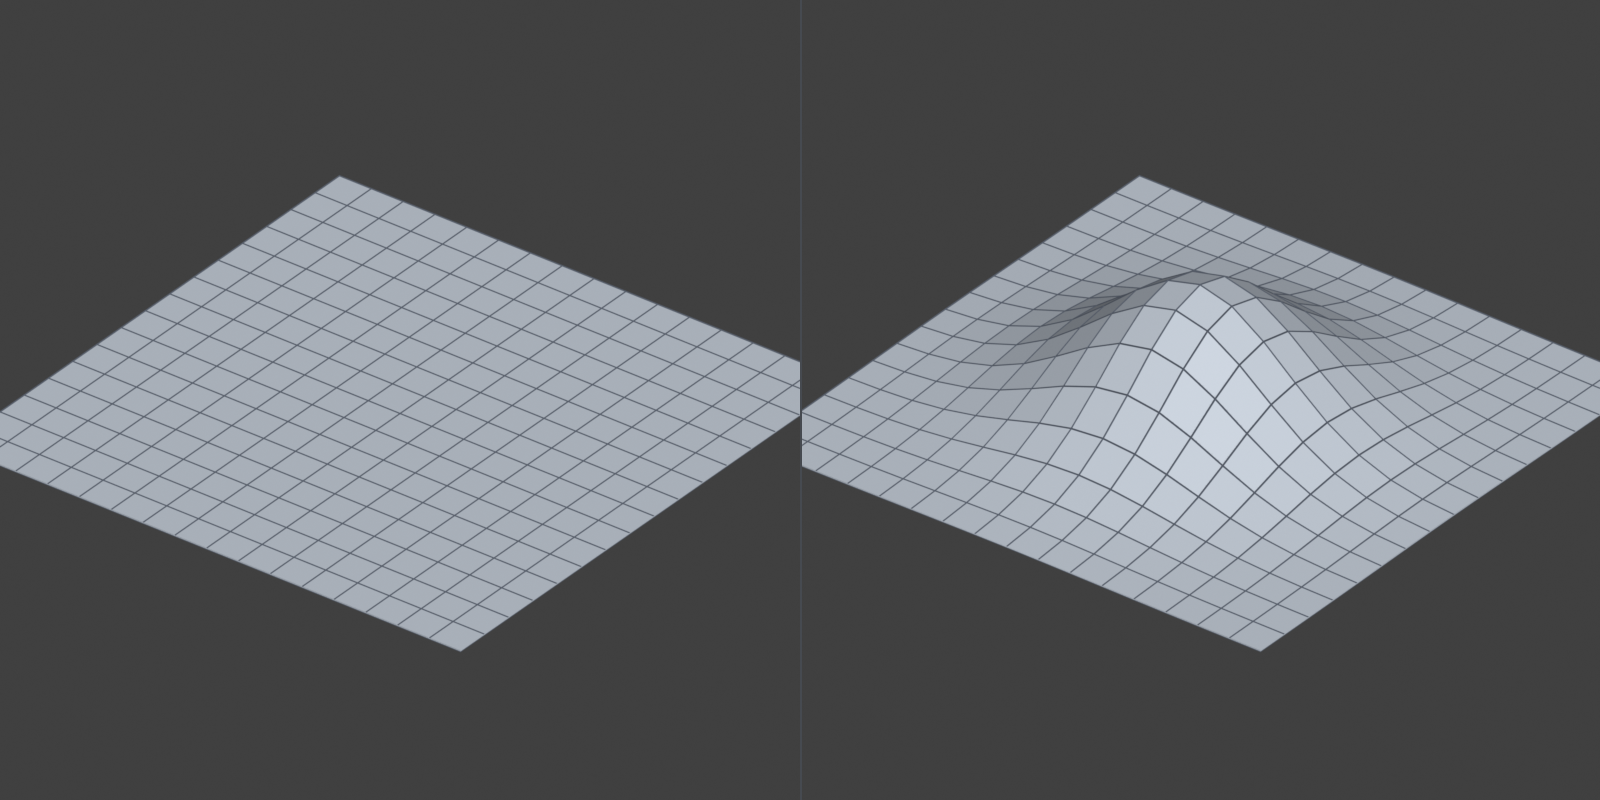
3. Proportional Editing (O)
- What it does: Moves nearby vertices along with selected vertex (smooth falloff)
- How to use: Press
Oto toggle on,Gto move, scroll to adjust influence radius - Pro tip: Change falloff type in header (smooth, sphere, sharp, etc.)
- Used for: Organic shaping, creating smooth curves, avoiding harsh angles
4. Inset Faces (I)
- What it does: Creates smaller faces inside selected faces
- How to use: Select face(s), press
I, move mouse inward, click to confirm - Pro tip: Press
Itwice for individual face insets - Used for: Adding detail without changing overall shape, creating recessed areas
5. Merge Vertices (M)
- What it does: Combines multiple vertices into one
- How to use: Select vertices, press
M, choose merge method (At Center, At Last, etc.) - Pro tip: Use "At Last" to merge all selected to your last selected vertex
- Used for: Closing gaps, simplifying geometry, fixing topology
6. Knife Tool (K)
- What it does: Manually cut new edges into faces
- How to use: Press
K, click to place cut points, pressEnterto confirm - Pro tip: Press
Cwhile in knife tool to cut through mesh - Used for: Creating specific edge flow, redirecting loops, surgical topology fixes
Box Modeling a Basic Torso (Walkthrough)
Let's walk through creating a simple torso step-by-step. This is the foundation you'll use for every humanoid character!
🎓 Practical Example: Building a Torso
Setup (2 minutes):
- Start new Blender file (
Ctrl + N> General) - Delete default cube (
X> Delete) - Add new cube (
Shift + A> Mesh > Cube) - Switch to Edit Mode (
Tab) - Scale cube taller:
S,Z,3(scale in Z axis by 3x) - Scale wider at top: Select top 4 vertices,
S,X,1.5 - Apply scale:
Tab(Object Mode),Ctrl + A> Scale,Tab(Edit Mode)
Enable Mirror Modifier (1 minute):
- In Edit Mode, face select mode (
3) - Select all faces on right side (box select with
B) - Delete faces (
X> Faces) - Go to Modifier Properties (wrench icon on right panel)
- Add Modifier > Mirror
- Enable "Clipping" option (prevents vertices from crossing center)
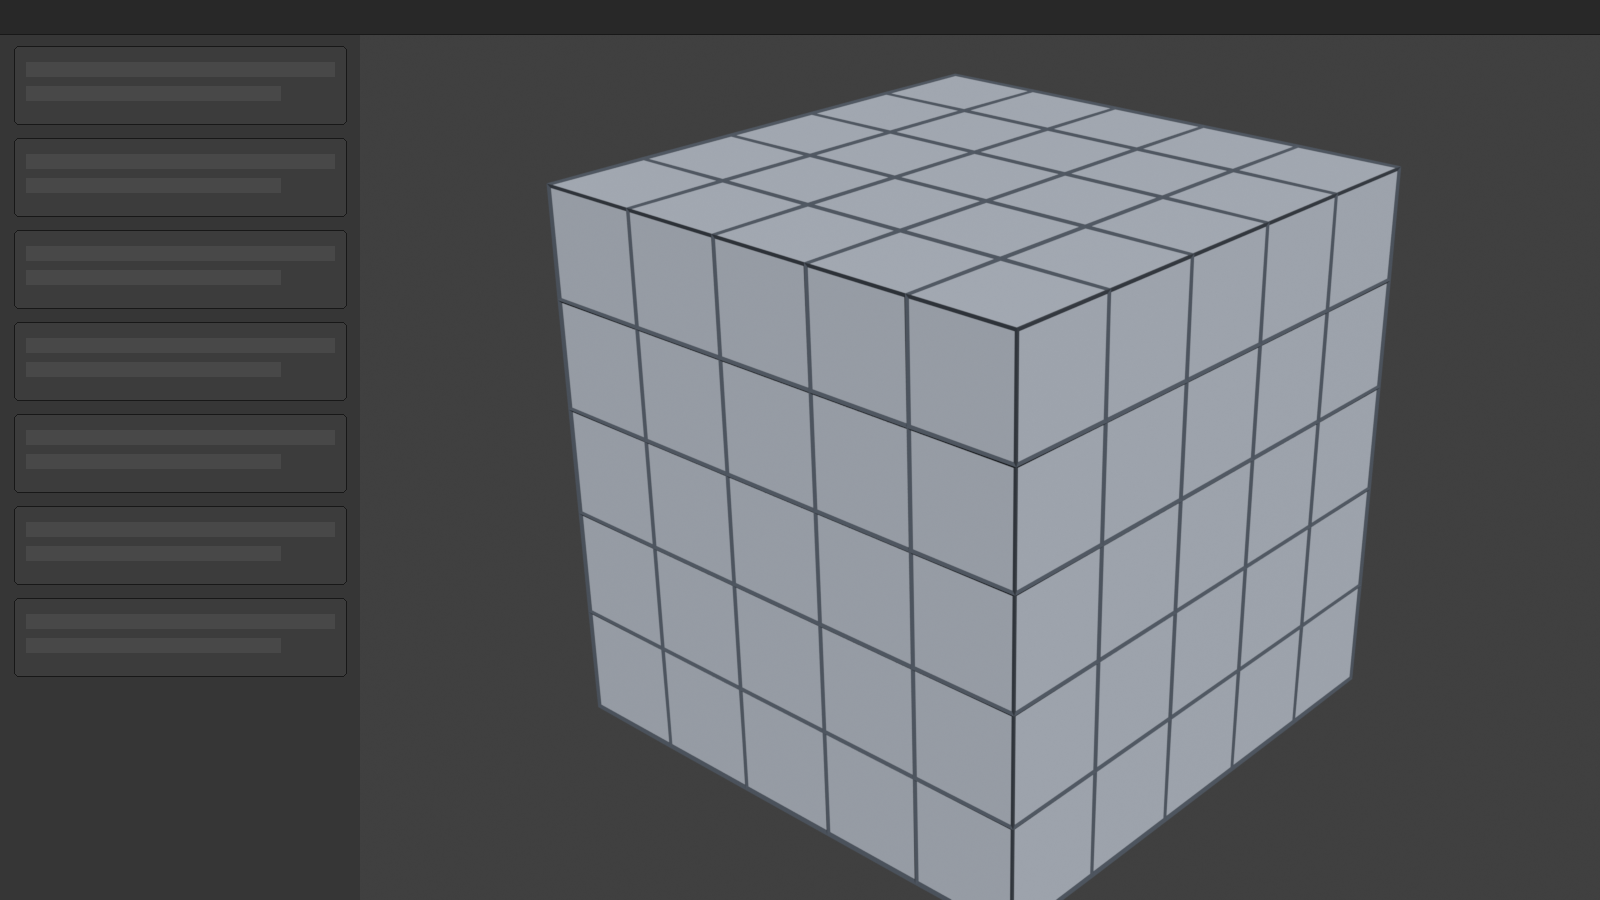
Block Out Torso Shape (5 minutes):
- Add horizontal loop cuts:
Ctrl + R, hover on vertical edge- Scroll to create 5 loops (shoulders, chest, waist, hips, legs)
- Click to place, then click again to confirm
- Shape the torso:
- Front view:
Numpad 1 - Enable proportional editing:
O - Select center chest vertex
Gto move, adjust scroll wheel for influence radius- Pull forward to create chest shape
- Repeat for stomach, hips, etc.
- Front view:
- Add vertical loops for arm sockets:
Ctrl + R, hover on horizontal edge- Add 2 loops around shoulder area
- Adjust position to define shoulder width
Check Both Views (1 minute):
- Front view (
Numpad 1): Check width, symmetry - Side view (
Numpad 3): Check depth, curves - Rotate view (middle mouse drag): Check from all angles
- Adjust as needed with proportional editing
⚠️ Common Box Modeling Mistakes
Mistake: Forgetting to Apply Scale
- Problem: Modifiers behave strangely, measurements are wrong
- Solution: Always
Ctrl + A> Scale after initial sizing - Check: In Object Properties, Scale should be 1.000 on all axes
Mistake: Adding Too Much Detail Too Early
- Problem: Hard to adjust proportions with lots of geometry
- Solution: Keep it simple! 6-8 edge loops total for initial torso
- Rule: Get proportions perfect in low-poly, then add detail
Mistake: Breaking Symmetry
- Problem: Left and right sides don't match
- Solution: Use Mirror Modifier with "Clipping" enabled
- Tip: If symmetry breaks, select center vertices,
S,X,0(scale to 0 on X axis)
Mistake: Uneven Edge Loops
- Problem: Some loops are close together, others far apart
- Solution: Use
Ctrl + Rcarefully, slide loops evenly - Tool: Edge > Edge Slide (
GGin edit mode) to reposition loops
Mistake: Extruding Without Selecting Properly
- Problem: Extrude creates interior faces or weird geometry
- Solution: Always check what's selected before pressing
E - Tip: Use wireframe view (
Z> Wireframe) to see what's selected
Extrusion Strategies for Body Parts
Different body parts require different extrusion approaches. Here are the patterns that work best!
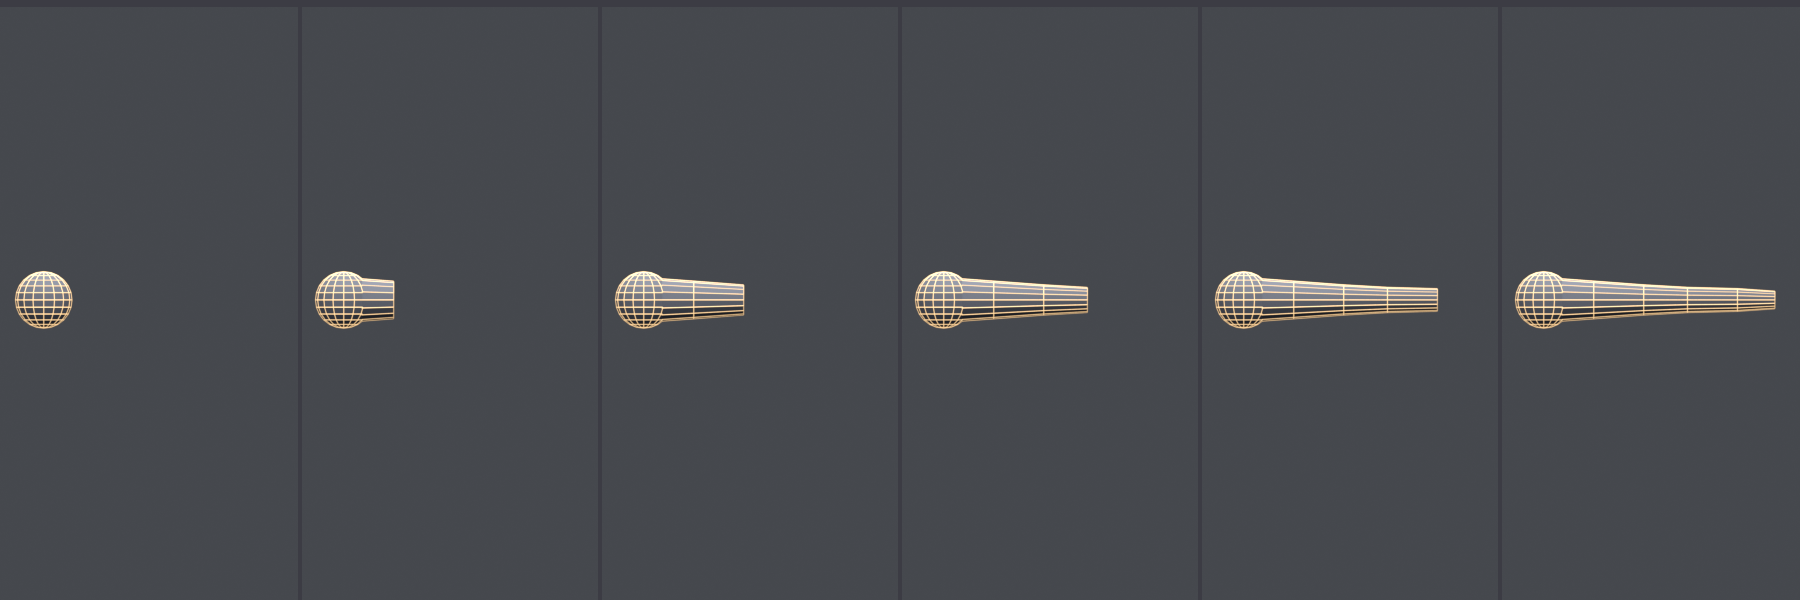
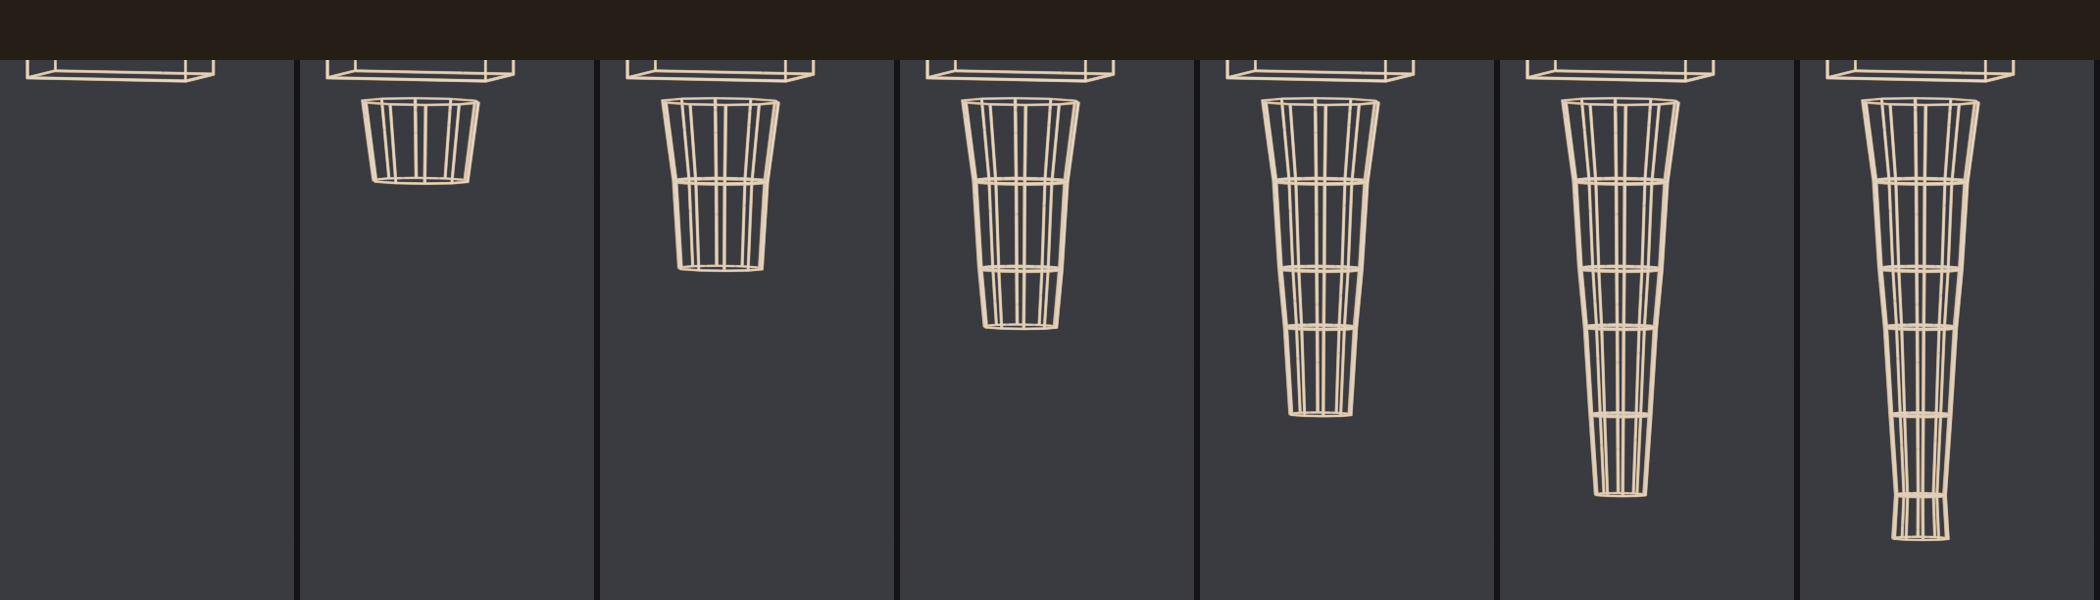
🦾 Extruding Arms
Preparation:
- Make sure torso has clean edge loop where shoulder should connect
- Select the 4-6 faces on side of torso at shoulder height
- These faces will become the arm socket
Extrusion Sequence:
- First extrusion (shoulder):
Eto extrude outwardSto scale slightly smaller- Move out ~10% of arm length
- Second extrusion (upper arm):
Eagain, move to mid-upper arm- Keep diameter consistent
- Third extrusion (elbow):
E, move to elbow positionSto scale slightly smaller (arms narrow at joints)
- Fourth extrusion (forearm):
E, move to mid-forearmSto taper toward wrist
- Fifth extrusion (wrist):
E, move to wrist positionSto narrow significantly- Stop here for now (hands come later!)
Refinement:
- Add 2-3 loop cuts at elbow for smooth bending
- Add 1-2 loop cuts at shoulder
- Adjust vertex positions to match arm shape in reference
🦵 Extruding Legs
Preparation:
- Select bottom faces of torso where legs connect
- Typically 6-8 faces per leg socket
- Position should be at hip/crotch area
Extrusion Sequence:
- Hip connection:
Edown slightly,Sto narrow - Upper thigh:
Edown, keep thick (legs are muscular) - Mid thigh:
Edown - Knee:
Edown,Sto narrow at joint - Upper calf:
Edown,Sslightly (calf tapers) - Lower calf:
Edown, continue taper - Ankle:
Edown,Sto narrow significantly
Special Considerations:
- Legs are thicker than arms (especially thighs)
- Knee needs 3-5 edge loops for smooth bending
- Ankle is narrower than wrist
- Stop at ankle (feet are complex, we'll add later)
💡 Pro Secret: Professional character artists often create a "base mesh" with perfect topology that they reuse for multiple characters. Once you've built one character with great edge flow, you can reshape that same topology for different body types, saving hours of work. Your first character teaches you the pattern; every character after that gets faster!
🎯 Box Modeling Workflow Summary
- Start simple: Basic cube scaled to rough proportions
- Mirror immediately: Delete half, add mirror modifier with clipping
- Block out form: Loop cuts + proportional editing = basic shape
- Extrude major parts: Arms, legs, head from base torso
- Add detail loops: 3-5 loops at each joint
- Check constantly: Switch between front/side/perspective views
- Stay in quads: Keep topology clean from the beginning
- Low-poly first: Perfect proportions before adding detail
Remember: Box modeling is iterative. Don't expect perfection on first try—adjust, refine, repeat!
🪞 Mirror Workflow
The Mirror Modifier is your secret weapon for efficient character modeling! Humans (and most creatures) are symmetrical—left and right sides are mirrors of each other. By modeling only one half and using the Mirror Modifier to automatically create the other half, you cut your work in half while guaranteeing perfect symmetry. It's like having a modeling assistant who perfectly copies everything you do!
Understanding the Mirror Modifier
🎨 Real-World Analogy: Imagine sculpting a clay statue with a magic mirror behind it. Every time you push clay on the left side, the mirror automatically creates an identical push on the right side. You only touch one side, but both sides stay perfectly matched. That's exactly how the Mirror Modifier works!
🎯 Why Mirror Modifier Is Essential
Efficiency Benefits:
- 50% less work: Model one side, get both sides automatically
- Perfect symmetry: No manual matching needed
- Half the vertices: Easier to work with, faster viewport
- Faster iterations: Make changes once, see them on both sides instantly
- Less room for error: Can't accidentally make sides different
Quality Benefits:
- Guaranteed symmetry: Critical for rigging and animation
- Clean center seam: No gaps or overlaps when applied
- Professional workflow: Industry-standard technique
- Easy to break symmetry: Can selectively model asymmetrical details later
Setting Up Mirror Modifier
Let's set up the Mirror Modifier properly from the start. This is the foundation of your symmetrical modeling workflow!
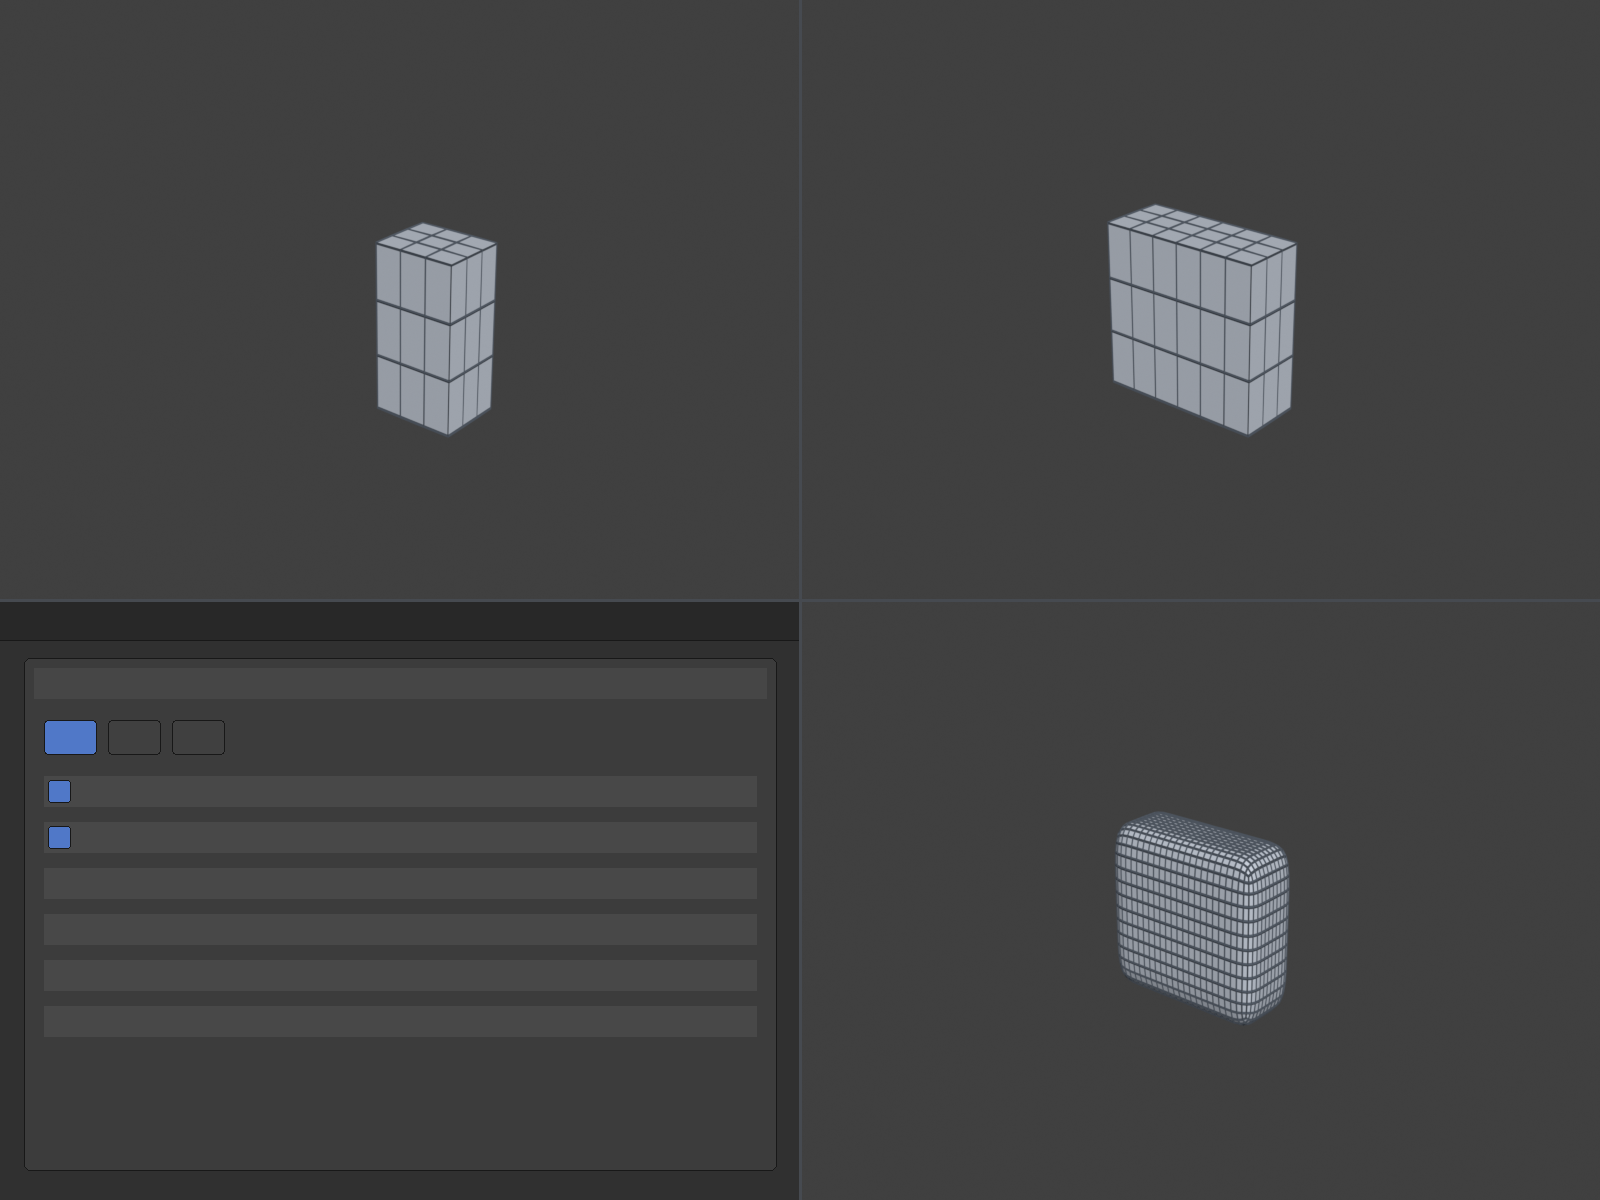
✅ Mirror Modifier Setup (Step-by-Step)
Step 1: Prepare Your Mesh
- Start with your base mesh (cube, cylinder, etc.)
- In Edit Mode (
Tab) - Switch to Face Select mode (
3) - View from Front (
Numpad 1)
Step 2: Delete Half the Mesh
- Use Box Select (
B) to select all faces on the right side - Press
Xand choose "Faces" to delete - You should now see only the left half of your mesh
- Why left side? Convention—positive X axis is mirrored to negative X
Step 3: Add Mirror Modifier
- Go to Modifier Properties panel (wrench icon 🔧)
- Click "Add Modifier"
- Choose "Mirror" from the Generate section
- The right half should instantly reappear!
Step 4: Configure Mirror Settings
- Axis: X should be checked (for left-right symmetry)
- Clipping: ✓ ENABLE THIS! (Prevents vertices from crossing center)
- Merge: Check if you want center vertices to merge (usually yes)
- Merge Distance: Keep default (0.001) unless issues arise
Step 5: Test the Mirror
- Stay in Edit Mode
- Select a vertex on the left side
- Move it (
G) - The corresponding vertex on the right should move identically!
- If not, check your settings above
⚠️ Common Mirror Setup Problems
Problem: Right side doesn't appear
- Cause: Wrong axis selected, or object isn't centered
- Solution: Check X axis is enabled, ensure object origin is at world center
Problem: Gap down the center
- Cause: Clipping not enabled, or vertices not exactly on center
- Solution: Enable Clipping, select center vertices,
SX0to snap to center
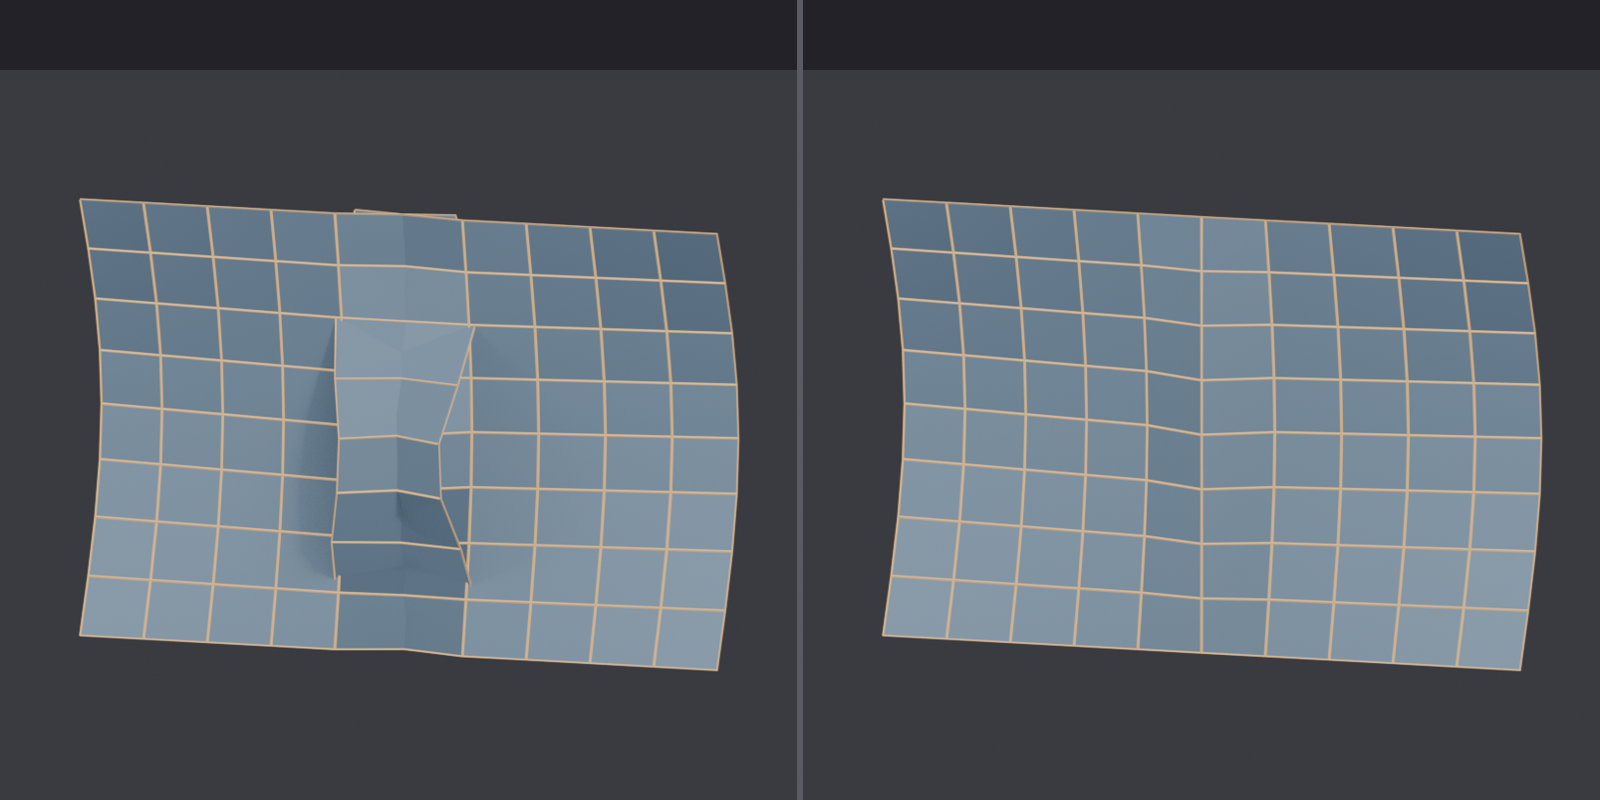
Problem: Mirror creates weird overlapping geometry
- Cause: Didn't fully delete the other half
- Solution: Remove modifier, delete all faces on right side, re-add modifier
Problem: Vertices cross to the other side
- Cause: Clipping not enabled
- Solution: Enable "Clipping" option in modifier settings
Working with Mirror Modifier
Now that mirror is set up, let's learn the best practices for modeling with it efficiently!
🛠️ Mirror Workflow Best Practices
1. Model on One Side Only
- Always work on the left side (positive X)
- The right side updates automatically—don't select or modify it!
- If you accidentally select mirrored vertices,
Alt + Ato deselect all - Think of the right side as "read-only"
2. Use X-Ray View for Center Vertices
- Press
Alt + Zto toggle X-ray mode - Helps see and select center vertices clearly
- Essential when working near the center line
3. Respect the Center Line
- Vertices exactly on center (X = 0) belong to both sides
- With Clipping enabled, they can't cross the center
- Center line should have clean, vertical edge loop
- This creates a clean seam when mirror is applied
4. Check Both Sides Constantly
- Rotate view frequently to see mirrored side
- Front view:
Numpad 1, thenNumpad 3for side view - Verify that mirroring looks correct from all angles
- Sometimes what looks good from front looks wrong from side
5. Keep Mirror Unapplied During Modeling
- Don't apply the mirror modifier until modeling is complete!
- Working with modifier active is faster and more flexible
- You can always break symmetry later if needed
- Only apply when ready for rigging/animation
Center Line Edge Topology
The center line where the two halves meet requires special attention. This is what makes or breaks a clean mirror!
💡 Center Line Best Practices
Clean Center Loop:
- Center should be a single edge loop running down the middle
- For a body: runs from top of head, down face, neck, chest, stomach, legs
- All vertices on this loop have X = 0
- Forms the "seam" where halves connect
Snap Vertices to Center:
- Select vertices that should be on center line
- Press
S(scale) - Press
X(constrain to X axis) - Type
0and pressEnter - All selected vertices snap perfectly to X = 0
Verify Center Alignment:
- Front view:
Numpad 1 - Select center edge loop:
Alt + Clickon center edge - Should form perfect vertical line
- If it zigzags, realign with
SX0
Breaking Symmetry Intentionally
Real humans aren't perfectly symmetrical! Scars, expressions, asymmetrical hairstyles—these details add realism. Here's how to add asymmetry when needed.
🎨 Adding Asymmetrical Details
Method 1: Apply Mirror First
- Complete all symmetrical modeling
- Apply the Mirror Modifier (click "Apply" in modifier panel)
- Now you have full independent control of both sides
- Add asymmetrical details (scars, different expressions, etc.)
- Caution: Can't go back to symmetrical after applying!
Method 2: Duplicate and Modify
- Keep mirror modifier active
- Duplicate entire mesh (
Shift + Din Object Mode) - On duplicate, apply mirror modifier
- Add asymmetrical details to duplicate
- Keep original as symmetrical backup
Method 3: Temporary Disable
- Click the eye icon (👁️) next to modifier to hide in viewport
- Model asymmetrical detail on one side
- Re-enable mirror when done
- Note: This doesn't actually break symmetry, just hides mirrored side temporarily
Common Asymmetrical Details:
- Facial scars or piercings
- Hairstyles (bangs sweeping one direction)
- Clothing details (bag on one shoulder)
- Facial expressions (wink, smirk)
- Battle damage or wear patterns
Advanced Mirror Techniques
🔥 Pro Mirror Tips
Tip 1: Multiple Mirror Axes
- Can mirror on X, Y, and Z simultaneously!
- X + Z = quadrant mirroring (useful for objects with 4-way symmetry)
- Example: Starfish, flowers, propellers
- Model one quarter, get all four automatically
Tip 2: Mirror Object vs Mirror World
- Object Space: Mirrors relative to object's center (default)
- World Space: Mirrors relative to world origin
- Usually want Object Space for characters
- World Space useful for environment pieces
Tip 3: Mirror Modifier for Clothing
- Body has mirror? Clothing should too!
- Keeps clothing symmetrical with body
- Model both with same workflow
- Apply both mirrors at same time
Tip 4: Flip Across Different Axes
- Can change which axis mirrors
- Useful if you need to mirror top/bottom instead of left/right
- Example: modeling half a face, then mirroring vertically for alien designs
- Just check/uncheck X, Y, or Z in modifier settings
When to Apply the Mirror Modifier
This is a critical decision! Apply too early and you lose symmetry benefits. Apply too late and it complicates other processes.
⏰ Mirror Application Timeline
Keep Mirror Active During:
- ✓ All base modeling and form blocking
- ✓ Adding edge loops and detail
- ✓ Sculpting (if doing symmetrical sculpting)
- ✓ Initial proportion adjustments
- ✓ Everything symmetrical!
Apply Mirror Before:
- ✓ UV unwrapping (both halves need separate UVs)
- ✓ Rigging and weight painting (need both sides independent)
- ✓ Adding asymmetrical details
- ✓ Exporting to other software
- ✓ Final render preparation
How to Apply:
- Make sure you're in Object Mode
- In Modifier Properties, click "Apply"
- Mirror modifier disappears—both halves are now permanent geometry
- Warning: Can't undo application! Save version before applying!
⚠️ Mirror Troubleshooting Guide
Issue: Can't select vertices on mirrored side
- This is normal! Mirrored vertices don't exist yet—they're virtual
- Select on the left side; right side copies automatically
Issue: Mirror creates doubled geometry
- Didn't fully delete the other half before adding modifier
- Remove modifier, delete ALL faces on right side, re-add mirror
Issue: Seam visible down center line
- Mirror was applied but center vertices aren't merged
- Select all center vertices:
Alt + Clickcenter edge loop - Merge:
M> "At Center" - Or use "Merge" option in mirror modifier before applying
Issue: Parts don't mirror correctly
- Object origin might not be centered
- Object Mode:
Object > Set Origin > Origin to Geometry - Then manually center:
Alt + Gresets location to world origin
💡 Industry Insight: Professional character artists spend 80% of their time modeling with the mirror modifier active. Only in the final stages—UV unwrapping and rigging—do they apply it. This workflow has been refined over decades of film and game production. Trust the process!
✅ Mirror Workflow Checklist
- ✓ Delete half the mesh (right side typically)
- ✓ Add Mirror Modifier to Modifier Properties
- ✓ Enable "Clipping" option (prevents crossing center)
- ✓ Enable "Merge" option (merges center vertices)
- ✓ Verify X axis is checked (left-right mirroring)
- ✓ Test by moving vertex—other side should mirror
- ✓ Keep center line clean (single edge loop)
- ✓ Model only on left side during work
- ✓ Apply mirror only when ready for UV/rigging
Follow this workflow and you'll have perfect symmetry every time!
👤 Head and Face Modeling
The face is the most important part of any character! It's where personality lives, where emotions show, and where viewers focus their attention. Face modeling is both an art and a science—you need to balance anatomical accuracy with clean topology that enables expressions. Let's learn how to create faces that can smile, frown, and bring your characters to life!
Why Face Topology Is So Critical
🎭 Think of Face Topology Like Puppet Strings: A puppet with strings in the right places can express anything—joy, sadness, surprise. Strings in the wrong places? The puppet looks stiff and lifeless. Face topology is exactly the same. Edge loops placed correctly let your character show emotion; loops placed wrong create a frozen, dead stare.
🎯 What Makes Face Topology Special
Deformation Requirements:
- Eyes: Eyelids need to open, close, blink, squint
- Mouth: Lips smile, frown, pucker, talk, stretch
- Eyebrows: Raise, lower, furrow for expression
- Cheeks: Bulge when smiling, compress when frowning
- Forehead: Wrinkle with concern, smooth when relaxed
Unlike Body Topology:
- Face has many small muscles (over 40!) vs large body muscles
- Face needs circular loops around features, not just lengthwise
- Face requires higher polygon density than most of body
- Face topology is standardized—universal patterns that work
The Face Loop Pattern (The Universal Standard)
There's a topology pattern used in virtually every professional character face. Once you learn this pattern, you can apply it to humans, cartoons, creatures—anything with a face!
✅ The "Mask" Pattern (Face Topology Gold Standard)
Eye Loops:
- Center: Eye socket (where eyeball sits)
- Ring 1: Eyelid edge (follows eyelid opening)
- Ring 2: Immediate surrounding area (defines socket)
- Ring 3: Outer orbital bone (where eye socket ends)
- Ring 4+: Transition to rest of face
- Minimum: 3 concentric rings, 5+ for detailed expressions
Mouth Loops:
- Center: Lip edge (where lips meet)
- Ring 1: Lip surface (red part of lips)
- Ring 2: Immediate surrounding skin
- Ring 3: Outer mouth area (defines smile/frown range)
- Ring 4+: Transition to cheeks and chin
- Minimum: 3 concentric rings, 5+ for talking characters
Connecting the Loops (The "Mask"):
- Eye loops connect to mouth loops via cheeks
- Edge flow curves from eyes down to mouth corners
- Creates a natural "smile line" path
- Loops also connect via nose bridge between eyes
- Forms a continuous figure-8 or mask shape on the face
- This pattern is universal! Used in Pixar, Marvel, AAA games—everywhere
Building the Head: Step-by-Step Approach
Let's walk through creating a basic head with proper face topology. We'll start simple and build up complexity!
🏗️ Head Construction Method (Box Modeling)
Phase 1: Basic Head Shape (5-10 minutes)
- Start with a UV Sphere:
Shift + A> Mesh > UV Sphere- Alternatively, extrude a cylinder from neck and shape it
- Sphere gives you built-in loops to work with
- Delete half for mirror:
- Edit Mode, select right half faces,
X> Faces - Add Mirror Modifier with Clipping
- Edit Mode, select right half faces,
- Shape into head form:
- Front view: flatten sides, widen at temples
- Side view: create face profile (forehead curves back, chin forward)
- Use Proportional Editing (
O) for smooth shaping
- Establish proportions:
- Eyes should be at halfway point of head (not higher!)
- Divide face into thirds (hairline to eyebrows, eyebrows to nose, nose to chin)
- Check against reference images constantly
Phase 2: Creating Eye Sockets (10-15 minutes)
- Position eye location:
- Front view, select faces where eyes should be
- Use reference to get spacing right (one eye-width between eyes)
- Inset for eye socket:
- Select eye area faces (4-6 faces per eye)
- Press
I(Inset), create smaller inner face - Press
Iagain for second ring - Press
Ithird time for third ring - You've created 3 concentric loops!
- Deepen eye socket:
- Select innermost face(s)
- Press
Eto extrude, push back into head - Creates eye socket depth where eyeball will sit
- Refine eye shape:
- Eye should be almond-shaped, not circular
- Select and adjust vertices to create realistic eye shape
- Inner corner slightly lower than outer corner (usually)
Phase 3: Creating the Mouth (10-15 minutes)
- Position mouth location:
- About 1/3 of way from nose to chin
- Width: outer corners align with pupils (roughly)
- Create mouth opening:
- Select faces in mouth area (6-8 faces)
- Press
I(Inset) multiple times for concentric rings - At least 3 rings: lip edge, lip surface, outer mouth area
- Shape lip line:
- Innermost loop is where lips meet
- Shape this into natural lip curve (Cupid's bow on top lip)
- Slightly curved line, not straight
- Add depth to mouth:
- Select center mouth face(s)
- Extrude (
E) inward slightly for mouth cavity - Don't go too deep—just suggestion of depth
Phase 4: Nose Construction (10 minutes)
- Extrude nose bridge:
- Select faces between eyes (nose bridge area)
- Extrude (
E) forward - Scale and shape to create bridge of nose
- Build nose tip:
- Continue extruding down and forward
- Add loop cuts to define nose width
- Shape tip—can be rounded, pointed, button-like depending on character
- Add nostrils (optional for stylized):
- Select faces on bottom/sides of nose
- Inset (
I) and extrude (E) up into nose - Or keep simple for cartoon characters
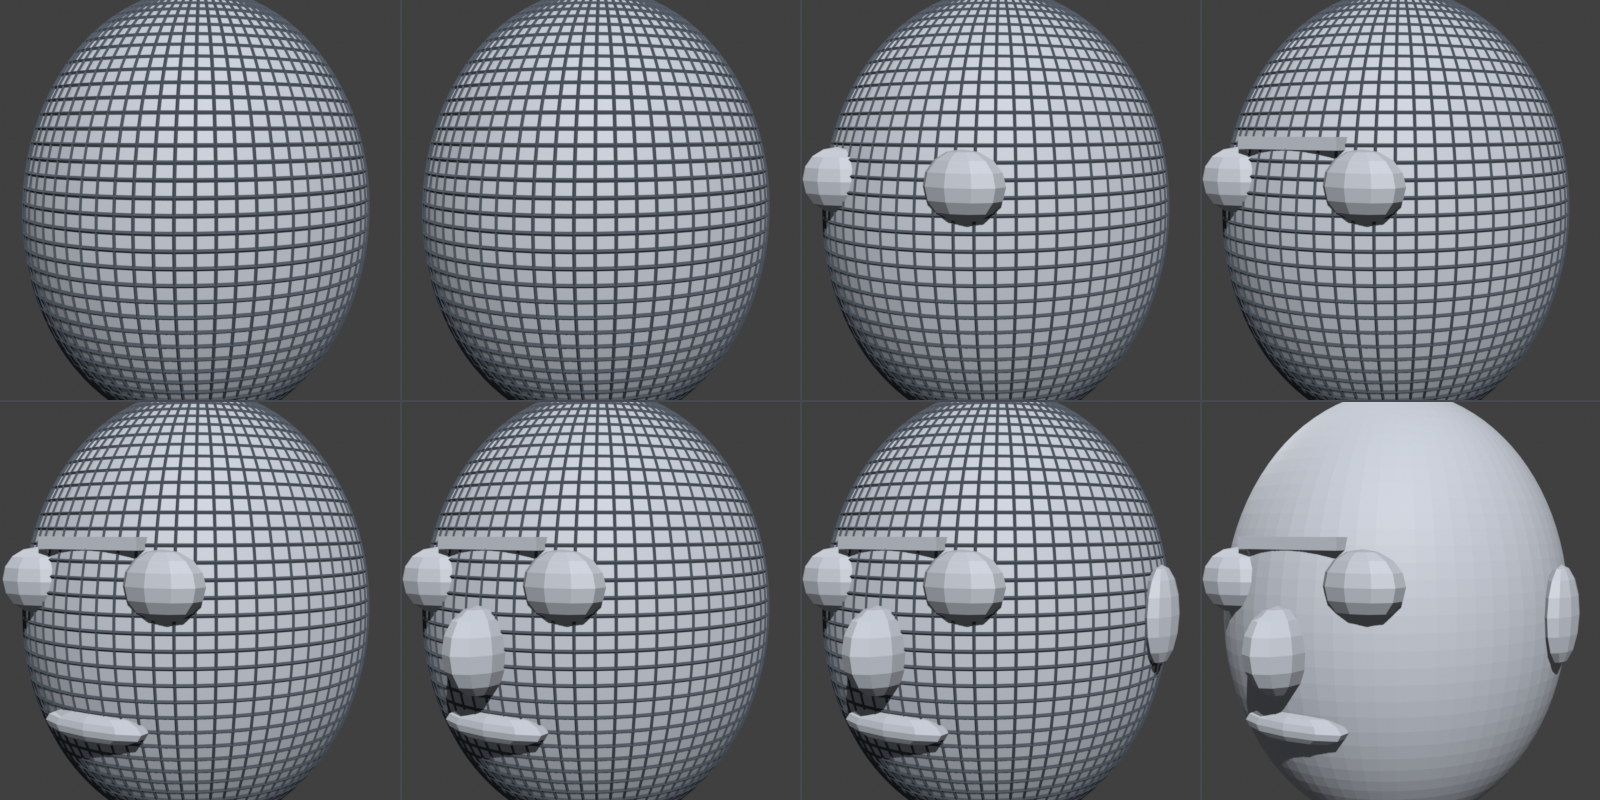
💡 Alternative Method: Plane-Based Face Modeling
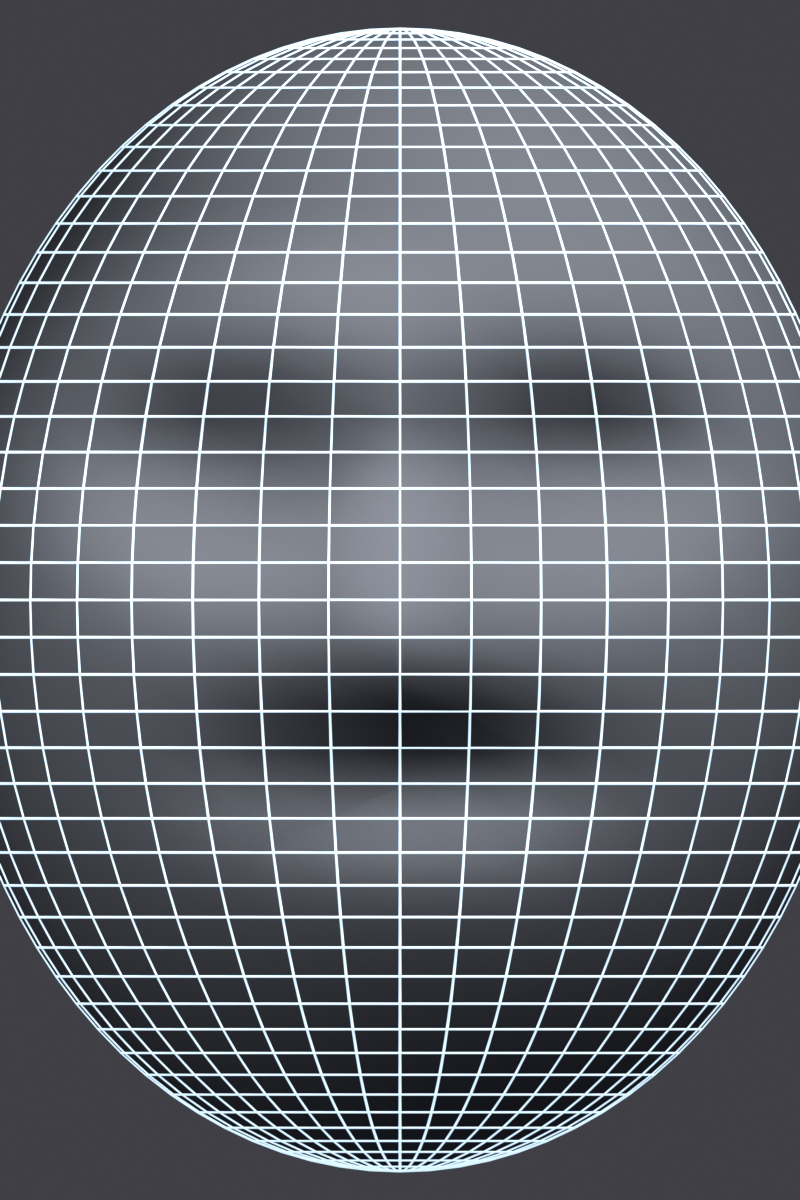
Some artists prefer starting with a plane and building the face outward:
- Start with a simple plane in front view
- Subdivide to create grid (4x6 grid works well)
- Select faces where eye should be, inset for eye loops
- Select faces for mouth, inset for mouth loops
- Extrude entire plane backward to create head depth
- Continue extruding and shaping to build 3D head
Advantages: Very controlled, can see face topology clearly from start
Disadvantages: Requires more manual shaping, longer learning curve
Facial Features in Detail
Each facial feature has specific topology considerations. Let's break them down!
👁️ Eyes - The Window to the Soul
Eye Socket Topology:
- Minimum 3 concentric loops: Socket edge, mid-socket, orbital bone
- Better: 5-7 loops for detailed expressions and eyelid control
- Loop flow: Circular around eye, connecting to nose and cheek
- Avoid: Triangles or n-gons near eyelid—breaks deformation
Eyelid Considerations:
- Top eyelid has more geometry than bottom (moves more)
- Eyelids should slightly overlap eye opening (creates depth)
- Inner corner (tear duct) needs a small face/vertex
- Outer corner can be sharper angle
Eyeball (Separate Object):
- Create eyeball as separate mesh (UV sphere works perfectly)
- Position slightly behind eyelid opening
- Scale to fit socket (not too big, not too small)
- Will be rigged to rotate for eye movement later
Common Eye Mistakes:
- ❌ Eyes too high on head (should be at halfway point!)
- ❌ Eyes too close together or too far apart
- ❌ Circular eye shape (should be almond/oval)
- ❌ No depth to eye socket (looks flat and lifeless)
👄 Mouth - The Expression Machine
Lip Topology:
- Lip line loop: Where upper and lower lips meet (most important loop!)
- Lip surface loops: 2-3 loops defining the red part of lips
- Outer loops: 2-4 loops for surrounding skin and muscle
- Vertical segments: 8-12 segments around mouth (enough for smooth curve)
Mouth Shape Details:
- Upper lip: "Cupid's bow" shape (M-shaped in center)
- Lower lip: Fuller, rounder than upper lip (usually)
- Corners: Slight downturn at rest, upturns for smile
- Philtrum: Vertical groove from nose to upper lip (important landmark)
Mouth Cavity (Optional):
- For characters that talk or open mouth wide
- Extrude mouth opening inward to create cavity
- Add teeth and tongue as separate objects
- For non-speaking characters, can skip cavity entirely
Common Mouth Mistakes:
- ❌ Too few loops (mouth won't smile properly)
- ❌ Perfectly horizontal lip line (needs natural curve)
- ❌ Lips too thick or too thin for character style
- ❌ Mouth too high or too low on face (check 3rds rule)
👃 Nose - The Center Point
Nose Construction:
- Bridge: Connects eyes, runs down center of face
- Width: Typically aligns with inner eye corners
- Tip: Can be bulbous, pointed, button, or flat (character dependent)
- Nostrils: Optional for stylized, required for realistic
Nose Topology Patterns:
- Simple (stylized): Just extrude forward, minimal detail
- Moderate (semi-realistic): Define bridge, tip, suggest nostrils
- Detailed (realistic): Full nostril holes, defined cartilage, subtle forms
- Match detail level to overall character style!
Nose as Edge Flow Hub:
- Nose bridge connects eye loops together
- Loops flow down to nostrils
- Nostrils connect to mouth loops via cheeks
- Central position makes nose critical for overall face flow
Ears - The Often-Forgotten Feature
👂 Ear Modeling Tips
Ear Placement:
- Vertical position: Top aligns with eyebrows, bottom with nose bottom
- Horizontal position: Middle of head depth-wise (side view)
- Angle: Slight backward tilt (10-15 degrees)
Ear Topology:
- For visible ears: Extrude from side of head, shape outer rim
- Add depth: Inner ear curves inward toward ear canal
- Detail level: Match face detail (simple for cartoon, complex for realistic)
- Hidden ears: (covered by hair) can be simplified or omitted
Quick Ear Method:
- Select 6-8 faces on side of head at ear position
- Extrude outward (
E) - Scale slightly (
S) - Rotate back slightly (
R,Y) - Add loop cuts for outer ear ridge
- Inset center faces (
I) for inner ear - Good enough for most characters!
Head to Body Connection
The neck is the bridge between head and body. Getting this connection right is crucial!
✅ Connecting Head to Neck/Body
Topology Requirements:
- Head bottom should have same number of edge loops as neck top
- Typically 8-16 loops around neck circumference
- Clean connection—no triangles at junction
- Smooth transition in polygon density
Connection Methods:
Method 1: Bridge Edge Loops
- Model head and body separately
- Select bottom edge loop of head
- Select top edge loop of neck/body
- Edge > Bridge Edge Loops
- Creates automatic connection
Method 2: Extrude from Body
- Model body first with neck area
- Select top neck faces
- Extrude upward to create head cylinder
- Shape into head form
- Guarantees clean connection
Neck Proportions:
- Width: About 1/2 head width
- Length: Varies by character (longer = elegant, shorter = stocky)
- Should have 2-4 horizontal loops for bending
- Connect to shoulders smoothly (no sudden edge changes)
🎨 Stylization Note: Everything we've covered applies to realistic faces, but the same principles work for stylized characters! Cartoon faces still need eye loops and mouth loops—they're just simpler. A Pixar character might have 3 loops around the eyes instead of 7, but the pattern is the same. Master realistic topology first, then you can simplify for any style!
🎯 Face Modeling Checklist
- ✓ Eyes positioned at halfway point of head height
- ✓ Face divided into thirds (hairline-brows-nose-chin)
- ✓ 3+ concentric loops around each eye
- ✓ 3+ concentric loops around mouth
- ✓ Eye loops connect to mouth loops via cheeks
- ✓ Nose bridge connects eyes together
- ✓ Ears aligned with eyebrows and nose bottom
- ✓ All quads (no triangles near eyes/mouth!)
- ✓ Smooth edge flow following facial muscles
- ✓ Clean connection to neck with matching loop count
Get these fundamentals right and your character will come alive with expression!
🏋️ Body Modeling
With the face complete, it's time to build the body! Body modeling is where you establish your character's overall silhouette, personality, and physical presence. Whether you're creating a heroic warrior, a nimble rogue, or a cute cartoon character, the body tells the story. Let's learn how to model bodies with clean topology that moves beautifully!
Body Modeling Philosophy
🏗️ Think of the Body Like Architecture: The skeleton is your frame, muscles are the walls, and skin is the finish. You don't need to model every individual muscle fiber—you just need to capture the major forms and make sure the "building" can move without collapsing. Focus on large shapes first, anatomical landmarks second, fine details last.
🎯 Body Modeling Priorities
1. Silhouette First (Most Important)
- Overall body shape tells the story at a glance
- Heroic? Broad shoulders, narrow waist
- Cute? Large head, small body, rounded forms
- Villain? Tall and thin, or massive and imposing
- Get silhouette right before worrying about details
2. Proportions Second (Foundation)
- Use the head-height system (7.5-8 heads for average adult)
- Key landmarks align: elbows at waist, wrists at crotch
- Proportions define character age and style
- Check against reference images constantly
3. Topology Third (Functionality)
- Edge loops follow muscle groups and bone structure
- Extra density at joints for smooth bending
- Clean quad topology throughout
- Deformation-ready from the start
4. Details Last (Polish)
- Muscle definition (if appropriate for character)
- Subtle anatomical forms
- Surface details added with subdivision
- Never add detail before proportions are perfect!
Torso Modeling - The Foundation
The torso is your character's center of mass. Everything else connects to it, so getting this right is crucial!
✅ Building the Torso
Starting Point (We covered this in Box Modeling section):
- Cube scaled to rough torso proportions
- Mirror modifier active (modeling left half only)
- 4-6 horizontal loop cuts for major body sections
- Basic form shaped with proportional editing
Key Torso Landmarks to Define:
- Shoulders/Clavicle:
- Widest part of upper body (male) or nearly as wide as hips (female)
- Curves slightly forward in front view
- Edge loop at shoulder height for arm connection
- Chest/Pectorals:
- Male: defined pec muscles, blocky chest
- Female: curves for breast tissue (if appropriate)
- Ribcage underneath creates form
- Curves outward in side view
- Waist:
- Narrowest point of torso
- More pronounced in female figures
- About halfway between chest and hips
- Edge loop here is critical for bending/twisting
- Hips/Pelvis:
- Male: narrower than shoulders, boxy
- Female: wider than waist, often wider than shoulders
- Edge loops here for leg connection
- Pelvis tilts slightly forward
- Belly/Abdomen:
- Between chest and hips
- Can be flat (athletic), curved (average), or rounded (stocky)
- Navel position: slightly below midpoint between chest and hips
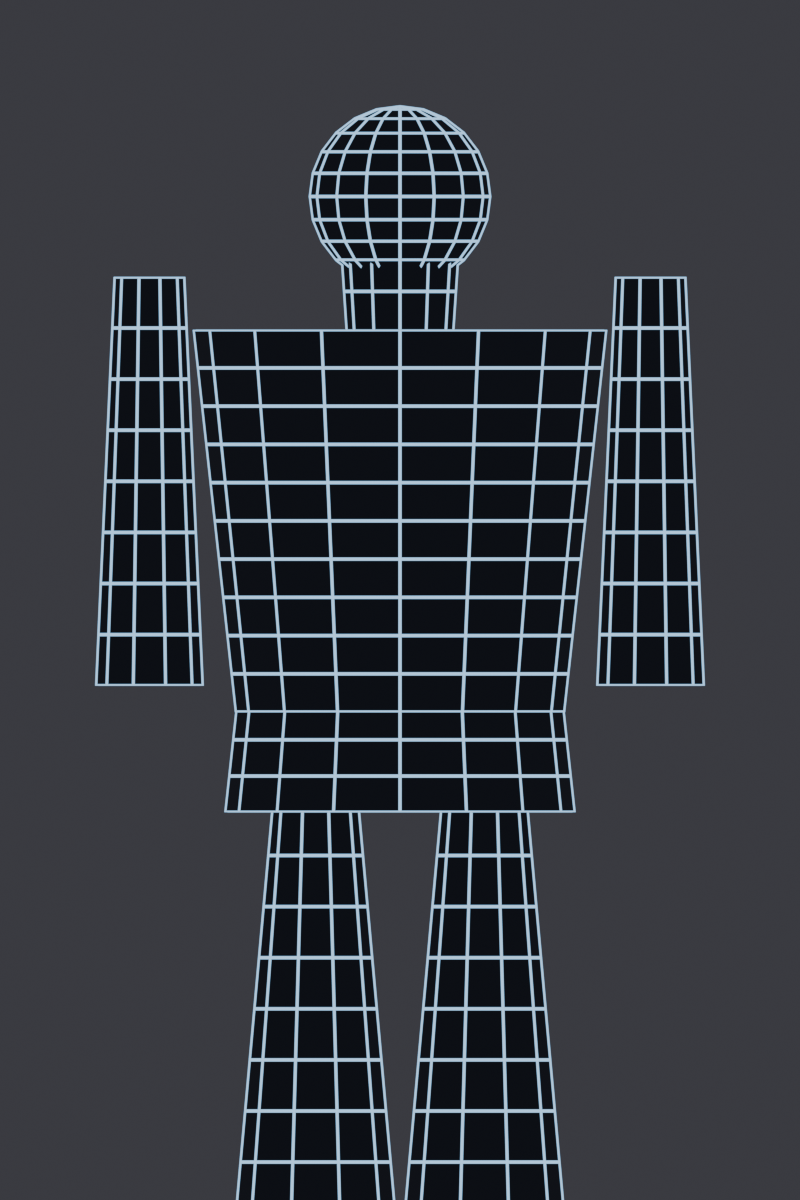
💡 Torso Topology Pattern
Horizontal Loops (Primary Structure):
- Run around the body like belts
- Define major body sections (shoulders, chest, waist, hips)
- Typically 6-10 horizontal loops for full torso
- More loops = smoother deformation, but more vertices to manage
Vertical Loops (Secondary Structure):
- Run from top to bottom of torso
- Typically 8-12 segments around torso circumference
- Define front/back, sides, and connection points for limbs
- Create the "cylinder" structure
Critical Edge Loops:
- Shoulder loop: Where arms connect (needs clean connection)
- Waist loop: Bending point for torso twist
- Hip loop: Where legs connect (needs clean connection)
- Center line: Vertical loop down middle (X=0) for mirror symmetry
Arms and Hands - Expressiveness
Arms convey action and emotion almost as much as faces. Hands are notoriously difficult but essential for expressive characters!
💪 Arm Construction
Arm Segments (We covered extrusion in Box Modeling):
- Shoulder Connection:
- Radiate edge loops from armpit in star pattern
- Connect to torso smoothly (no sudden density changes)
- Allow full range of shoulder rotation
- Upper Arm (Bicep/Tricep):
- Cylindrical form, slightly tapered toward elbow
- 8-12 loops around circumference
- 2-3 horizontal sections
- Slightly thicker in front (bicep) than back (tricep)
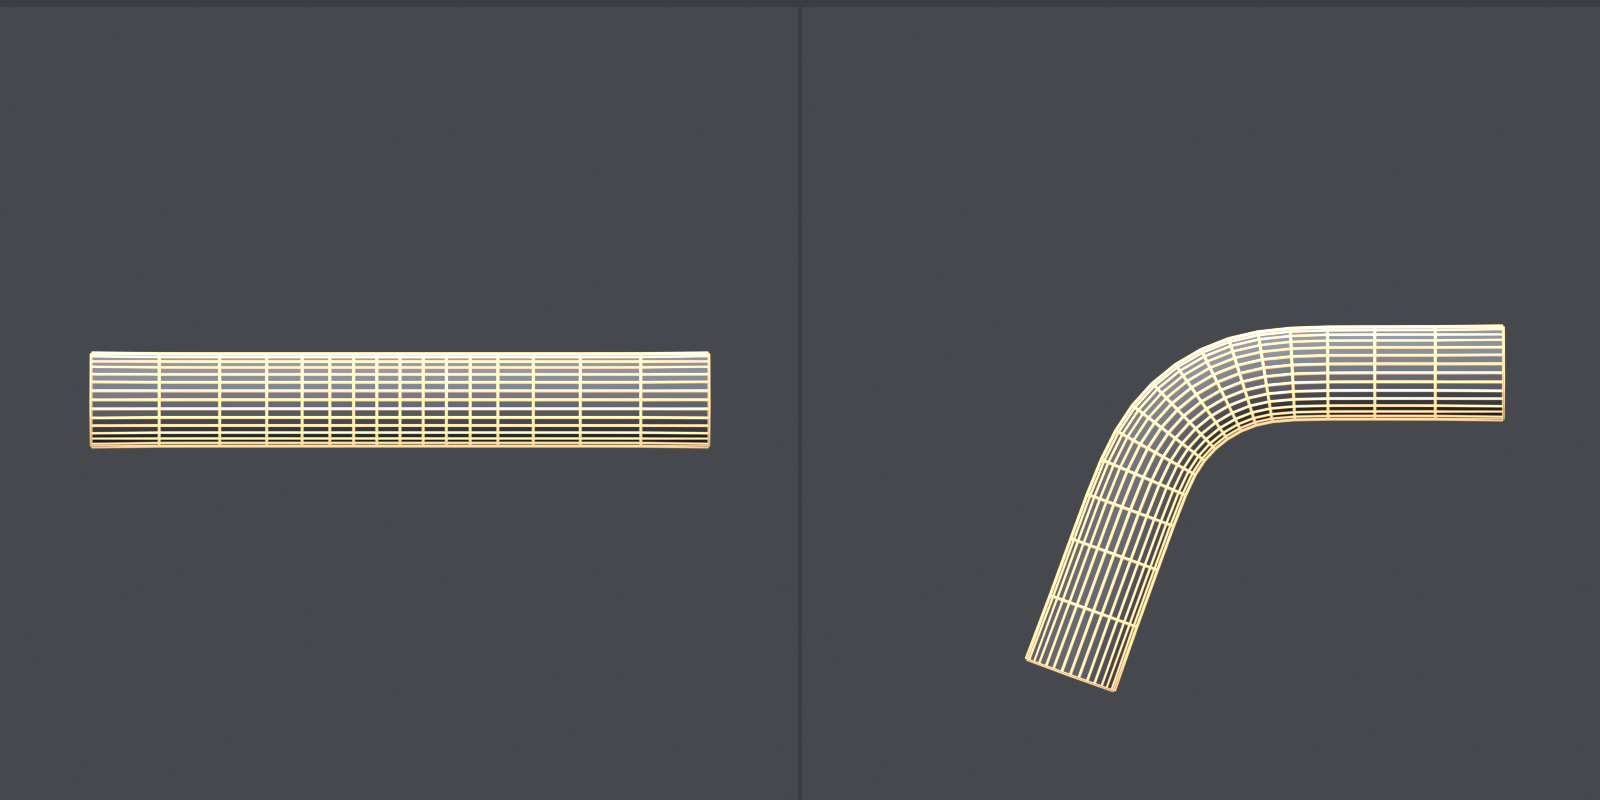
- Elbow:
- Critical joint—needs 3-5 horizontal loops!
- Slightly narrower than upper arm and forearm
- Loops compress on inside, stretch on outside when bent
- More loops = smoother bend
- Forearm:
- Tapers from elbow to wrist
- Slight curve (not perfectly straight cylinder)
- Narrower than upper arm
- 2-3 horizontal sections before wrist
- Wrist:
- Significantly narrower than forearm
- 2-3 loops for wrist articulation
- Clean connection to hand
- Should match hand edge loop count (typically 8 loops)
Arm Edge Flow:
- Loops run around arm like rings (not spiraling)
- Front-to-back symmetry along arm length
- Denser at joints, sparser on straight sections
- Test by selecting edge loop—should go cleanly around arm
🖐️ Hand Modeling (Simplified Approach)
Hand Complexity Options:
- Mitten hands: No individual fingers, just hand shapes (cartoons, background characters)
- Simple 5-finger: Finger cylinders, minimal detail (most characters)
- Detailed hands: Full knuckles, finger segments, palm creases (hero characters, close-ups)
Basic Hand Workflow (5-Finger Approach):
- Create Palm Base:
- Box shape extending from wrist
- Slightly curved to match natural hand curve
- Palm is about as long as thumb
- Extrude Fingers:
- Select top edge of palm, subdivide into 4 sections (4 fingers)
- Extrude each finger: 3 segments (3 knuckles)
- Pinky is shortest, middle finger longest
- Add 1-2 edge loops at each knuckle for bending
- Add Thumb:
- Select faces on side of palm (base of thumb)
- Extrude at angle (thumb connects lower than fingers)
- 2 segments for thumb (2 knuckles)
- Thicker than other fingers
- Shape and Refine:
- Taper fingers toward tips
- Curve fingers slightly inward (natural relaxed pose)
- Round fingertips
- Add edge loops as needed for smooth deformation
Hand Topology Tips:
- Each finger needs 5-6 edge loops (3 segments + 2-3 at knuckles)
- Palm should have clean quad flow
- Avoid triangles at finger connections
- Knuckles need extra loops for curling fingers
- Can simplify for characters where hands aren't prominent
⚠️ Hand Modeling Reality Check
Hands are HARD! They're the second-most complex part after faces. Here's the truth:
- Beginners often spend hours on hands and get frustrated
- Professional tip: Start with simple "mitten" hands to test your character
- Add detailed fingers later only if character needs them
- Many successful characters have simplified hands (Mickey Mouse, LEGO figures, etc.)
- If stuck, use reference photos or trace your own hand in different poses
Recommendation: For your first character, model simple hand blocks. Come back and add fingers after you've finished the rest of the body. This keeps momentum going!
Legs and Feet - The Foundation
Legs support the entire character and enable all locomotion. Strong leg topology is essential for walking, running, and posing!
🦵 Leg Construction
Leg Segments:
- Hip Connection:
- Similar topology to shoulder (radial loops from hip joint)
- Connect to pelvis/hips smoothly
- Front-to-back connection for leg movement range
- Slightly complex topology area—many loops converge here
- Upper Leg (Thigh):
- Thickest part of leg (quadriceps muscle)
- Cylindrical but with more mass in front (quads)
- Tapers toward knee
- 10-14 loops around circumference
- 2-4 horizontal sections
- Knee:
- Critical joint—needs 4-6 horizontal loops!
- More complex than elbow (bigger range of motion)
- Kneecap on front creates subtle bump
- Narrower than thigh and calf
- Loops compress on back, stretch on front when bent
- Lower Leg (Calf):
- Muscle bulge (gastrocnemius) in upper rear section
- Tapers significantly toward ankle
- Narrower than thigh
- Shin in front is relatively flat
- 3-4 horizontal sections
- Ankle:
- Narrowest point of leg
- 2-3 loops for ankle articulation
- Ankle bones (malleolus) slightly protrude on sides
- Clean connection to foot
Leg Proportions:
- Legs are typically same length as torso + head combined
- Thigh slightly longer than lower leg (or equal)
- Knees should align between front and side views
- Legs have slight inward angle from hips to feet (not straight down)
👟 Foot Modeling (Simplified Approach)
Foot Complexity Options:
- Stub feet: Just rounded ends (cartoons, chibi characters)
- Simple feet: Foot shape with no individual toes (most characters)
- Detailed feet: Individual toes, arch, heel detail (realistic characters)
Basic Foot Workflow:
- Create Foot Base:
- Extend from ankle at right angle
- Length: roughly same as hand length
- Wider at toe end, narrower at heel
- Define Foot Shape:
- Top (dorsal): Relatively flat or slightly curved
- Bottom (sole): Arch in middle (higher on inside edge)
- Heel: Rounded back section
- Toes: Extend forward from ball of foot
- Add Toes (Optional):
- 5 toes: big toe largest, pinky toe smallest
- Simple version: just suggest toes with edge loops (no actual separation)
- Detailed version: extrude individual toe segments
- Refine:
- Add edge loops at ball of foot (where toes bend)
- Add loops at ankle connection for foot flexing
- Slight asymmetry (feet aren't perfectly symmetrical)
Foot Topology Tips:
- Ball of foot needs 2-3 edge loops for bending
- Ankle connection should have matching loop count
- For characters that wear shoes, can simplify foot greatly
- For barefoot characters, add more detail to foot shape
The Back - Often Overlooked
💡 Back Modeling Considerations
Back Is Simpler Than Front:
- No facial features to worry about
- Broader, flatter forms than front
- But still needs proper anatomy and topology!
Key Back Features:
- Shoulder Blades (Scapulae):
- Wing-like bones on upper back
- Create subtle triangular forms
- Move when arms move (will be rigged later)
- Can suggest with gentle curves in mesh
- Spine:
- Runs down center of back (on mirror line)
- Creates shallow vertical groove
- Can be simplified or detailed based on character style
- Latissimus Dorsi (Lats):
- Large back muscles creating V-shape
- From armpits down to lower back
- More prominent on muscular characters
- Lower Back:
- Curves inward slightly (lumbar curve)
- Transitions to buttocks
- Important for bending/posing
Back Topology:
- Same horizontal loops as front (they wrap around)
- Center vertical edge loop down spine (X=0)
- Smooth transitions—no sudden density changes
- Often less detailed than front (unless character shows back prominently)
💭 Pro Workflow Tip: Professional character artists often work in this order: 1) Block out entire body in low-poly (100-300 faces total), 2) Perfect proportions and silhouette, 3) Add subdivision and detail ONLY after proportions are locked. Resist the urge to detail one part before the whole is roughed in—it's the fastest path to frustration!
🎯 Body Modeling Checklist
- ✓ Torso has 6-10 horizontal loops defining major sections
- ✓ Shoulders wider than hips (male) or hips wider (female)
- ✓ Arms have 3-5 loops at elbow for smooth bending
- ✓ Hands simplified or detailed based on character needs
- ✓ Legs have 4-6 loops at knee for bending
- ✓ Feet shape appropriate for character style
- ✓ Clean edge loop flow throughout body
- ✓ All major joints have extra loops for deformation
- ✓ Proportions checked against reference (head-height system)
- ✓ Silhouette reads clearly from all angles
- ✓ Back has proper anatomy (shoulder blades, spine curve)
- ✓ Mirror modifier still active (don't apply yet!)
With a solid body model, you're ready for the final refinement stage!
✨ Detail and Optimization
You've built the foundation—a character with solid proportions and clean topology. Now comes the artistry: adding details that bring personality, refining forms to perfection, and optimizing the model for its intended use. This is where your character transforms from "good" to "great!" Let's learn how to polish your model without sacrificing the clean topology you've worked so hard to create.
The Art of Knowing When to Stop
🎨 The Golden Rule of Detail: Every polygon you add should serve a purpose. If removing it wouldn't change the silhouette or hurt animation, you probably don't need it. Detail for detail's sake leads to bloated, slow models. Strategic detail creates efficient, beautiful characters. Think like a sculptor removing excess marble—every cut is intentional!
🎯 Detail Philosophy
Ask These Questions Before Adding Detail:
- "Will the camera see this?" – Detail only what's visible at viewing distance
- "Does this help the character?" – Does it add personality, readability, or appeal?
- "Can this be textured instead?" – Many "details" are better as textures than geometry
- "Will this deform properly?" – Detail near joints must maintain topology rules
- "What's the target platform?" – Real-time game? Film render? Mobile? Affects poly budget!
Three Levels of Detail:
- Low Detail (Base Model): Clean silhouette, proper proportions, 500-2000 polygons total
- Medium Detail (Subdivision): Smooth surfaces, subtle forms, 5000-15000 polygons
- High Detail (Final): Muscle definition, facial features, wrinkles, 20000-50000+ polygons
Subdivision Surface Modifier - Your Secret Weapon
The Subdivision Surface modifier is how you transform your low-poly base model into a smooth, organic character without manually adding thousands of vertices!
✅ Using Subdivision Surface Effectively
What Subdivision Surface Does:
- Automatically smooths your mesh by adding polygons between existing edges
- Preserves your clean base topology (modifier is non-destructive)
- Level 1 = 4x polygons, Level 2 = 16x polygons, Level 3 = 64x polygons!
- Creates smooth, organic surfaces perfect for characters
Adding Subdivision Surface:
- Select your character mesh (Object Mode)
- Modifier Properties panel (wrench icon 🔧)
- Add Modifier > Subdivision Surface
- Set Viewport level to 1 or 2 (for preview)
- Set Render level to 2 or 3 (for final output)
- Character instantly becomes smooth!
Controlling Subdivision Sharpness:
- Crease edges: Select edge(s),
Shift + E, adjust crease value (0-1) - Edge loops: Add loops close together to create sharp edges
- Mean Crease: In edge properties, set crease weight for selective sharpness
- Example: Character's jaw line might be slightly creased for definition
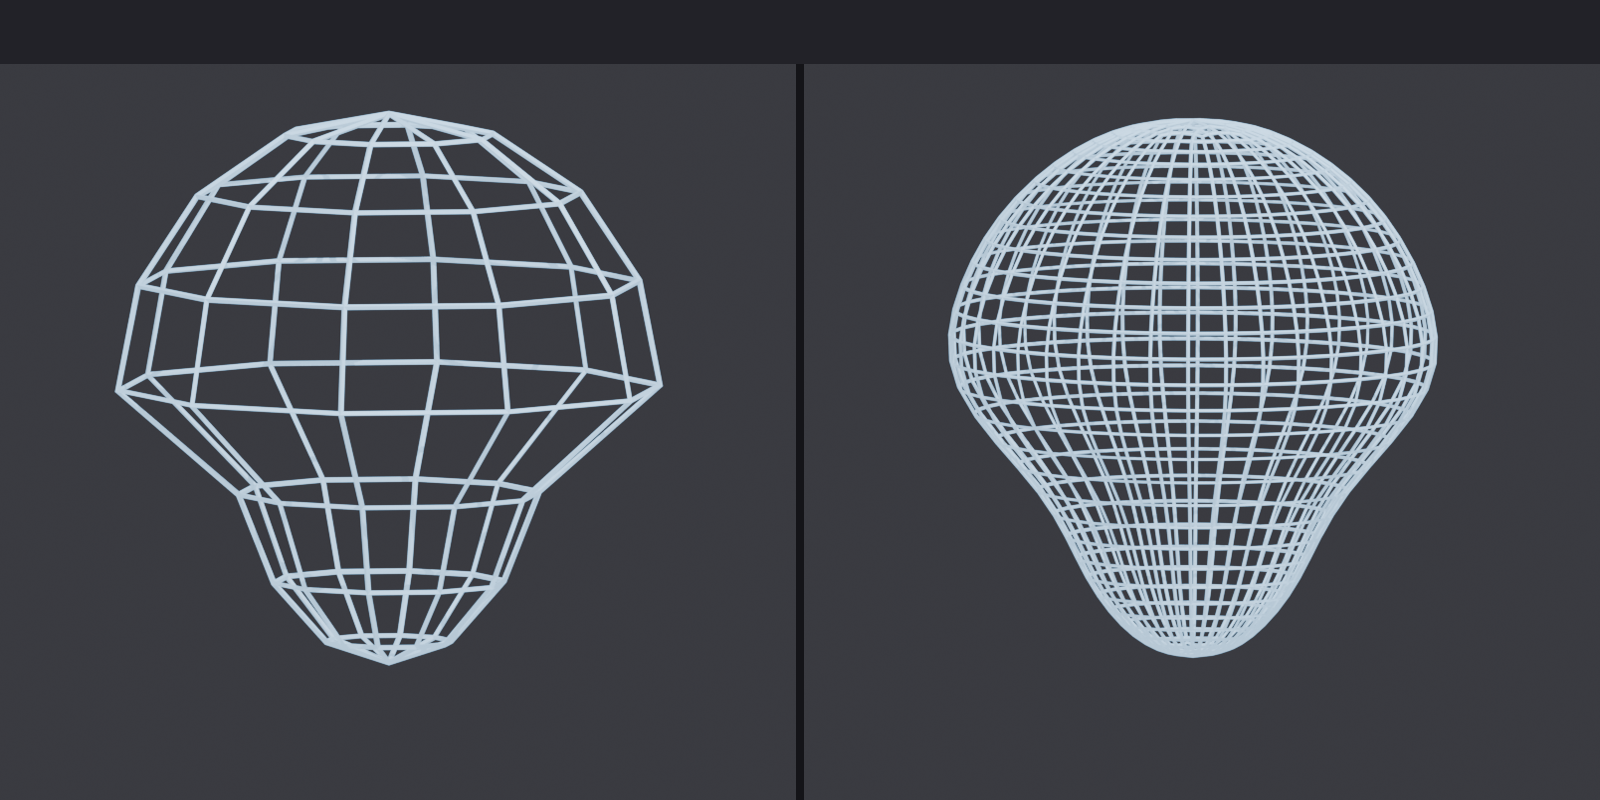
💡 Subdivision Best Practices
DO:
- ✓ Keep base mesh as simple as possible (subdivision adds detail)
- ✓ Use all quads in base mesh (subdivides predictably)
- ✓ Add edge loops to control sharpness where needed
- ✓ Work in low subdivision (1) while modeling, higher (2-3) for preview
- ✓ Place mirror modifier BEFORE subdivision in modifier stack
DON'T:
- ✗ Apply subdivision modifier (keep it non-destructive!)
- ✗ Use high subdivision levels while editing (very slow)
- ✗ Add unnecessary edge loops thinking "more is better"
- ✗ Forget about topology—subdivision won't fix bad edge flow
- ✗ Use triangles in subdivided areas (creates shading artifacts)
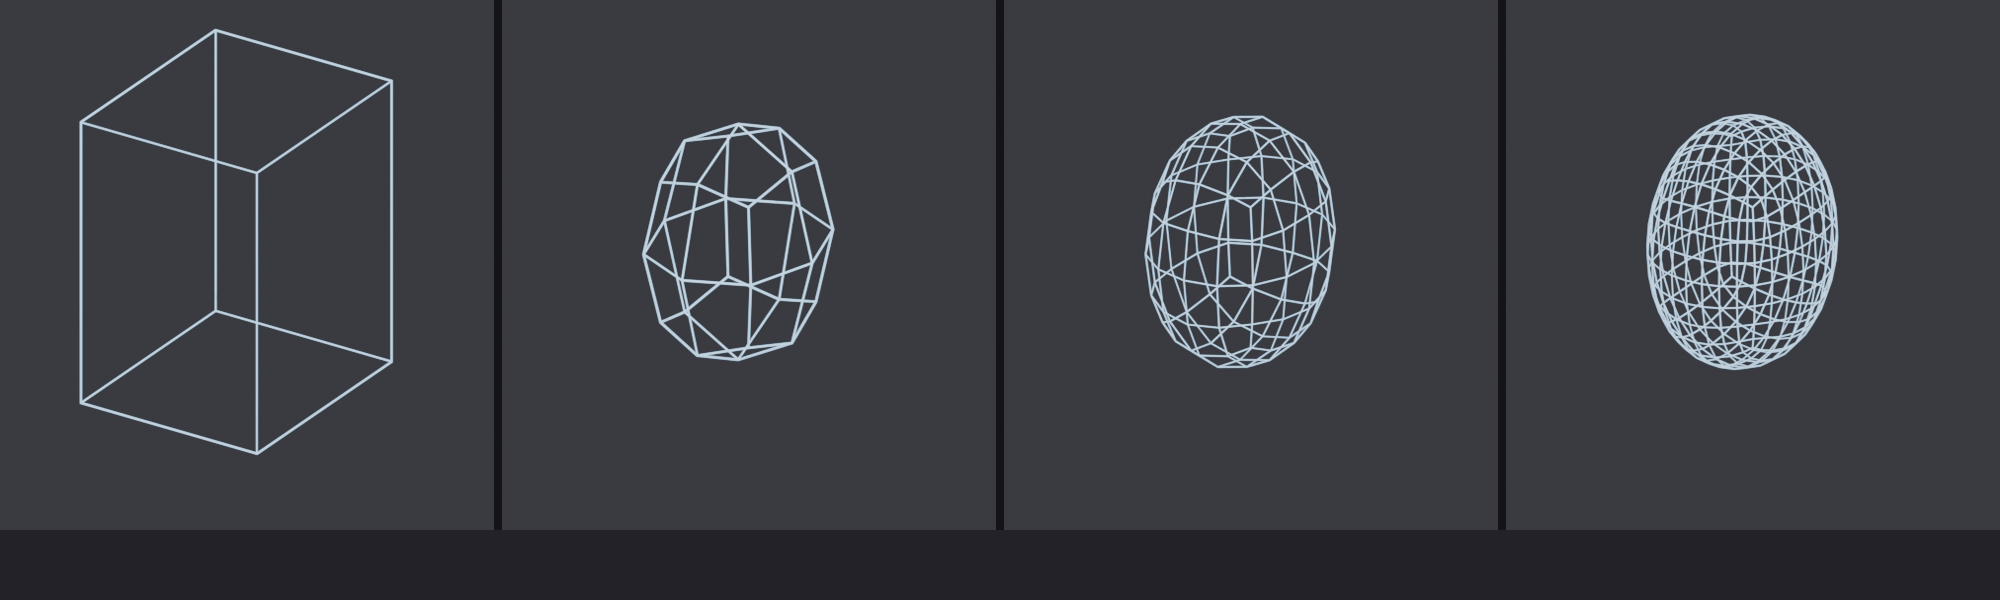
Adding Muscle Definition and Form
With subdivision active, you can now sculpt subtle anatomical forms without destroying your clean topology!
💪 Adding Subtle Anatomy
Proportional Editing Method (Non-Destructive):
- Enable Proportional Editing (
O) - Set falloff to "Smooth" or "Sphere"
- Select vertex at center of muscle area
- Move it (
G) to create subtle bulge - Adjust influence radius with mouse scroll
- Creates organic, flowing forms
Key Muscle Forms to Suggest:
- Shoulders (deltoids): Rounded cap shape on upper arm
- Chest (pectorals): Broad, slightly curved forms on front torso
- Abs: Slight vertical divisions (or omit for non-muscular characters)
- Thighs (quadriceps): Fuller in front, creates leg thickness
- Calves: Diamond-shaped bulge on back of lower leg
- Biceps/Triceps: Subtle bulges on upper arm (front and back)
How Much Muscle to Add?
- Stylized/Cartoon: Minimal or no muscle definition—simple forms
- Average/Realistic: Suggest major muscle groups subtly
- Athletic/Heroic: Clear muscle definition, but not exaggerated
- Bodybuilder: Highly defined muscles, sharp divisions
- Match your character's fitness level and art style!
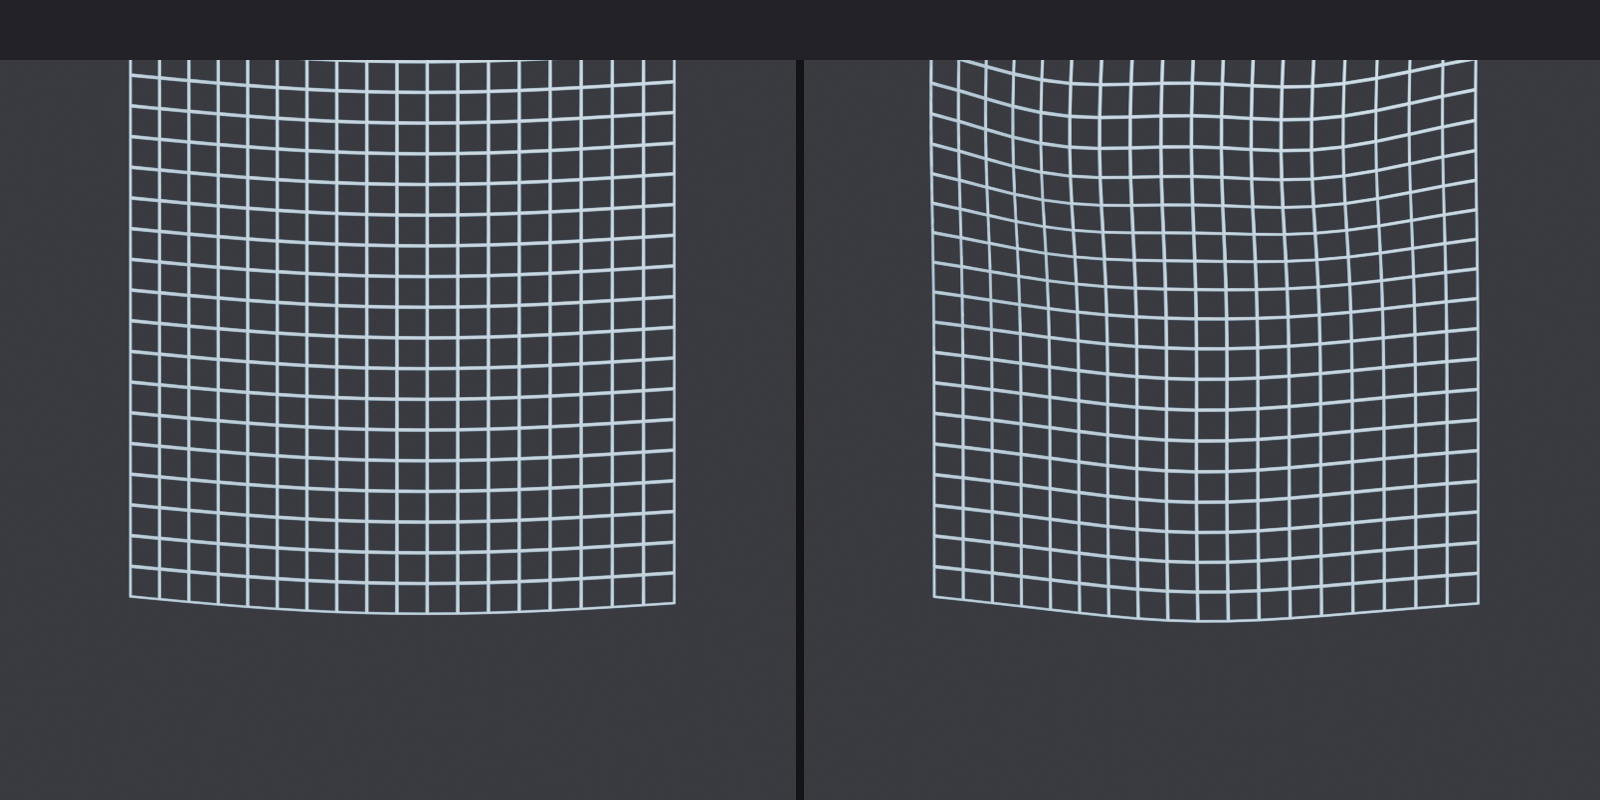
⚠️ Common Over-Detailing Mistakes
Mistake 1: Six-Pack on Everyone
- Not every character needs visible abs!
- Average people have smooth stomachs
- Add muscle definition only if character would realistically have it
Mistake 2: Modeling Details That Should Be Textures
- Wrinkles, pores, scars → These are texture details, not geometry!
- Only model features that change the silhouette
- Rule: If it's not visible in silhouette, it's probably a texture
Mistake 3: Uneven Detail Density
- Super detailed face, but stick-figure body = looks unfinished
- All parts should match detail level
- Detail should be consistent across character
Mistake 4: Destroying Topology for Details
- Adding details that break your clean quad flow
- Every detail must maintain topology rules
- If detail creates triangles at joints—don't add it!
Optimization for Performance
A beautiful character that crashes the game or takes hours to render is useless. Let's optimize!
⚡ Polygon Count Guidelines
Target Polygon Counts (Post-Subdivision):
| Use Case | Polygon Count | Notes |
|---|---|---|
| Mobile Game | 3,000-8,000 | Very limited, simplified details |
| PC/Console Game (Background) | 8,000-15,000 | NPCs, crowd characters |
| PC/Console Game (Hero) | 15,000-30,000 | Main playable characters |
| Cinematic/Film | 30,000-100,000+ | No real-time constraints |
| Still Renders | 50,000-200,000+ | High detail acceptable |
| Learning/Practice | 10,000-25,000 | Sweet spot for portfolio |
Checking Your Polygon Count:
- Look at top-right corner of viewport (shows Verts/Faces count)
- With subdivision enabled, this shows post-subdivision count
- Toggle subdivision on/off to see base vs subdivided counts
✅ Optimization Techniques
1. Remove Unnecessary Edge Loops
- Select edge loop that doesn't contribute to form
X> Edge Loops (removes loop, merges surrounding geometry)- Test subdivision after—if it still looks good, loop wasn't needed!
- Focus on flat areas (backs, sides) for removal candidates
2. Use Subdivision Levels Wisely
- Viewport: Level 1 (fast preview while working)
- Preview: Level 2 (check appearance)
- Render: Level 2-3 (final quality)
- Don't need Level 4+ unless extreme close-up
3. Simplify Hidden Areas
- Bottom of feet (if wearing shoes) = minimal geometry
- Inside mouth (if never opens) = can be simplified
- Hair-covered scalp = doesn't need detail
- Clothed body parts = reduce detail under clothing
4. LOD (Level of Detail) Strategy
- Create multiple versions: High (close-up), Medium (normal), Low (distance)
- Game engines swap between LODs based on camera distance
- Save subdivided version at different levels for each LOD
- Not needed for single images or animations
Final Quality Checks
Before declaring your character "done," run through this comprehensive quality checklist!
🔍 Pre-Finalization Checklist
Topology Verification:
- ✓ Wireframe view (
Z> Wireframe): Check edge flow, look for errors - ✓ Face orientation (
Alt + Zin Edit Mode): All faces facing outward (blue)? - ✓ Non-manifold geometry (Select > Select All by Trait > Non-Manifold): Should be NONE
- ✓ Loose vertices/edges: Select All by Trait > Loose Geometry, delete if found
- ✓ Overlapping faces: Check in X-ray mode, remove duplicates
Proportions Check:
- ✓ Front view: Character matches reference proportions
- ✓ Side view: Profile depth matches reference
- ✓ Both arms same length when extended
- ✓ Both legs same length
- ✓ Face landmarks align (eyes level, ears level)
Symmetry Check:
- ✓ Mirror modifier active? (if still modeling symmetrically)
- ✓ Center vertices at X=0 (select,
SX0) - ✓ No gaps down center line
- ✓ Left and right sides visually identical (if intended)
Deformation Test:
- ✓ Rotate elbow edge loops—do they bend smoothly?
- ✓ Rotate knee edge loops—smooth deformation?
- ✓ Twist waist edge loops—torso bends naturally?
- ✓ No pinching or weird creasing at joints
Visual Polish:
- ✓ Subdivision Surface applied and looks smooth
- ✓ No shading artifacts (flat shading vs smooth)
- ✓ Character looks good from all angles (rotate 360°)
- ✓ Silhouette is clear and readable
- ✓ All details serve the character design
⚠️ When to Stop Modeling
Perfectionism is the enemy of completion! Here's when to call your model "done":
You're Done When:
- ✓ Character matches reference/concept art
- ✓ Proportions are correct from all angles
- ✓ Topology is clean and animation-ready
- ✓ Polygon count meets your target platform
- ✓ All quality checks pass
- ✓ You're excited about the character!
You're Over-Working When:
- Adding details that won't be visible at normal viewing distance
- Tweaking the same vertex for the 10th time
- Polygon count is 2x your target
- You're modeling wrinkles/pores (that's texture work!)
- You've spent more than planned time on modeling phase
Remember: Modeling is just ONE phase of character creation. You still need to UV unwrap, texture, rig, and animate. Don't burn out on modeling—save energy for the rest of the pipeline!
💡 Industry Reality: Professional character artists rarely spend more than 8-16 hours on the modeling phase (for a game character). They know the secret: a "perfect" model that takes forever is less valuable than a "good enough" model that's finished. Polish happens in multiple phases—modeling, texturing, lighting, rendering. You'll be amazed how much better your "good enough" model looks after proper texturing and lighting!
✨ Detail & Optimization Summary
- Add Subdivision Surface modifier (Level 2 for most uses)
- Use Proportional Editing to add subtle muscle forms
- Detail only what serves the character (silhouette-changing features)
- Match detail level to character style (cartoon vs realistic)
- Optimize polygon count for target platform
- Run quality checks (topology, proportions, symmetry, deformation)
- Know when to stop (good enough is better than perfect-but-never-finished!)
Your character model is now ready for UV unwrapping and texturing!
🎯 Project: Model a Character Torso
Time to put everything you've learned into practice! In this hands-on project, you'll create a complete character torso from scratch using the box modeling workflow. This torso will have clean topology, proper proportions, and be ready for arms, legs, and a head to be attached. Think of this as building the "foundation" of your first complete character!
🎯 Project Goals
By completing this project, you will:
- Apply box modeling technique to create organic forms
- Establish correct human proportions using reference images
- Create clean quad-based topology suitable for animation
- Use Mirror Modifier for efficient symmetrical modeling
- Add Subdivision Surface for smooth results
- Prepare connection points for limbs and head
Estimated Time: 45-60 minutes
Project Setup
📋 Before You Begin
Materials Needed:
- Blender 4.0+ installed and running
- Reference images (optional but helpful):
- Front view of human torso
- Side view of human torso
- Can use anatomy diagrams or character art
- Mouse or trackpad (mouse strongly recommended)
- About 1 hour of uninterrupted time
Setup Your Workspace:
- Start new Blender file:
File > New > General - Delete default cube: Select it,
X> Delete - Keep default camera and light (we'll ignore them for now)
- (Optional) Load reference images using method from earlier lesson
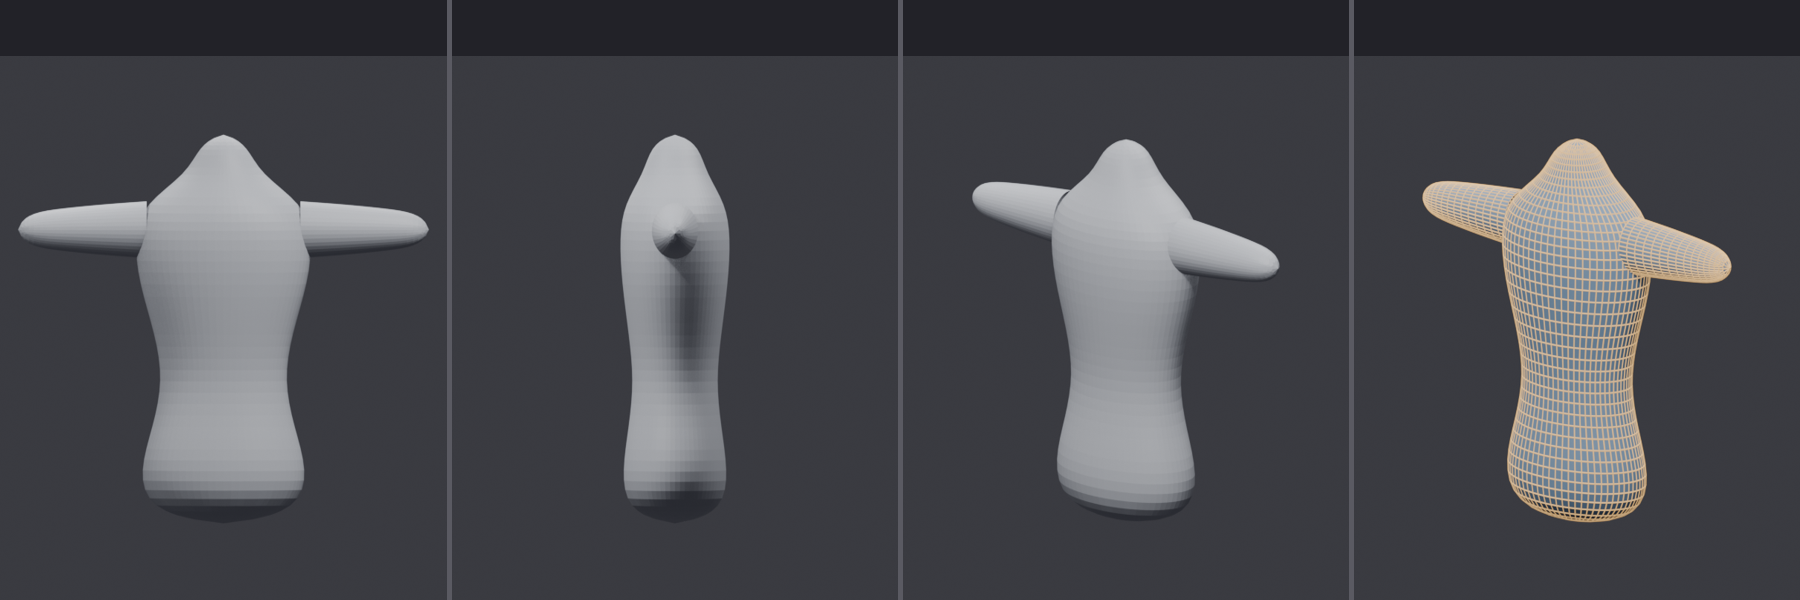
Part 1: Creating the Base Form (15 minutes)
Step 1: Add and Shape the Starting Cube
- Add a cube:
Shift + A> Mesh > Cube- This will be your torso foundation
- Enter Edit Mode:
- Press
Tabto enter Edit Mode - You should see the cube's vertices, edges, and faces
- Press
- Scale it into a torso shape:
- Press
S(scale),Z(constrain to Z-axis), type2.5, pressEnter - This makes it taller (roughly torso height)
- Press
S,X, type0.8,Enter - This makes it narrower front-to-back
- Press
- Make shoulders wider than hips:
- Switch to vertex select mode: Press
1 - Box select (
B) the top 4 vertices - Press
S,X,1.5,Enter - Shoulders are now wider—good start!
- Switch to vertex select mode: Press
- Exit Edit Mode and apply scale:
- Press
Tabto return to Object Mode - Press
Ctrl + A, choose "Scale" - This locks in your transformations (important!)
- Press
Step 2: Set Up Mirror Modifier
- Enter Edit Mode again:
- Press
Tab
- Press
- Delete half the mesh:
- Press
3to switch to face select mode - Front view: Press
Numpad 1 - Box select (
B) all faces on the right side - Press
X, choose "Faces" - Right half disappears—perfect!
- Press
- Add Mirror Modifier:
- Look at right side panel (Modifier Properties—wrench icon 🔧)
- Click "Add Modifier"
- Choose "Mirror"
- Right half reappears like magic!
- Configure mirror settings:
- ✓ Check that X axis is enabled
- ✓ Enable "Clipping" checkbox
- ✓ Enable "Merge" checkbox
- Now you'll model only the left half!
Part 2: Adding Edge Loops and Defining Form (15 minutes)
Step 3: Add Horizontal Edge Loops
- Add loop cuts for body sections:
- Press
Ctrl + R(Loop Cut tool) - Hover over a vertical edge until yellow loop appears
- Scroll mouse wheel to add 5 loops
- Click to place, then click again to confirm
- You now have 6 horizontal sections!
- Press
- Position the loops for anatomy:
- Press
GG(edge slide mode) - Click on each loop and slide it to approximate positions:
- Top loop: Shoulders/clavicle
- Second loop: Upper chest
- Third loop: Lower chest/ribcage
- Fourth loop: Waist
- Fifth loop: Upper hips
- Bottom: Lower hips/crotch
- Press
Step 4: Shape the Torso Form
- Enable Proportional Editing:
- Press
Oto toggle it on - Top of screen should show proportional editing icon enabled
- Press
- Shape from front view:
- Press
Numpad 1for front view - Press
1for vertex select mode - Select center front vertex at chest level
- Press
Gto move, adjust scroll wheel for influence size - Pull forward to create chest curve
- Repeat for other levels (waist narrows, hips widen)
- Press
- Shape from side view:
- Press
Numpad 3for side view - Select front center vertices
- Pull forward at chest (ribcage protrudes)
- Pull back slightly at waist
- Slight curve at lower back
- Create natural S-curve of spine!
- Press
- Check your work:
- Middle mouse drag to rotate view
- Does it look torso-like from all angles?
- Adjust as needed with proportional editing
Part 3: Preparing Connection Points (10 minutes)
Step 5: Create Arm Socket Area
- Add vertical loops for shoulder definition:
- Press
Ctrl + R - Hover over horizontal edge near shoulder
- Add 2 loops (scroll wheel)
- These define shoulder width
- Press
- Mark where arm will attach:
- Switch to face select mode:
3 - Front view:
Numpad 1 - Select 3-4 faces on side of torso at shoulder height
- This will be your arm socket
- Just select them for now—we won't extrude yet
- Switch to face select mode:
Step 6: Create Leg Socket Area
- Define leg attachment area:
- Select 4-6 faces at bottom of torso
- These will connect to legs later
- Make sure they're at hip width (not too narrow!)
- Create neck opening:
- Select faces at top of torso
- Press
I(inset) to create smaller opening - This is where neck/head will connect
- Make it roughly 1/2 the shoulder width
Part 4: Refinement and Polish (15 minutes)
Step 7: Add Subdivision Surface
- Exit Edit Mode:
- Press
Tabto return to Object Mode
- Press
- Add Subdivision Surface modifier:
- Modifier Properties panel (wrench icon)
- Click "Add Modifier"
- Choose "Subdivision Surface"
- Set Viewport level to 1
- Your torso becomes smooth!
- Check the result:
- Rotate view (middle mouse drag)
- Does it look organic and smooth?
- Notice how subdivision rounds everything
Step 8: Final Adjustments
- Return to Edit Mode for tweaks:
- Press
Tab - Subdivision is still visible in Edit Mode
- Press
- Refine proportions:
- Use Proportional Editing (
O) to adjust forms - Pull out chest slightly if too flat
- Narrow waist if needed
- Check front and side views
- Use Proportional Editing (
- Add subtle muscle forms (optional):
- Select center chest vertices
- Slight forward pull for pectoral muscles
- Keep it subtle—torso should look natural!
- Verify center line:
- Front view:
Numpad 1 - Press
Altand click center edge - This selects entire center edge loop
- Press
S,X,0,Enter - Centers all vertices perfectly (removes any asymmetry)
- Front view:
Project Success Checklist
✅ Verify Your Torso Is Complete
Check each item below. If you can check them all, congratulations—your torso is finished!
- ⬜ Torso has proper proportions (shoulders wider than hips, natural curves)
- ⬜ Mirror modifier is active and working (left half mirrors to right)
- ⬜ 5-6 horizontal edge loops define major body sections
- ⬜ Vertical loops are evenly spaced around torso
- ⬜ Center line is perfectly straight (X=0)
- ⬜ All faces are quads (no triangles or n-gons)
- ⬜ Arm socket areas defined (faces selected on sides)
- ⬜ Leg socket areas defined (faces at bottom)
- ⬜ Neck opening created at top
- ⬜ Subdivision Surface modifier applied (looks smooth)
- ⬜ Torso looks good from front, side, and perspective views
- ⬜ Shape is organic and human-like
Going Further (Optional Challenges)
🚀 Bonus Challenges
If you finished early and want more practice, try these extensions:
Challenge 1: Add Simple Arms
- Select arm socket faces
- Extrude (
E) outward 4-5 times to create simple arm - Add loop cuts at elbow position (3 loops)
- Test bending the elbow by rotating those loops
Challenge 2: Add Simple Legs
- Select leg socket faces
- Extrude (
E) downward to create legs - Add loop cuts at knee (4 loops)
- Taper legs toward ankles
Challenge 3: Add Basic Head
- Select neck opening faces
- Extrude (
E) upward to create neck cylinder - Add loop cuts to neck (2-3 loops)
- Extrude again for simple head shape (sphere-like)
Challenge 4: Experiment with Proportions
- Duplicate your torso (
Shift + D) - On the duplicate, make it heroic (wider shoulders, 8 heads tall)
- Or make it cartoony (shorter, rounder, 4 heads tall)
- See how topology works for different character types!
Troubleshooting Common Issues
🔧 Problem Solving Guide
Problem: Mirror isn't working
- Solution: Make sure you deleted the right half (not left)
- Check that X axis is enabled in mirror modifier
- Verify object origin is at world center
Problem: Torso looks blocky even with subdivision
- Solution: Add more edge loops (you might only have 3-4, need 5-6)
- Use proportional editing to create smoother curves
- Increase subdivision level to 2
Problem: Center line has a gap
- Solution: Enable "Clipping" in mirror modifier settings
- Select center vertices,
SX0to snap them - Enable "Merge" in mirror modifier
Problem: Proportions look wrong
- Solution: Load reference images and compare
- Use proportional editing to reshape major sections
- Remember: shoulders should be widest point (male) or hips (female)
Problem: Can't select center vertices
- Solution: Enable X-ray mode (
Alt + Z) - This lets you see and select through the mesh
Save Your Work!
💾 Important: Save Your Project
- Press
Ctrl + S(orCmd + Son Mac) - Choose a location (create a "Blender Projects" folder if you don't have one)
- Name it something like "character_torso_01.blend"
- Click "Save Blender File"
Why save? This torso is your foundation! You can use it as a starting point for future characters, modify it for different body types, or continue building a complete character.
🎉 Congratulations! You've just created your first character torso using professional modeling techniques! This might seem simple, but you've learned the exact workflow used by professionals at Pixar, Blizzard, and other top studios. The techniques you practiced—box modeling, mirror workflow, edge loop placement, subdivision—are the same ones used to create the characters you see in films and games. You've taken a huge step forward!
🎯 What You Accomplished
- ✅ Built a 3D character torso from a simple cube
- ✅ Used box modeling workflow professionally
- ✅ Applied Mirror Modifier for efficient symmetrical modeling
- ✅ Created clean quad topology suitable for animation
- ✅ Established proper human proportions
- ✅ Added Subdivision Surface for smooth, organic results
- ✅ Prepared connection points for limbs and head
- ✅ Gained hands-on experience with core character modeling techniques
You're now ready to build complete characters! Next up: arms, legs, heads, and beyond!
📚 Lesson Summary
Congratulations on completing this comprehensive lesson on character modeling workflow! You've covered an enormous amount of ground—from understanding the complete character pipeline to building your first character torso. Let's review everything you've learned and look ahead to your next steps in character creation.
What You've Learned
🎓 Key Concepts Mastered
1. Character Modeling Pipeline
- The complete workflow from concept to animation-ready character
- Understanding when to focus on proportions vs. details vs. topology
- How box modeling, sculpting, and poly modeling compare
- Why good topology from the start saves hours of work later
2. Proportions and Anatomy
- The head-height system for measuring character proportions (7.5-8 heads for adults)
- Key body landmarks: shoulders, chest, waist, hips, knees
- Facial proportions: eyes at halfway point, face divided into thirds
- How proportions change with age, gender, and style
- Essential muscle groups that define character form
3. Reference Setup
- Why references are professional tools, not "cheating"
- Different reference types: orthographic, concept art, anatomy, style
- How to import and align references in Blender
- Using background images effectively in orthographic views
- Working with references throughout the modeling process
4. Topology Principles
- The golden rules: quads, edge loops, face loops, strategic poles
- Why edge loops must follow muscles and bones
- The universal face topology "mask" pattern
- Polygon density variations (high at face/joints, lower elsewhere)
- How to check topology quality and avoid common mistakes
5. Box Modeling Technique
- The complete box modeling workflow: cube → form → extrude → refine
- Essential tools: Extrude, Loop Cut, Proportional Editing, Inset, Merge, Knife
- Building torso from simple primitives
- Extrusion strategies for arms and legs
- Maintaining clean topology while adding complexity
6. Mirror Workflow
- Setting up Mirror Modifier for symmetrical modeling
- Benefits: 50% less work, perfect symmetry, efficiency
- Working with center line and clipping
- When to keep mirror active vs. when to apply it
- Breaking symmetry intentionally for asymmetrical details
7. Face Modeling
- The critical importance of face topology for expressions
- Eye loops: concentric rings around eyes for blinking/expressions
- Mouth loops: concentric rings around lips for talking/smiling
- Connecting eye and mouth loops via cheeks (the "mask" pattern)
- Building eyes, nose, mouth, and ears with proper topology
8. Body Modeling
- Body modeling priorities: silhouette → proportions → topology → details
- Torso construction with key anatomical landmarks
- Arm and leg modeling with proper joint topology (3-6 loops at joints)
- Hand and foot modeling approaches (simple to detailed)
- Back anatomy and considerations
9. Detail and Optimization
- When to add detail and when to stop
- Subdivision Surface modifier for smooth organic forms
- Adding subtle muscle definition with Proportional Editing
- Polygon count guidelines for different platforms
- Final quality checks before declaring model "complete"
Critical Takeaways
💡 The Most Important Lessons
Topology Is Everything
Clean topology isn't optional for character models—it's the foundation of everything that comes next. Bad topology makes rigging painful, animation ugly, and texturing frustrating. Good topology makes all future work easier and produces professional results.
Proportions Before Details
The biggest beginner mistake is adding details before proportions are locked in. Work in low-poly until your character's silhouette and proportions are perfect. Only then add subdivision and details. This workflow is faster and produces better results.
References Are Professional Tools
Every professional character artist uses references—anatomy books, photo shoots, character sheets. They're not crutches; they're how you ensure accuracy and consistency. Embrace references as part of your workflow.
The Face Loop Pattern Is Universal
Concentric loops around eyes and mouth, connected via cheeks—this pattern appears in every professional character face from Pixar to AAA games. Learn it once, use it forever. It's the most important topology pattern in character modeling.
Mirror Modifier Is Your Best Friend
Model one half, get both sides free. Keep mirror active throughout modeling, only applying when ready for UV unwrapping or rigging. This workflow has been refined over decades—trust it.
Know When to Stop
"Good enough" and finished is infinitely more valuable than "perfect" and never completed. Modeling is one phase of many. Save energy for texturing, rigging, and animation.
Your Character Modeling Checklist
✅ Complete Character Modeling Checklist
Use this checklist for every character you create:
Planning Phase:
- □ Concept/reference images gathered
- □ Decided on character style (realistic, stylized, cartoon)
- □ Determined proportions (how many heads tall?)
- □ Set target polygon count based on use case
Setup Phase:
- □ References imported and aligned in Blender
- □ Mirror Modifier configured with Clipping enabled
- □ Workspace organized for efficient modeling
Base Modeling Phase:
- □ Torso blocked out with major forms
- □ Proportions match reference (checked in front/side views)
- □ Edge loops placed at key anatomical points
- □ All geometry is quads (no triangles/n-gons)
- □ Center line is clean and straight
Limbs and Features Phase:
- □ Arms extruded with 3-5 loops at elbows
- □ Legs extruded with 4-6 loops at knees
- □ Hands modeled (at appropriate detail level)
- □ Feet modeled (at appropriate detail level)
- □ Head/face with proper eye and mouth loops
- □ Neck connection clean with matching loop counts
Refinement Phase:
- □ Subdivision Surface modifier added
- □ Subtle anatomy/muscle forms added (if appropriate)
- □ All deformation tests passed (elbows, knees, waist bend smoothly)
- □ Topology quality checked (all quads, good edge flow)
- □ Polygon count within target range
Finalization Phase:
- □ Character looks good from all angles
- □ Silhouette is clear and readable
- □ Proportions verified against reference one final time
- □ All modifiers configured (Mirror before Subdivision in stack)
- □ File saved with clear naming convention
Common Beginner Mistakes (And How to Avoid Them)
⚠️ Learn from Common Errors
- Adding detail too early
- ❌ Mistake: Modeling facial wrinkles before proportions are right
- ✅ Solution: Perfect low-poly proportions first, add detail last
- Breaking topology for details
- ❌ Mistake: Adding triangles at joints for muscle definition
- ✅ Solution: Use Subdivision + edge loops, maintain quads everywhere
- Applying Mirror Modifier too early
- ❌ Mistake: Applying mirror, losing ability to easily edit symmetrically
- ✅ Solution: Keep mirror active until ready for UV unwrapping
- Forgetting to check side view
- ❌ Mistake: Modeling only in front view, creating flat character
- ✅ Solution: Constantly switch between front (Numpad 1) and side (Numpad 3)
- Placing eyes too high on head
- ❌ Mistake: Eyes near top of head (feels right but looks wrong)
- ✅ Solution: Eyes at halfway point of head—this is anatomically correct!
- Over-detailing hands and feet
- ❌ Mistake: Spending hours on individual finger joints for first character
- ✅ Solution: Start with simple hands/feet, add detail in later projects
- Not using Proportional Editing
- ❌ Mistake: Moving individual vertices, creating lumpy forms
- ✅ Solution: Use Proportional Editing (O) for smooth organic shapes
- Perfectionism paralysis
- ❌ Mistake: Tweaking same vertex for hours, never finishing
- ✅ Solution: Set time limits, remember "done" beats "perfect"
Next Steps in Your Character Creation Journey
🚀 Where to Go From Here
Immediate Next Steps (This Course):
- Lesson 37: Armature and Bones – Learn to create skeletal structures for your characters
- Lesson 38: Weight Painting – Control how mesh deforms with bones
- Lesson 39: Rigging Essentials – Build complete control rigs for animation
Skills to Practice:
- Model multiple characters: Different body types (athletic, stocky, thin, muscular)
- Try different styles: Realistic human, cartoon character, creature, robot
- Focus on weak areas: If hands are hard, model 10 different hands
- Speed challenges: Time yourself—can you model torso in 30 minutes?
- Copy references: Find professional character art and try to match it
Advanced Topics to Explore Later:
- Sculpting workflow (ZBrush-style organic modeling in Blender)
- Retopology (creating clean topology over sculpted meshes)
- Advanced face topology for realistic humans
- Clothing and accessories modeling
- Hair and fur creation
- Facial rigging for complex expressions
💪 Practice Projects to Build Your Skills
Project 1: Complete Simple Character
- Build entire body: torso, arms, legs, head
- Keep it simple (stylized/cartoon proportions)
- Goal: Complete workflow experience, not perfection
- Time limit: 3-4 hours total
Project 2: Character Variations
- Take your first character's topology
- Reshape it into 3 different body types
- Learn how same topology works for different proportions
- Save these as base meshes for future use
Project 3: Face Focus
- Model just a head and face
- Practice the mask pattern until it's automatic
- Try different face types (young, old, male, female)
- Goal: Master face topology completely
Project 4: Creature Design
- Apply character principles to non-human character
- Mix animal references (cat body, bird legs, etc.)
- Practice topology on unusual proportions
- Stretch your creative muscles!
Resources for Continued Learning
📖 Recommended Study Materials
Anatomy References:
- Books: "Figure Drawing for All It's Worth" by Andrew Loomis
- Online: Proko YouTube channel (figure drawing tutorials)
- 3D References: Character Artist (3D anatomy references)
Topology Study:
- Examine professional models (Blender Market, Sketchfab)
- Download free character models and study their topology
- Screenshot and trace edge flows to understand patterns
Community Resources:
- Blender Artists forum (share work, get feedback)
- r/blender subreddit (daily inspiration and tips)
- Polycount forum (industry-standard character art)
- ArtStation (professional character portfolios)
🎓 Final Thoughts: Character modeling is both an art and a craft. The technical skills—topology, proportions, workflow—can be learned through practice and study. But the artistry—making characters that feel alive, that have personality, that people connect with—comes from observation, experimentation, and putting your own creative vision into every model. You've learned the technical foundation today. The artistry will come with practice and passion. Keep modeling, keep learning, and most importantly, keep creating!
🎉 You've Completed Lesson 36!
You now understand the complete character modeling workflow used by professionals worldwide. From concept to animation-ready model, you have the knowledge to create any character you can imagine.
Key Achievements:
- ✅ Mastered professional character modeling pipeline
- ✅ Learned universal topology principles
- ✅ Built your first character torso with clean topology
- ✅ Understand box modeling, mirror workflow, and subdivision
- ✅ Ready to create complete characters from concept to completion
The skills you've learned today will serve you throughout your entire 3D career. Every character you create from now on will use these principles. Welcome to the world of character modeling—now go create something amazing!