🎲 Lesson 35: Rigid Body Physics
Ever wanted to create a tower of blocks that topples dramatically? A chain of dominos that cascade perfectly? Or maybe an epic destruction scene where objects crash and collide realistically? Welcome to rigid body physics—where solid objects behave according to real-world physics laws! Unlike cloth simulation where objects are soft and flexible, rigid body physics is all about hard surfaces that maintain their shape: cubes, spheres, furniture, buildings, and anything else that doesn't bend or deform. In this lesson, you'll learn how to make objects fall, bounce, collide, and interact in ways that would take days to animate manually.
🎯 What You'll Learn
- Rigid Body Fundamentals: Understand the difference between active and passive objects
- Basic Physics Setup: Create your first rigid body simulation
- Mass and Shape Properties: Control how objects behave physically
- Collision Settings: Fine-tune how objects interact with each other
- Constraints and Joints: Connect objects with hinges, motors, and more
- World Settings: Adjust gravity, speed, and simulation parameters
- Common Effects: Create domino chains, towers, destruction, and more
- Optimization and Baking: Make simulations run smoothly
⏱️ Estimated Time: 90-120 minutes
🎯 Project: Create a dynamic tower collapse simulation
In This Lesson
🔬 Understanding Rigid Body Physics
Before we jump into creating simulations, let's understand what makes rigid body physics different from other physics systems in Blender. The key is in the name: rigid. These objects don't bend, stretch, or deform—they maintain their shape no matter what happens to them.
What Are Rigid Bodies?
Think about everyday objects around you: a coffee mug, a book, a chair, wooden blocks, or a bowling ball. When these objects fall, collide, or roll, they keep their shape. They don't squish like cloth or flow like liquid. This is rigid body behavior!
💡 Real-World Examples
- Building Blocks: Stack them high and watch them tumble
- Bowling: Ball rolls down lane, hits pins, pins scatter
- Dominos: One falls, knocks the next, chain reaction
- Pool/Billiards: Balls collide and bounce off each other
- Jenga Tower: Remove blocks, tower becomes unstable, crashes
- Destruction Scenes: Buildings crumbling, walls breaking
How Rigid Body Physics Works
Blender's rigid body system calculates physics frame by frame, considering several factors:
Each frame, Blender:
- Checks for collisions between objects
- Calculates forces (gravity, impacts, constraints)
- Updates positions based on velocity and acceleration
- Updates rotations based on angular momentum
- Applies friction and damping to slow things down
🎮 Think of It Like a Video Game Physics Engine: Rigid body physics is exactly what powers realistic physics in video games. When you knock over crates in a game or watch debris fly in an explosion, that's rigid body simulation at work. Blender uses similar principles!
Rigid Body vs. Other Physics Systems
📊 Physics Systems Comparison
| System | Objects | Behavior | Use Cases |
|---|---|---|---|
| Rigid Body | Solid, hard objects | Keep shape, bounce, collide | Falling objects, destruction, collisions |
| Cloth | Flexible fabrics | Bend, fold, drape | Clothing, flags, curtains |
| Soft Body | Squishy objects | Deform, jiggle, compress | Jello, pillows, soft materials |
| Fluid | Liquids and gases | Flow, splash, pour | Water, smoke, fire |
Key Concepts You Need to Know
Before we start creating simulations, here are the fundamental concepts:
🔑 Essential Rigid Body Concepts
1. Active vs. Passive
- Active: Objects affected by physics (they fall, bounce, react)
- Passive: Objects that affect others but don't move (floors, walls)
- Think: Active = dynamic, Passive = static
2. Mass
- How heavy an object is
- Heavier objects hit harder but are harder to move
- Measured in kilograms
3. Collision Shape
- Simplified shape used for collision detection
- Box, Sphere, Mesh, Convex Hull, etc.
- Simpler shapes = faster simulation
4. Friction and Bounciness
- Friction: How much surfaces "stick" when sliding
- Bounciness: How much energy is retained after impact
- Combine to create realistic material behavior
5. Constraints
- Connections between objects
- Hinges, motors, springs, fixed joints
- Create complex mechanical behavior
⚠️ Important Limitation
Rigid bodies don't deform. If you need objects that break apart, bend, or shatter, you'll need to:
- Pre-fracture the object (break it into pieces beforehand)
- Use addons like Cell Fracture for destruction
- Combine with other simulation types
The object maintains its shape—it just moves, rotates, and collides as a solid unit.
When to Use Rigid Body Physics
Perfect for:
- Dice rolling, marbles falling, blocks tumbling
- Domino chain reactions
- Objects falling onto or off surfaces
- Bouncing balls, rolling wheels
- Furniture tipping over
- Pre-fractured destruction scenes
- Newton's cradle and pendulums
- Rube Goldberg machines
Not ideal for:
- Fabric, hair, or flexible materials (use Cloth)
- Liquids or gases (use Fluid simulation)
- Squishy, deformable objects (use Soft Body)
- Character animation (use rigging and keyframes)
💭 Creative Possibilities: Rigid body physics is incredibly versatile. From simple falling blocks to complex mechanical contraptions, from abstract art installations to realistic destruction scenes—once you understand the basics, your creativity is the only limit!
🚀 Your First Rigid Body Simulation
Let's dive right in with the classic rigid body example—dropping a cube onto a floor. This simple setup will teach you the fundamental workflow that applies to all rigid body simulations.
Setting Up the Scene
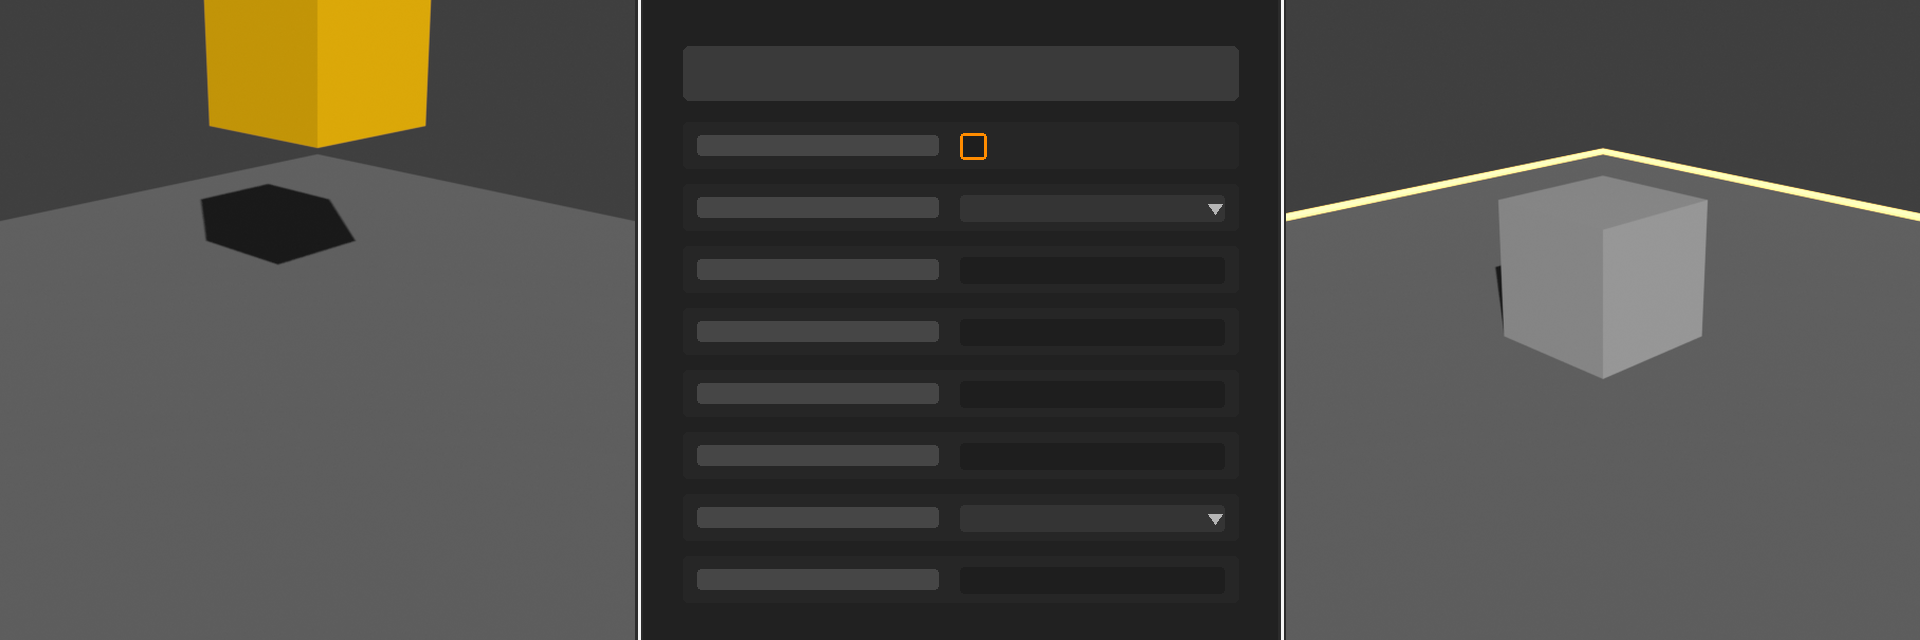
We need two things: an object that falls (active) and a surface to catch it (passive). Think of it like a ball and a floor—the ball falls, the floor stays put.
✅ Quick Start: Falling Cube
Step 1: Prepare Your Scene
- Start with a new Blender file (or File → New → General)
- You should have the default cube in the center
- Move it up: Select cube, press G, then Z, then 5, then Enter
- This positions the cube 5 units above the origin
Step 2: Create a Ground Plane
- Add a plane: Shift + A → Mesh → Plane
- The plane should be at the origin (Z = 0)
- Scale it larger: Press S, then 5, then Enter
- This creates a large floor to catch the cube
Step 3: Make the Cube Active (Falling)
- Select the cube
- Look for Physics Properties tab (bouncing ball icon on the right)
- Click the "Rigid Body" button at the top
- Make sure Type is set to "Active" (should be default)
- That's it! The cube is now affected by physics
Step 4: Make the Plane Passive (Floor)
- Select the plane
- Go to Physics Properties
- Click the "Rigid Body" button
- Change Type to "Passive" in the dropdown
- The plane is now a solid surface but won't move
Step 5: Run the Simulation!
- Make sure you're at frame 1 (Shift + Left Arrow if needed)
- Press Spacebar to play the animation
- Watch your cube fall and bounce on the ground!
- Press Spacebar again to stop
Congratulations! You just created your first rigid body simulation. That cube fell, bounced, and came to rest—all calculated by Blender's physics engine based on real-world physics!
🎯 What Just Happened: Blender calculated gravity pulling the cube down, detected when it hit the plane, calculated the impact force, applied a bounce based on the object's bounciness (elasticity), and gradually slowed it down with friction and damping. All this happens automatically!
Understanding What You See
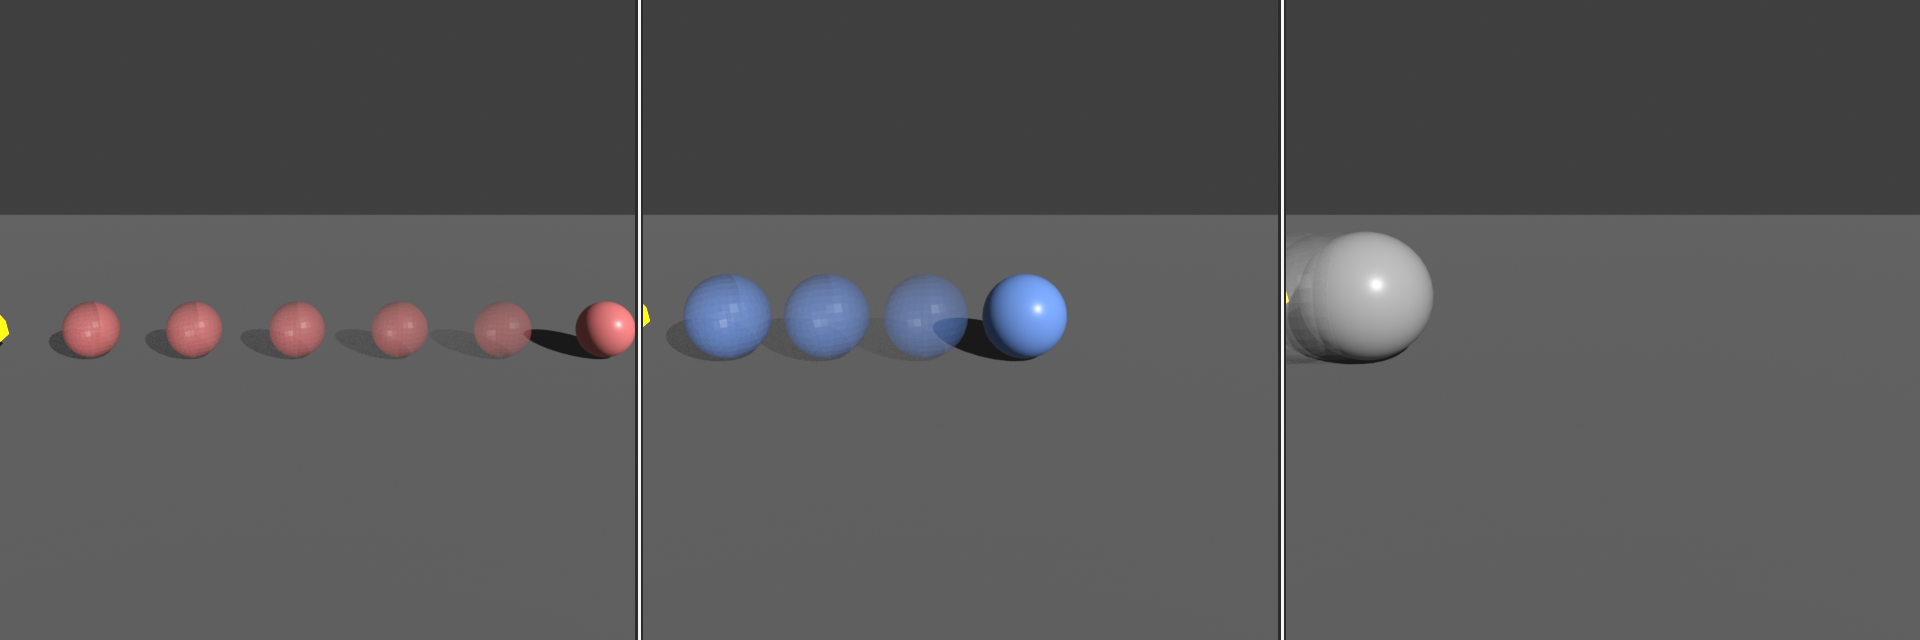
As you played the simulation, you witnessed several physics principles in action:
📚 Physics in Action
| Phase | What's Happening | Physics Principle |
|---|---|---|
| Initial Fall | Cube accelerates downward | Gravity (9.8 m/s²) |
| Impact | Cube hits plane, velocity reverses | Collision detection & response |
| Bounce | Cube bounces back up (lower height) | Elasticity (energy loss) |
| Settling | Multiple smaller bounces | Damping & energy dissipation |
| Rest | Cube stops moving | Friction & sleep threshold |
Exploring the Simulation
Now that you have a working simulation, let's explore what you can do with it:
🧪 Experiment with Your Simulation
Try This: Scrubbing Through Time
- After running the sim once, click and drag in the timeline
- You can move backward and forward through the animation
- The physics results are cached (stored in memory)
- Notice how smooth the movement is
Try This: Change Starting Height
- Go back to frame 1 (Shift + Left Arrow)
- Select the cube
- Move it higher: G, Z, 10, Enter
- Play the simulation again
- Notice: The cube falls faster and bounces higher!
Try This: Add More Cubes
- Go to frame 1
- Select your cube
- Duplicate it: Shift + D, then X (move along X), then 2, Enter
- The duplicate automatically has rigid body physics!
- Play the simulation—both cubes fall independently
- Duplicate more! Create 5-10 cubes at different positions
Try This: Make Cubes Collide
- Position some cubes so they'll hit each other during the fall
- Play the simulation
- Watch them bounce off each other!
- Each collision is calculated in real-time
⚠️ First-Time Simulation Notes
- Slow first playback is normal: Blender calculates physics in real-time on first play
- Second playback is faster: Results are cached in memory
- Changes reset the cache: Moving objects or changing settings requires recalculation
- Can't edit during playback: Stop the animation to make changes
The Physics Properties Panel

When you added rigid body physics, several settings appeared. Let's understand what they mean:
⚙️ Basic Rigid Body Settings
Type (Active vs. Passive):
- Active: Object affected by physics—falls, collides, bounces
- Passive: Acts as obstacle but doesn't move—floors, walls, ramps
- You can change this anytime!
Animated (Checkbox):
- Only visible for Passive objects
- Allows passive objects to move with keyframe animation
- Example: Animated platform that active objects can stand on
Dynamic (Checkbox):
- Only for Active objects
- When unchecked, object won't be affected by forces but can still collide
- Rarely used, keep it checked normally
Mass (kg):
- How heavy the object is (in kilograms)
- Default: 1.0 kg
- Heavier objects hit harder but are harder to move
Quick Experiment: Mass Differences
✅ Seeing Mass in Action
- Create two cubes at the same height, side by side
- Give both rigid body physics (Active)
- Select one cube, set Mass to 0.1 (light)
- Select other cube, set Mass to 10.0 (heavy)
- Play the simulation
- Observation: Both fall at the same speed (gravity affects equally)
- But when they hit the ground, heavy cube settles faster (more momentum)
Try This Next:
- Stack the light cube on top of the heavy cube
- Let them fall together
- See how they interact on impact!
💡 Real Physics Fact: In a vacuum, a feather and a bowling ball fall at the same speed! That's because gravity accelerates all objects equally regardless of mass. Mass matters for collisions, momentum, and how easily objects are moved by forces—but not for falling speed in gravity alone.
Common First-Time Issues
⚠️ Troubleshooting Your First Simulation
Problem: Nothing happens when I press play
- Check: Did you add Rigid Body physics to objects?
- Check: Is at least one object set to Active?
- Check: Is the timeline actually playing? (look for moving blue line)
Problem: Object falls through the floor
- Check: Is the floor set to Passive rigid body?
- Check: Is the floor actually below the falling object?
- Solution: Make sure floor has rigid body physics enabled
Problem: Objects move in slow motion
- This is normal! First playback calculates physics in real-time
- Second playback will be smooth (cached results)
- Or: You might have low frame rate scene settings
Problem: Objects explode or behave erratically
- Check: Objects aren't intersecting at frame 1
- Check: Object scales are applied (Ctrl + A → Apply Scale)
- Solution: Start with objects separated in space
💡 Pro Tip: The Ground Doesn't Have to Be a Plane
Any object can be passive! You can use:
- A bowl (objects roll inside it)
- A ramp (objects slide down)
- Complex terrain
- Architectural geometry
The passive object just needs to have Rigid Body physics with Type set to Passive. The shape determines how active objects interact with it!
⚡ Active vs. Passive Objects
Understanding the difference between Active and Passive rigid bodies is fundamental to creating successful simulations. This distinction determines which objects move and which stay put—it's like the difference between actors and the stage in a play.
Active Objects: The Dynamic Performers
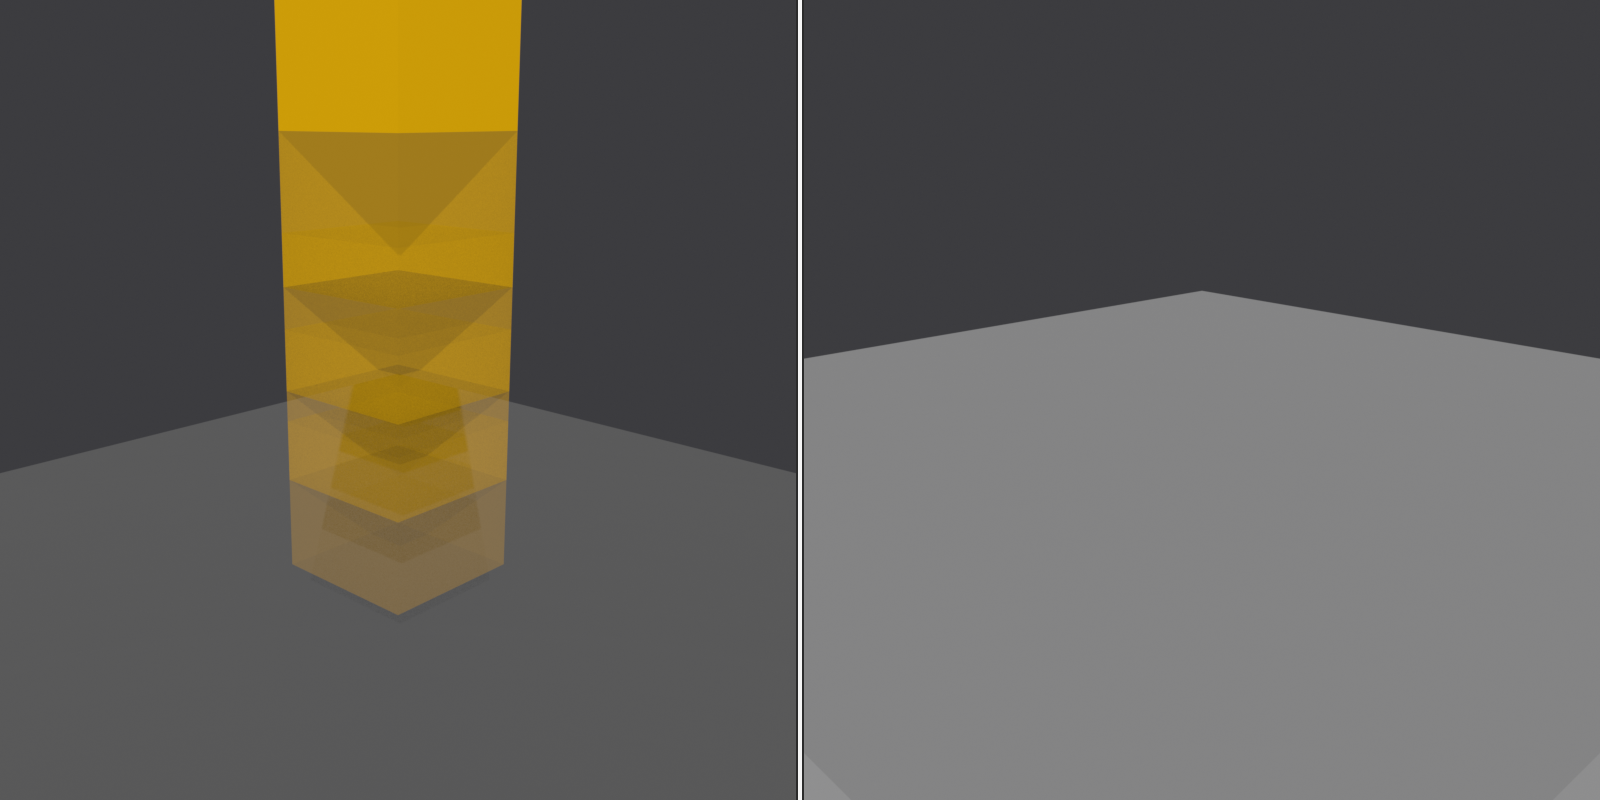
Active objects are the stars of your simulation. They respond to gravity, collide with things, bounce, roll, and generally behave according to physics laws.
✅ Active Object Characteristics
- Affected by gravity: They fall down unless supported
- Affected by forces: Wind, explosions, impacts move them
- Collide with everything: Both active and passive objects
- Can be pushed: Other active objects can move them
- Have momentum: Moving objects keep moving until forces stop them
- Require calculation: Physics engine constantly updates their state
Common Active Objects:
- Falling debris, tumbling blocks
- Balls, dice, marbles
- Dominos (before they're knocked over)
- Projectiles (cannonballs, thrown objects)
- Any object you want to see move dynamically
Passive Objects: The Immovable Stage
Passive objects create the environment for your simulation. They're solid obstacles that active objects interact with, but they themselves don't move or respond to physics (unless you animate them manually).
💡 Passive Object Characteristics
- Not affected by gravity: They stay exactly where you place them
- Immune to forces: Impacts, explosions, wind don't move them
- Collide with active objects: Active objects bounce off them
- Infinitely strong: Can't be pushed or knocked over
- Can be animated: You can keyframe their movement
- Computationally cheap: Don't require continuous physics calculation
Common Passive Objects:
- Floors, walls, ceilings
- Ramps, platforms, terrain
- Bowls, containers, barriers
- Large immovable structures (buildings, columns)
- Animated moving platforms
Comparing Active and Passive
📊 Active vs. Passive Comparison
| Aspect | Active | Passive |
|---|---|---|
| Gravity | ✅ Falls down | ❌ Stays put |
| Forces | ✅ Affected | ❌ Immune |
| Collisions | ✅ Bounces off things | ✅ Things bounce off it |
| Can Move | ✅ Via physics | ⚠️ Only via animation |
| Can Be Pushed | ✅ Yes | ❌ Immovable |
| Performance Cost | High (continuous calculation) | Low (static) |
| Best For | Moving objects, props | Environment, obstacles |
Practical Example: Building a Scene
Let's think about a bowling alley to understand when to use each type:
🎳 Bowling Alley Example
Active Objects (things that move):
- Bowling ball: Rolls down the lane
- Bowling pins: Get knocked over and scatter
- These need to respond to forces and collide with each other
Passive Objects (the environment):
- Lane surface: Ball rolls on it, doesn't move
- Gutters: Ball bounces off them, they stay put
- Back wall: Pins bounce off it, it doesn't move
- Pin deck: Surface pins sit on before being hit
Why This Matters:
- Making everything Active would be computationally expensive
- The lane doesn't need physics—it never moves!
- Passive objects provide a stable environment
- Performance is better with fewer active objects
Switching Between Active and Passive
Sometimes you need to change an object from one type to another. This is completely fine and often useful!
✅ How to Switch Types
- Select the object
- Go to Physics Properties
- Find the "Type" dropdown (under Rigid Body section)
- Select Active or Passive
- Simulation updates immediately
When to Switch:
- Dominos: Start as Active, but could be Passive until first one is hit
- Props: Passive for stability, Active when you want them to fall
- Optimization: Make settled objects Passive to improve performance
- Debugging: Temporarily make Active objects Passive to isolate issues
Animated Passive Objects
Here's where things get interesting! Passive objects can move if you animate them with keyframes. This creates moving platforms, animated obstacles, and more.
💡 Animated Passive Objects
Enable Animation:
- Select your passive object
- In Physics Properties, enable "Animated" checkbox
- Now you can keyframe its position/rotation
- Active objects will react to its movement!
Cool Uses:
- Moving platform: Elevator that carries active objects
- Swinging pendulum: Passive object that knocks active objects
- Rotating obstacles: Windmill blades that hit things
- Opening doors: Door pushes active objects as it opens
Important Note:
- Animated passive objects push active objects
- But active objects can't push the passive object back
- It's one-way interaction: animated object wins!
Example: Creating a Moving Platform
✅ Quick Tutorial: Animated Platform
- Create the platform:
- Add a cube: Shift + A → Mesh → Cube
- Scale it flat: S, Z, 0.2, Enter
- Scale it wide: S, 2, Enter
- Make it passive animated:
- Add Rigid Body physics
- Set Type to Passive
- Enable "Animated" checkbox
- Animate the platform:
- At frame 1: Position at origin
- Press I → Location (creates keyframe)
- Go to frame 100
- Move platform: G, Z, 5, Enter
- Press I → Location again
- Add active objects:
- Place small cubes on the platform
- Give them Active rigid body physics
- Play simulation:
- Platform rises, carrying the cubes!
- Cubes stay on top due to collision
🎮 Real-World Application: Video games use this exact concept! Moving platforms, elevators, rotating obstacles—they're all animated passive rigid bodies that active objects (like the player character) interact with. You're learning professional game development techniques!
Active-to-Passive Performance Trick
💡 Pro Optimization Technique
For large simulations with hundreds of objects:
- Start: All objects Active
- After they settle: Identify objects that stopped moving
- Convert them: Change settled objects to Passive
- Result: Physics engine has fewer objects to calculate
- Performance: Simulation runs much faster!
When to Use:
- Building collapse with many pieces
- Avalanche or landslide simulations
- Cascading domino effects
- Any scene with 100+ active objects
Note: This is usually done after baking the simulation for part of the frames, then continuing with fewer active objects.
Common Mistakes with Active/Passive
⚠️ Avoid These Errors
Mistake 1: Making everything Active
- Problem: Floor falls down, walls move, chaos!
- Solution: Environment should be Passive
- Only objects you want to see move should be Active
Mistake 2: Making moving objects Passive
- Problem: Object doesn't fall or react to physics
- Solution: Objects that should move need to be Active
- Passive objects only move via animation
Mistake 3: Forgetting "Animated" checkbox
- Problem: Keyframed passive object doesn't affect active objects
- Solution: Enable "Animated" on passive objects you keyframe
- Without this, animation is ignored by physics
Mistake 4: Too many Active objects
- Problem: Simulation becomes very slow
- Solution: Use Passive for any object that doesn't need to move
- Each Active object increases calculation time
⚙️ Physical Properties
Now that you understand Active and Passive objects, let's dive into the properties that control how they behave. These settings determine whether your object acts like a feather or a boulder, bounces like rubber or settles like lead.
Mass: The Foundation of Physics
Mass is how much "stuff" your object is made of, measured in kilograms. It's one of the most important properties because it affects how objects interact with each other.
⚖️ Understanding Mass
What Mass Affects:
- Collision impact: Heavier objects hit harder
- Resistance to movement: Heavy objects are harder to push
- Momentum: Heavy moving objects keep moving longer
- Stability: Heavy objects are harder to knock over
What Mass DOESN'T Affect:
- Fall speed: All objects fall at same rate in gravity (like real physics!)
- Visual appearance: Mass is invisible, purely physical
Real-World Mass References:
- 0.1 kg: Apple, baseball
- 1.0 kg: Textbook, small laptop (default value)
- 5.0 kg: Bowling ball, small monitor
- 10.0 kg: Microwave, bag of concrete
- 100.0 kg: Average adult human, large furniture
- 1000.0 kg: Small car
🧪 Mass Experiment: Heavy vs. Light
- Create three cubes in a row
- Left cube: Mass 0.1 (light)
- Middle cube: Mass 1.0 (default)
- Right cube: Mass 10.0 (heavy)
- Add a large sphere above them (Mass 5.0)
- Make sphere Active, let it fall onto the cubes
- Observe: Light cube flies away, heavy cube barely moves!
Friction: The Sliding Controller
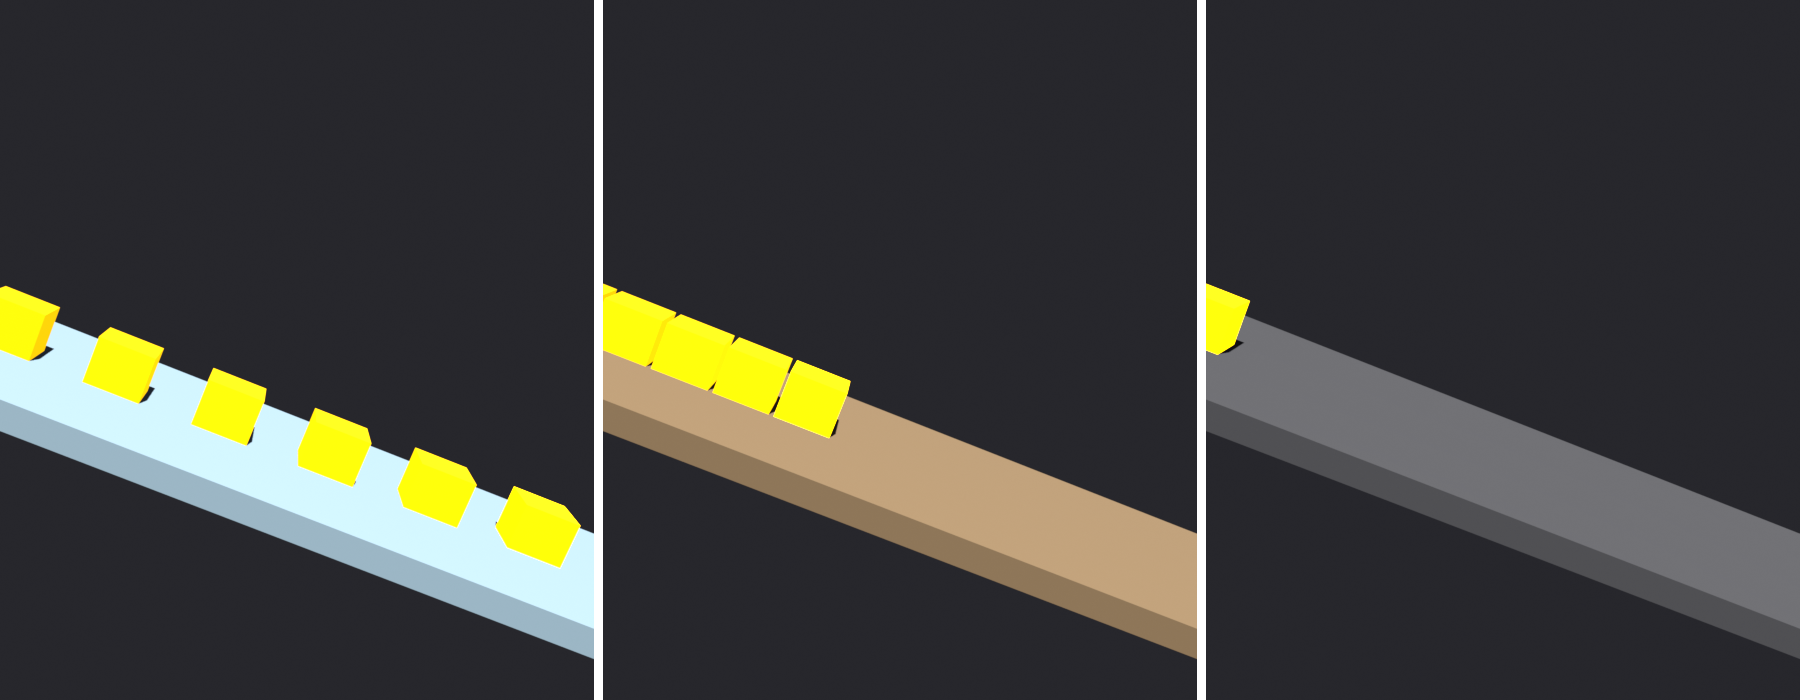
Friction determines how much surfaces resist sliding against each other. Think about ice (low friction) versus rubber (high friction).
🛝 Friction Settings
Friction Value Range: 0.0 (no friction) to 1.0+ (high friction)
Default: 0.5
Friction Values by Material:
- 0.0-0.1: Ice, oil, perfectly slippery
- 0.2-0.3: Wet surfaces, polished metal
- 0.5: General default, normal surfaces
- 0.7-0.8: Wood on wood, concrete
- 0.9-1.0: Rubber, sandpaper, very grippy
What Friction Controls:
- How easily objects slide down slopes
- How quickly rolling objects stop
- Whether stacked objects stay together or slide apart
- How much grip surfaces have
💡 Friction Interaction
When two objects collide, Blender averages their friction values:
- Object A (friction 0.2) hits Object B (friction 0.8)
- Effective friction = approximately 0.5
- Both objects' friction matters!
Pro Tip: For a very slippery object, give it low friction AND give the surface it's on low friction. Double low = super slippery!
Bounciness (Elasticity): The Bounce Factor
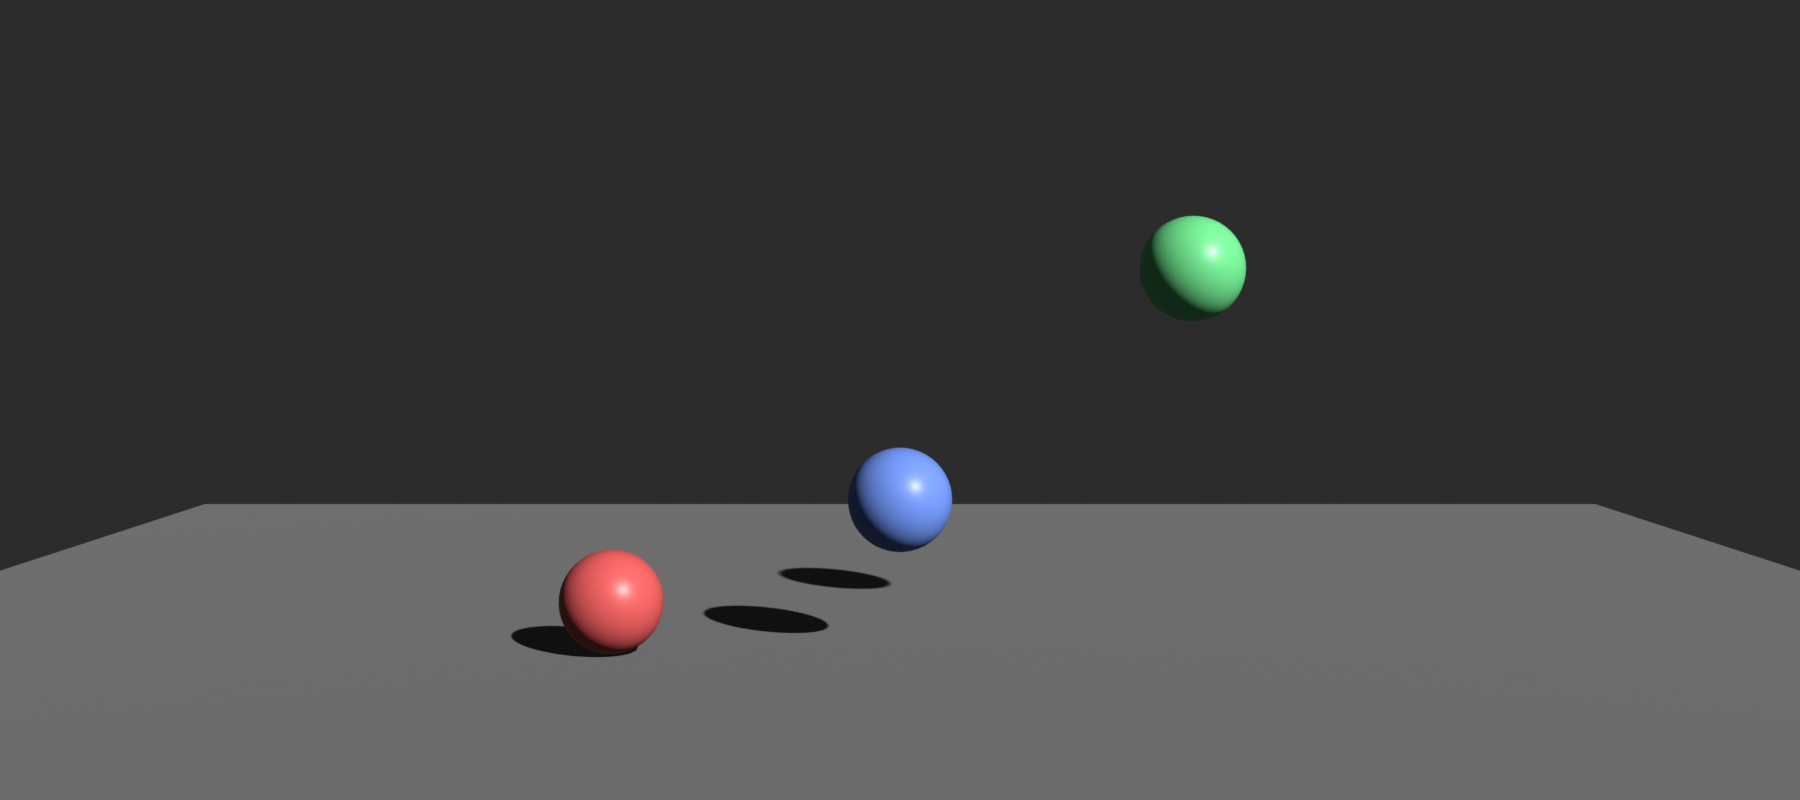
Bounciness determines how much kinetic energy is retained after a collision. It's technically called "elasticity" or "restitution" in physics.
⚾ Bounciness Settings
Bounciness Value Range: 0.0 (no bounce) to 1.0+ (super bounce)
Default: 0.0
Bounciness by Material:
- 0.0: Clay, putty, beanbag—absorbs all energy, no bounce
- 0.1-0.3: Wood, plastic—small bounce
- 0.4-0.6: Basketball, tennis ball—noticeable bounce
- 0.7-0.9: Super ball, rubber ball—high bounce
- 1.0: Perfect elasticity (theoretical, ball returns to same height)
- 1.0+: Gains energy (unrealistic but fun for effects!)
What Bounciness Controls:
- How high objects bounce after impact
- Whether objects settle quickly or keep bouncing
- Energy transfer in collisions
🧪 Bounciness Experiment
- Create a ground plane (Passive, default settings)
- Create three spheres at same height
- Sphere 1: Bounciness 0.0 (no bounce)
- Sphere 2: Bounciness 0.5 (medium bounce)
- Sphere 3: Bounciness 0.9 (super bounce)
- All Active, let them fall
- Watch: First one thuds, second bounces moderately, third bounces high multiple times!
🎯 Real Physics Note: In the real world, no material has perfect elasticity (1.0). Even super balls lose some energy as heat and sound with each bounce. That's why even bouncy balls eventually stop bouncing. Values above 1.0 are physically impossible but great for stylized effects!
Damping: The Slow-Down Force
Damping simulates air resistance and internal friction. It gradually slows objects down over time.
💨 Damping Settings
Two Types of Damping:
- Translation Damping: Slows down movement (sliding, falling)
- Rotation Damping: Slows down spinning
Value Range: 0.0 (no damping) to 1.0 (extreme damping)
Default: 0.04 for both types
When to Adjust:
- Lower (0.0-0.02): Objects in space/vacuum, frictionless environments
- Default (0.04): Normal air resistance, good for most scenes
- Higher (0.1-0.5): Underwater effects, thick atmosphere, slow motion
- Very High (0.5-1.0): Moving through syrup, exaggerated slow effects
What Damping Does:
- Helps simulations stabilize and settle
- Prevents endless bouncing or spinning
- Simulates air/water resistance
- Makes animations look more natural
⚠️ Damping vs. Friction
These are easy to confuse but serve different purposes:
- Friction: Acts at contact surfaces (sliding, rolling contact)
- Damping: Acts on the object itself, always (air resistance, internal losses)
Example: A ball rolling in space has no friction (no air) but could still have damping (internal losses in the ball material itself).
Dynamic Settings
🎚️ Additional Dynamic Properties
Dynamic (Checkbox):
- Usually enabled by default for Active objects
- When disabled: Object can collide but won't be affected by forces
- Use case: Animated active objects (keyframed but still collide)
- Rarely disabled—keep it on in most cases
Enable Deactivation (Checkbox):
- Default: Enabled
- Allows objects to "sleep" when they stop moving
- Sleeping objects don't calculate until something hits them
- Performance benefit: Settled objects don't use CPU
- Keep enabled unless you have specific reasons not to
Start Deactivated (Checkbox):
- Object starts "asleep" and only wakes when hit
- Use case: Objects that don't move until something disturbs them
- Example: Bowling pins that sit still until ball hits them
Combining Properties for Realistic Materials
🎨 Material Presets
| Material | Mass | Friction | Bounciness | Damping |
|---|---|---|---|---|
| Rubber Ball | 0.5 | 0.8 | 0.8 | 0.04 |
| Bowling Ball | 7.0 | 0.3 | 0.1 | 0.02 |
| Ice Cube | 0.1 | 0.05 | 0.2 | 0.04 |
| Metal Box | 10.0 | 0.4 | 0.2 | 0.04 |
| Wooden Block | 1.5 | 0.6 | 0.2 | 0.04 |
| Concrete Block | 20.0 | 0.8 | 0.05 | 0.05 |
| Plastic Toy | 0.2 | 0.5 | 0.4 | 0.04 |
💭 Tuning Tip: Start with real-world material values as a baseline, then adjust to taste. Sometimes you need to exaggerate properties for dramatic effect—a bowling ball in animation might be heavier and bouncier than reality for better visual impact!
💡 Pro Workflow: Property Testing
- Start with defaults: Mass 1.0, Friction 0.5, Bounciness 0.0
- Run basic test: See how it behaves
- Adjust one at a time: Change mass, test. Change friction, test.
- Compare to reference: Think "should this be heavier/lighter than X?"
- Fine-tune: Small adjustments make big differences
🔷 Collision Shapes
Here's a crucial concept that dramatically affects both simulation accuracy and performance: collision shapes. Your beautiful high-poly mesh might look complex, but for physics calculations, Blender can use a simplified shape. This is like having a stunt double for dangerous scenes—the simple shape does the physics work while your detailed mesh looks pretty!
Why Collision Shapes Matter
Calculating precise collisions between complex meshes is computationally expensive. A sphere with 10,000 faces colliding with another complex object? That's millions of calculations per frame! Collision shapes are simplified versions that make physics fast while maintaining believable behavior.
💡 The Performance vs. Accuracy Trade-off
- Simple shapes (Box, Sphere): Super fast but approximate
- Complex shapes (Mesh, Convex Hull): Accurate but slow
- The art: Finding the right balance for your scene
Think of it like this: A basketball doesn't need to know about every tiny bump on its surface to bounce correctly. A sphere collision shape works perfectly and calculates instantly!
Available Collision Shapes
🔷 Collision Shape Types
1. Box (Default for cubes)
- Best for: Cubes, rectangular objects, buildings, crates
- Performance: Excellent (very fast)
- Accuracy: Perfect for box-like objects
- Rotation: Oriented to object's bounding box
2. Sphere
- Best for: Balls, planets, rounded objects
- Performance: Excellent (very fast)
- Accuracy: Perfect for spherical objects
- Note: Sized to fit entire object (might be oversized)
3. Capsule
- Best for: Characters, cylinders with rounded ends, pills
- Performance: Excellent (very fast)
- Accuracy: Good for elongated rounded objects
- Use case: Perfect for character collision proxies
4. Cylinder
- Best for: Cans, barrels, columns
- Performance: Excellent (very fast)
- Accuracy: Good for cylindrical objects
- Note: Flat ends, not rounded
5. Cone
- Best for: Traffic cones, pyramids, pointed objects
- Performance: Excellent (very fast)
- Accuracy: Good for cone-shaped objects
- Limitation: Less commonly used
6. Convex Hull
- Best for: Irregular but convex objects (no indentations)
- Performance: Good (moderate speed)
- Accuracy: Very good—wraps tight around object
- How it works: Imagines shrink-wrapping your object
- Limitation: Can't handle concave shapes (bowls, caves, "C" shapes)
7. Mesh
- Best for: Complex shapes, terrain, architectural details
- Performance: Poor (slow with high poly)
- Accuracy: Perfect—uses actual mesh geometry
- ONLY for Passive objects! Active objects can't use Mesh shape
- Use case: Detailed ground, complex environment pieces
⚠️ Critical Limitation: Mesh Shape
Mesh collision shape ONLY works on Passive objects!
- Active objects cannot use Mesh shape (will default to Convex Hull)
- If you need complex Active collision, use multiple simple shapes or Convex Hull
- Passive terrain, floors, walls? Mesh is perfect!
Choosing the Right Collision Shape
✅ Collision Shape Decision Guide
Use Box when:
- Object is cube-like, rectangular, or has flat sides
- Building blocks, crates, books, furniture
- Speed is priority and shape is close to box
Use Sphere when:
- Object is round from all angles
- Balls, marbles, planets, bubbles
- Rolling is important behavior
Use Capsule when:
- Object is tall and rounded
- Character stand-ins, bottles, pills
- Need smooth rounded collision
Use Cylinder when:
- Object is cylindrical with flat ends
- Cans, barrels, columns, wheels (when standing)
Use Convex Hull when:
- Object has irregular shape but no holes/indentations
- Rocks, potatoes, simple organic shapes
- Need better accuracy than primitives
- Object is Active (can't use Mesh)
Use Mesh when:
- Object is Passive and has complex details that matter
- Terrain, detailed floors, architectural elements
- Has concave features (bowls, caves, indentations)
- Accuracy is more important than speed
Changing Collision Shapes
✅ How to Change Collision Shape
- Select your rigid body object
- Go to Physics Properties
- Find "Collisions" section
- Click the "Shape" dropdown
- Select new shape
- Simulation updates immediately
Visual Feedback:
- In viewport, you can see collision shape as wireframe overlay
- Enable in Viewport Overlays → Physics → Rigid Body
- Helps visualize what the physics engine "sees"
Collision Margin
This is a subtle but important setting that adds an invisible padding around collision shapes.
📏 Collision Margin Setting
What it does:
- Adds invisible buffer zone around collision shape
- Default: 0.04 units
- Helps prevent objects from getting "stuck" in each other
- Like a personal space bubble
When to adjust:
- Increase (0.1-0.2): Objects penetrating each other slightly
- Decrease (0.01-0.02): Need very tight stacking, gaps too visible
- Keep default: Works well in most cases
Note: Larger margin = more stable but less accurate. Smaller = more accurate but can cause penetration.
Practical Examples: Choosing Shapes
🎯 Real-World Shape Choices
| Object | Best Shape | Why |
|---|---|---|
| Basketball | Sphere | Perfect sphere, needs to roll smoothly |
| Wooden Crate | Box | Rectangular, fast collision |
| Soda Can | Cylinder | Cylindrical shape matches perfectly |
| Rock | Convex Hull | Irregular but no holes, Active object |
| Bowl (Passive) | Mesh | Concave interior matters for objects inside |
| Character | Capsule | Tall, rounded, smooth collision |
| Terrain (Passive) | Mesh | Complex surface detail matters |
| Domino | Box | Thin rectangle, box works perfectly |
Performance Impact
⚡ Collision Shape Speed Comparison
Ranked from fastest to slowest:
- Sphere: ⚡⚡⚡⚡⚡ Fastest (single point and radius)
- Box: ⚡⚡⚡⚡⚡ Fastest (6 planes)
- Capsule: ⚡⚡⚡⚡ Very fast (2 spheres + cylinder)
- Cylinder: ⚡⚡⚡⚡ Very fast
- Cone: ⚡⚡⚡ Fast
- Convex Hull: ⚡⚡ Moderate (depends on vertex count)
- Mesh: ⚡ Slow (depends heavily on polygon count)
Performance Tips:
- Use simplest shape that gives acceptable results
- Reserve Convex Hull for when primitives don't work
- Use Mesh only for Passive objects where accuracy is critical
- 100 spheres simulate faster than 10 high-poly mesh collisions
💡 Pro Secret: Many professional destruction scenes use Box collision shapes even for irregularly shaped debris! As long as objects tumble and bounce believably, viewers don't notice that collision shapes are simpler than visual meshes. Speed matters more than perfect accuracy!
Advanced: Compound Shapes
💡 Creating Complex Collision with Simple Shapes
For very complex objects, you can use multiple simple collision objects:
- Visual mesh: Your detailed, pretty object
- Collision proxies: Multiple simple shapes (invisible) that approximate the form
- Parent collision to visual: They move together
- Hide collision objects: Only visual mesh renders
Example: Chair
- Visual: High-poly detailed chair model
- Collision: 5 boxes (seat, back, four legs)
- Result: Fast, accurate collision without mesh shape
⚠️ Common Collision Shape Mistakes
- Using Mesh for Active objects: Blender will override to Convex Hull
- Over-complicating: Mesh shape for everything = slow simulation
- Wrong shape orientation: Cylinder lying on side needs Convex Hull, not Cylinder
- Forgetting margin: Objects stuck? Check collision margin
- Not visualizing: Enable collision shape overlay to see what physics "sees"
🔗 Constraints and Joints
Now we're getting into the really cool stuff! Constraints allow you to connect rigid body objects together in specific ways. Think hinges on a door, wheels on a car, a pendulum swinging, or a chain of connected links. Constraints create mechanical relationships between objects that follow real physics.
What Are Rigid Body Constraints?
Constraints are invisible connections between rigid body objects that limit or control how they move relative to each other. They're like the joints in your skeleton—your elbow can bend but not twist sideways.
💡 Understanding Constraints
- Think of them as: Invisible connectors between objects
- They define: How objects can move relative to each other
- Common uses: Doors, wheels, chains, ragdolls, machines
- Physics-based: Connections respond to forces naturally
Real-World Examples:
- Hinge: Door on a wall, laptop lid
- Ball-and-socket: Shoulder joint, trailer hitch
- Slider: Drawer sliding in/out, piston in engine
- Spring: Car suspension, pogo stick
Types of Rigid Body Constraints
🔧 Constraint Types
1. Fixed (Glue)
- Function: Objects move as one unit, completely locked together
- Think: Welded joint, super glue
- Use cases: Permanently attach objects, compound objects
- Example: Gluing a handle to a sword
2. Point (Ball-and-Socket)
- Function: Objects share a single pivot point, can rotate freely around it
- Think: Shoulder joint, chain link
- Degrees of freedom: 3 rotational axes
- Use cases: Pendulums, chains, rope connections
- Example: Wrecking ball on a cable
3. Hinge
- Function: Objects rotate around single axis only
- Think: Door hinge, elbow joint
- Degrees of freedom: 1 rotational axis
- Use cases: Doors, flaps, rotating wheels
- Example: Door swinging open
- Extra: Can add limits (door only opens 90°), motors (powered rotation)
4. Slider (Piston)
- Function: Objects slide along single axis only
- Think: Drawer, piston
- Degrees of freedom: 1 translational axis
- Use cases: Drawers, sliding doors, pistons
- Example: Drawer sliding in and out
- Extra: Can set limits (drawer only opens 30cm)
5. Piston (Slider + Spring)
- Function: Slider with spring force
- Think: Car shock absorber
- Use cases: Suspension, springy connections
- Example: Car bouncing on suspension
6. Generic (Fully Customizable)
- Function: Customize every degree of freedom independently
- Think: Swiss army knife of constraints
- Use cases: Complex joints, custom limitations
- Complexity: Most powerful but most complex to set up
7. Generic Spring
- Function: Generic constraint with springs on all axes
- Think: Flexible, bouncy connections
- Use cases: Soft connections, ragdoll physics
- Example: Floppy antenna on a car
8. Motor
- Function: Powered rotation at constant speed
- Think: Electric motor, fan blade
- Use cases: Spinning wheels, rotating fans, conveyor belts
- Example: Fan blades spinning continuously
Creating Your First Constraint: Swinging Pendulum
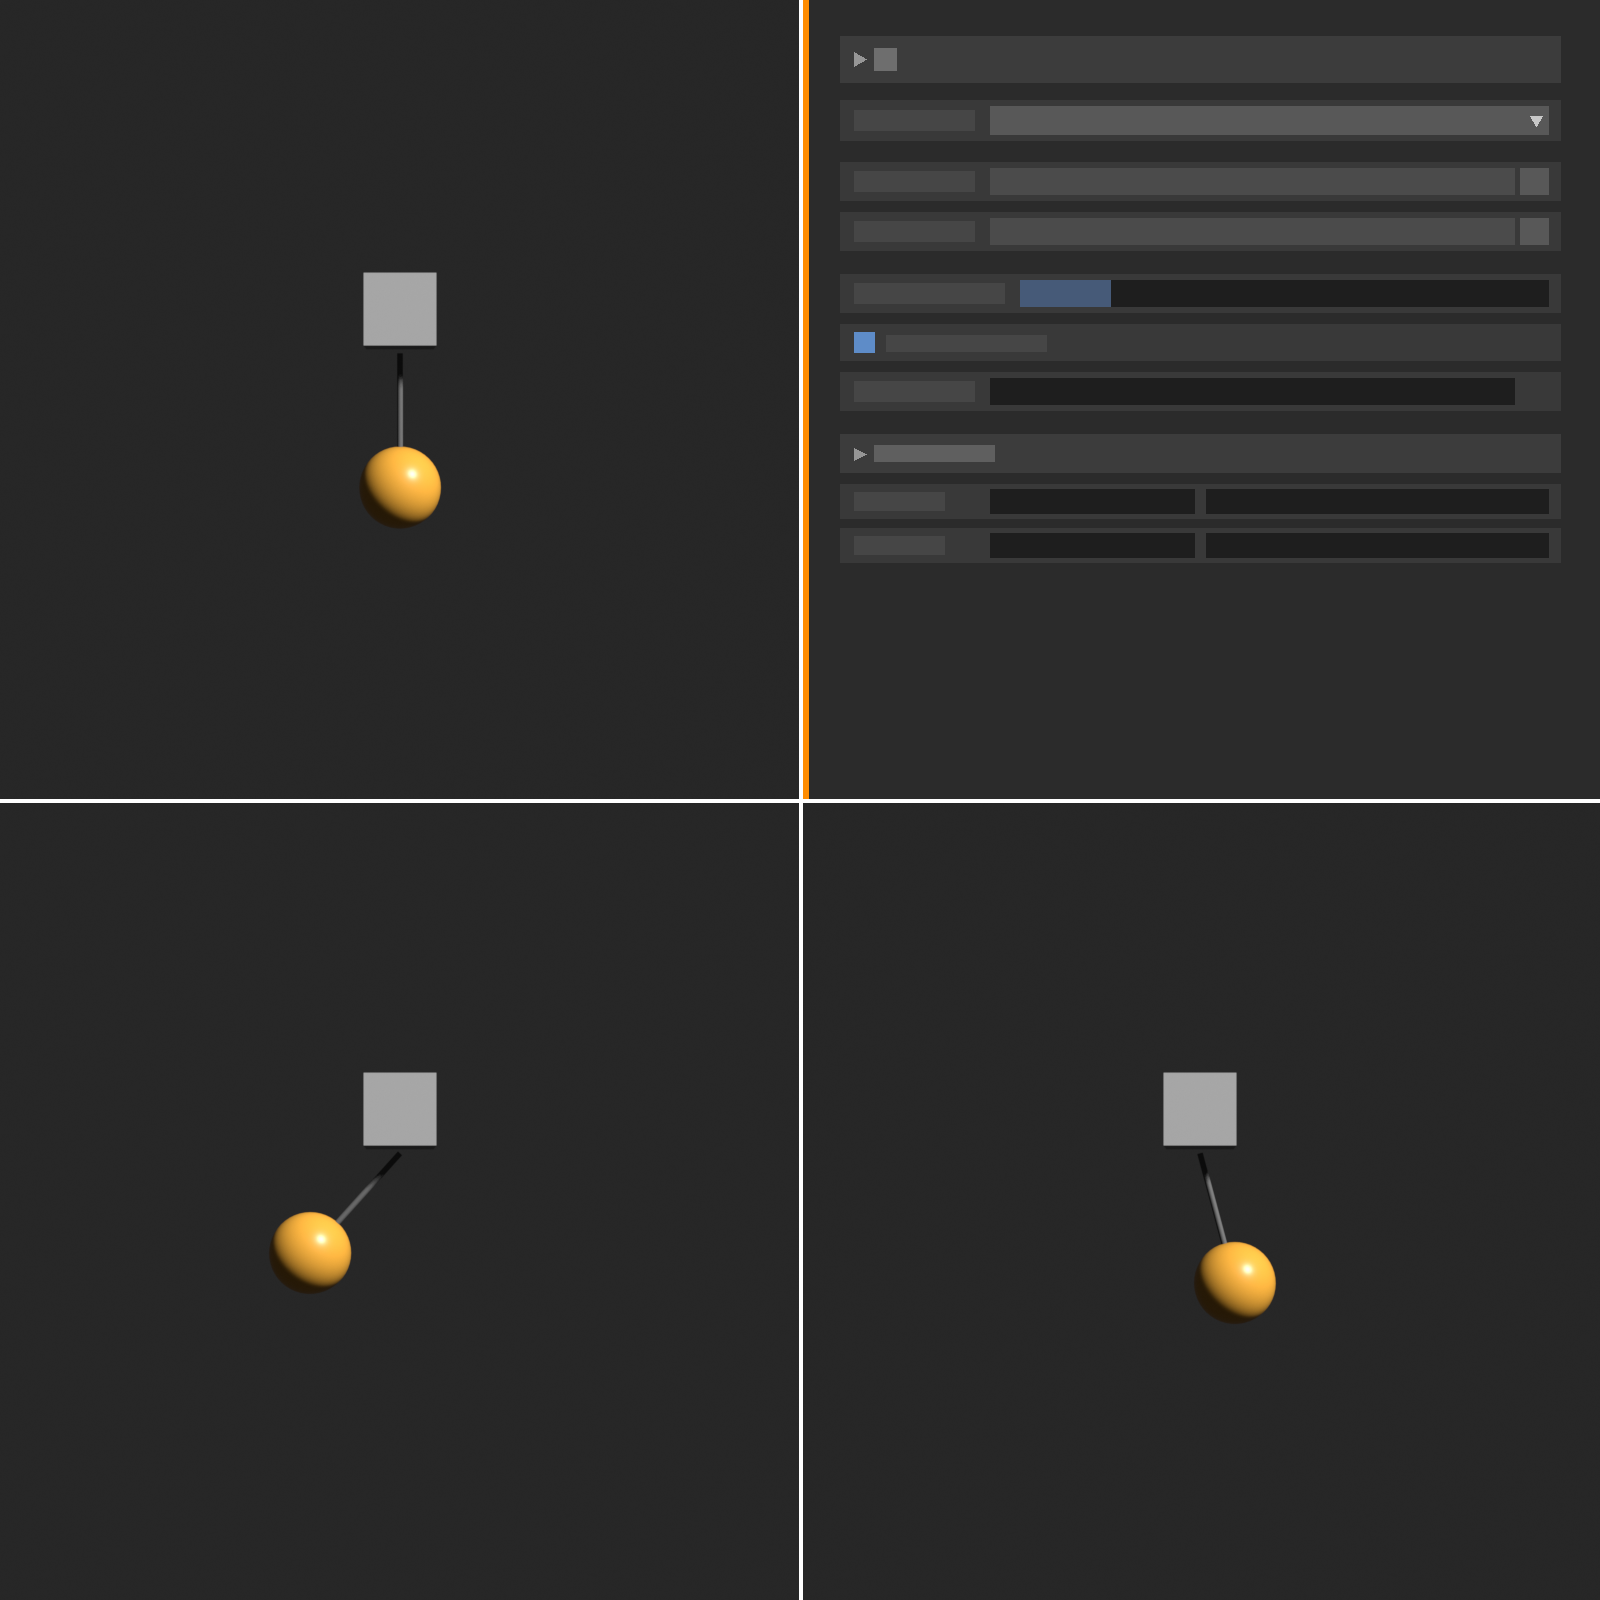
✅ Tutorial: Simple Pendulum
Step 1: Create the Objects
- Add a small cube: Shift + A → Mesh → Cube, scale to 0.3
- Position it at origin
- Add an UV Sphere: Shift + A → Mesh → UV Sphere
- Move sphere down: G, Z, -3, Enter (hangs below cube)
Step 2: Set Up Physics
- Select cube → Add Rigid Body → Set to Passive
- Select sphere → Add Rigid Body → Set to Active
- Cube acts as anchor point (doesn't move)
- Sphere will swing (affected by gravity)
Step 3: Add the Constraint
- Shift + A → Force Field → Rigid Body Constraint
- An empty appears (looks like a small octahedron)
- Position it at the cube's location (Shift + S → Cursor to Selected, then Shift + S → Selection to Cursor)
Step 4: Configure the Constraint
- With constraint selected, go to Physics Properties
- Set Type to Point
- In Object 1, select the cube (click eyedropper, click cube)
- In Object 2, select the sphere
- Objects are now connected!
Step 5: Test the Pendulum
- Go to frame 1
- Select sphere, move it to the side: G, X, 2, Enter
- Press Spacebar to play
- Watch the sphere swing back and forth like a pendulum!
Congratulations! You just created a physics-based pendulum. The sphere swings naturally under gravity while staying connected to the anchor point.
Creating a Hinged Door
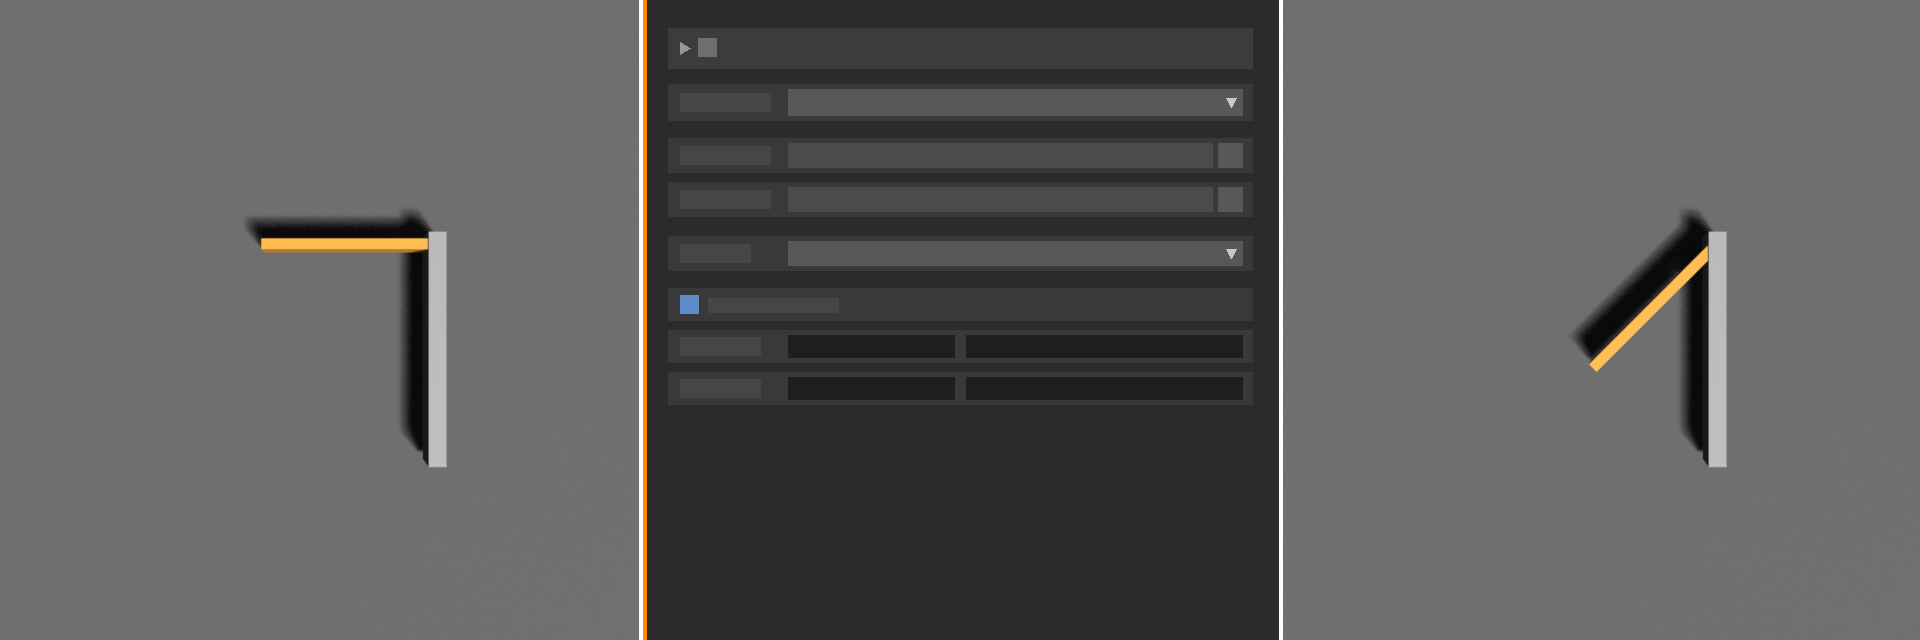
✅ Tutorial: Swinging Door
Step 1: Create Door and Frame
- Add a cube for door: Scale flat (S, X, 0.1), scale tall (S, Z, 2)
- Add a cube for door frame: Position to side of door
- Door should be next to frame, aligned at one edge
Step 2: Physics Setup
- Frame: Rigid Body → Passive
- Door: Rigid Body → Active
Step 3: Add Hinge Constraint
- Add Rigid Body Constraint empty
- Position it at the edge where door meets frame (hinge location)
- Set Type to Hinge
- Object 1: Frame, Object 2: Door
Step 4: Set Hinge Axis
- In constraint settings, find "Axis" setting
- Set to Z axis (door rotates around vertical axis)
- You can enable limits: 0° to 90° (door only opens one way)
Step 5: Test
- Add a sphere to push the door open
- Position sphere to fly toward door
- Sphere hits door, door swings open on hinge!
Constraint Settings Deep Dive
⚙️ Common Constraint Settings
Object 1 & Object 2:
- The two rigid bodies connected by this constraint
- Use eyedropper to select objects
- Order usually doesn't matter (except for some limits)
Breaking Threshold:
- Force required to break the constraint
- 0.0 = unbreakable (default)
- Higher value = stronger connection
- Use case: Breakable chains, destructible connections
- Example: Set to 50.0 for a chain link that breaks under stress
Disable Collisions:
- Prevents connected objects from colliding with each other
- Usually enabled (checked) to prevent jittering
- Connected objects pass through each other
- Important for hinges and sliders to work smoothly
Override Iterations:
- How many times solver calculates this constraint per frame
- Higher = more stable but slower
- Increase if constraint is unstable or "breaking" when it shouldn't
Hinge-Specific Settings
🚪 Hinge Constraint Options
Limits:
- Enable to restrict rotation range
- Lower Limit: Minimum rotation angle
- Upper Limit: Maximum rotation angle
- Example: Door opens 0° to 90° only
Motor:
- Enable to add powered rotation
- Target Velocity: Speed of rotation (radians/second)
- Max Impulse: Motor strength (torque)
- Use case: Spinning wheel, powered door
- Example: Fan blade spinning at constant speed
Spring:
- Adds springy resistance to rotation
- Tries to return to rest position
- Stiffness: How strong the spring force is
- Damping: How quickly spring settles
- Use case: Self-closing door, car suspension
Creating a Chain
✅ Quick Tutorial: Simple Chain
- Create links: Make 5 torus objects in a vertical line
- Physics: All Active rigid bodies (Box or Convex Hull collision)
- Connect them:
- Point constraint between Link 1 and Link 2
- Point constraint between Link 2 and Link 3
- Continue for all links
- Anchor: Make top link Passive (or connect to passive ceiling)
- Test: Chain hangs and swings naturally!
- Bonus: Add breakable constraints (Breaking Threshold: 10.0)
🎮 Game Development Connection: Ragdoll physics in games uses exactly these constraint types! A character's skeleton is made of rigid body bones connected with Point and Hinge constraints. When the character "dies," physics takes over and creates realistic falling animations automatically.
Motor Constraint: Spinning Fan
💡 Creating a Powered Motor
- Create fan blades (4 flat cubes arranged in cross pattern)
- Create axle (small cylinder at center)
- Axle: Passive, Blades: Active
- Add Hinge constraint connecting axle to blades
- Enable Motor in constraint settings
- Set Target Velocity to 10.0 (fast spin)
- Set Max Impulse to 100.0 (strong motor)
- Play simulation: Fan spins continuously!
Common Constraint Issues
⚠️ Troubleshooting Constraints
Problem: Objects fly apart or behave erratically
- Enable "Disable Collisions" between connected objects
- Increase Override Iterations to 20-50
- Check that constraint empty is positioned correctly
- Make sure both objects have rigid body physics
Problem: Constraint doesn't seem to work
- Check Object 1 and Object 2 are assigned
- Verify constraint type is correct
- Make sure objects aren't already constrained elsewhere
- Position constraint empty at connection point
Problem: Hinge rotates wrong direction
- Change Axis setting (X, Y, or Z)
- Rotate the constraint empty to align properly
- Swap Object 1 and Object 2
Problem: Chain links pass through each other
- This is normal with "Disable Collisions" enabled
- Links should overlap slightly for stability
- If you need collision, disable that setting (but may jitter)
🌍 Rigid Body World Settings
While individual object properties control how specific objects behave, the Rigid Body World settings control the overall simulation environment. This is where you adjust global physics parameters like gravity, simulation speed, and solver accuracy.
Accessing Rigid Body World Settings

Unlike object-specific settings, world settings apply to your entire scene's rigid body simulation.
✅ Finding World Settings
- Go to Scene Properties tab (looks like a stack of spheres/objects icon)
- Scroll down to find "Rigid Body World" section
- If you don't see it, add rigid body physics to at least one object first
- These settings affect all rigid bodies in the scene
Key World Settings
🌐 Rigid Body World Properties
Collection:
- Defines which collection contains rigid body objects
- Default: Usually auto-created "RigidBodyWorld" collection
- Only objects in this collection participate in simulation
- Use case: Separate collections for different physics simulations
Speed:
- Controls simulation playback speed
- Default: 1.0 (real-time)
- Less than 1.0 (0.5): Slow motion effect
- Greater than 1.0 (2.0): Fast forward effect
- Important: Doesn't affect baked simulation, only real-time playback
Split Impulse:
- Advanced physics solver option
- Default: Enabled
- Helps prevent objects from penetrating each other at high speeds
- Keep enabled unless you have specific reasons not to
Time Scale:
- Scales simulation time relative to scene time
- Default: 1.0
- Similar to Speed but affects baked simulations too
- Usually left at default
Gravity Settings
One of the most important world settings is gravity—the invisible force pulling everything downward.
⬇️ Gravity Configuration
Gravity Vector (X, Y, Z):
- Default: (0, 0, -9.81) meters per second squared
- -9.81 is Earth's gravity on Z axis (downward)
- Adjust to simulate different environments
Common Gravity Values:
- Earth: (0, 0, -9.81) - default, normal gravity
- Moon: (0, 0, -1.62) - weak gravity, floaty feeling
- Mars: (0, 0, -3.71) - between Moon and Earth
- Jupiter: (0, 0, -24.79) - super heavy, objects fall fast
- Zero Gravity: (0, 0, 0) - space/floating objects
- Reversed: (0, 0, 9.81) - everything falls upward!
- Sideways: (-9.81, 0, 0) - gravity pulls to the side
Creative Uses:
- Slow motion: Reduce gravity to -2.0 for dreamy floating
- Heavy impact: Increase to -20.0 for dramatic falls
- Sideways world: Change axis for unusual perspectives
- Weightless: Zero gravity for space scenes
💡 Gravity Direction Explained
The gravity vector has three components:
- X: Left/Right gravity force
- Y: Forward/Backward gravity force
- Z: Up/Down gravity force (most common)
Example: Setting gravity to (-5, 0, -5) creates diagonal gravity—objects fall down AND to the left simultaneously!
Solver Settings
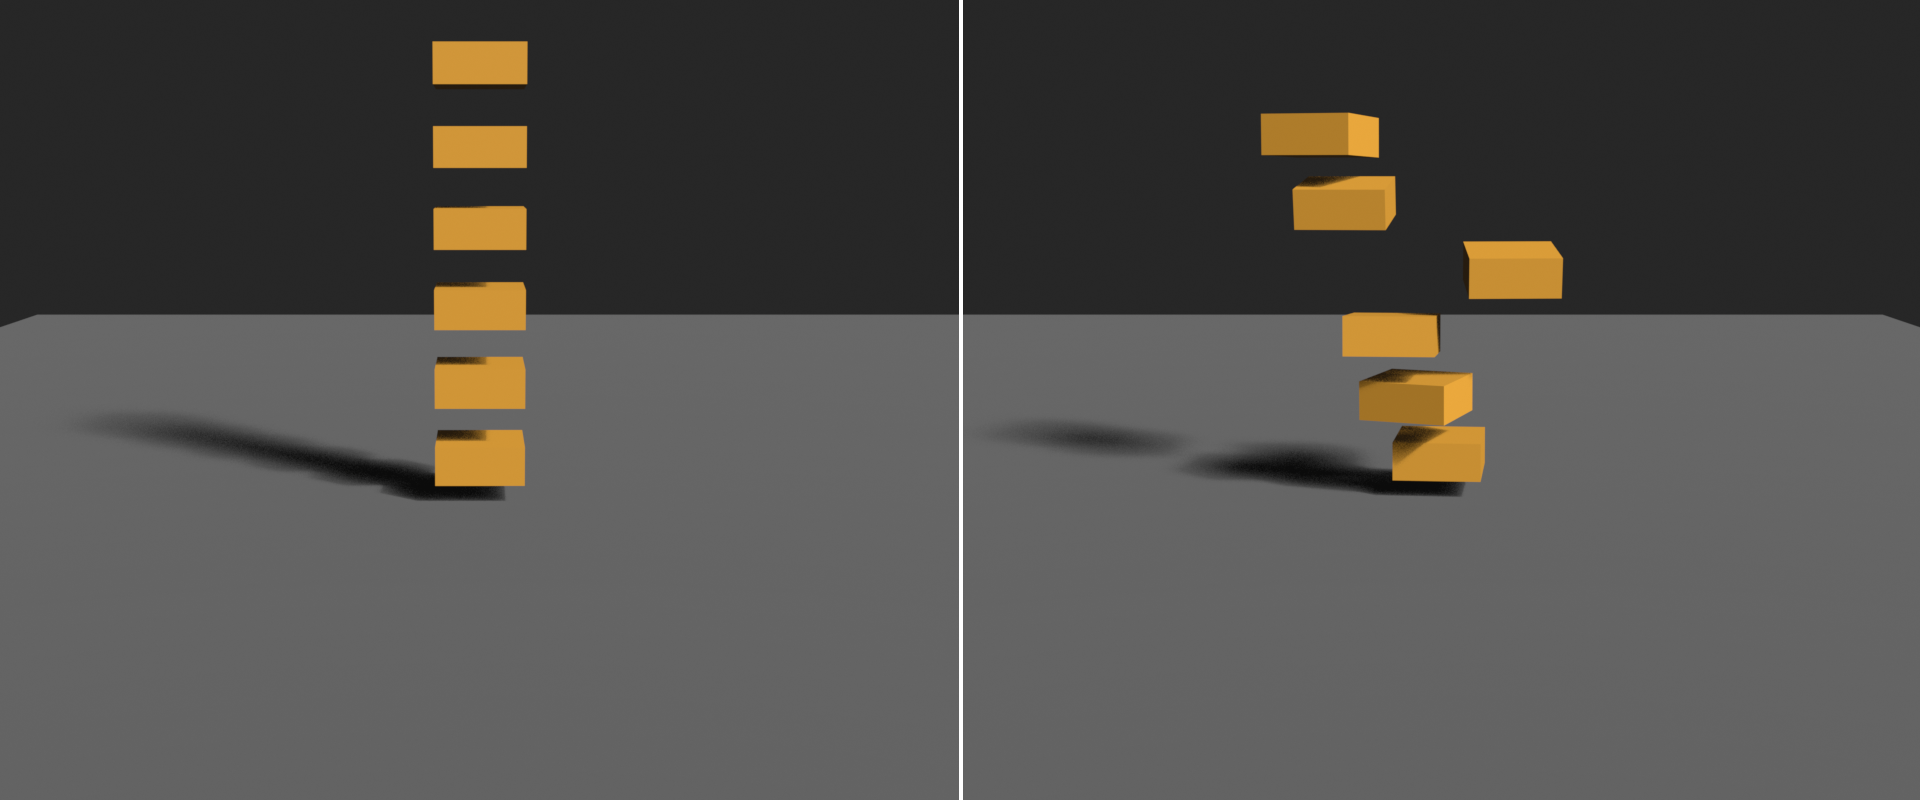
These control how accurately Blender calculates physics. Higher accuracy = slower but more stable.
🧮 Physics Solver Options
Steps Per Second:
- How many physics calculations per second
- Default: 60 (matches typical frame rate)
- Lower (30-40): Faster calculation, less accurate
- Higher (120-240): Slower but more stable/accurate
- When to increase: Fast-moving objects, complex collisions
- When to decrease: Simple scenes, need faster preview
Solver Iterations:
- How many times solver refines calculations per step
- Default: 10
- Lower (5): Faster but objects may penetrate each other
- Higher (20-50): More stable stacking, accurate collisions
- Use case: Increase for tall towers, complex stacking
⚠️ Performance vs. Accuracy
The Trade-off:
- Higher Steps Per Second = More accurate but slower
- Higher Solver Iterations = More stable but slower
- For testing: Use lower values (30 steps, 5 iterations)
- For final: Use higher values (60-120 steps, 10-20 iterations)
Rule of thumb: Start low for speed, increase only if you see problems!
Cache Settings
💾 Rigid Body Cache
Simulation Start/End:
- Which frames to simulate
- Default: 1 to 250
- Set to your animation's actual range
- Tip: Simulate only frames you need to save time
Cache Step:
- How often to save simulation state
- Default: 1 (every frame)
- Higher values save less data but less smooth playback
- Keep at 1 for smooth results
Bake Button:
- Pre-calculates entire simulation
- Saves to disk for instant playback
- Required before rendering
- We'll cover baking in detail later!
Experimenting with World Settings
🧪 World Settings Experiments
Experiment 1: Moon Gravity
- Set gravity to (0, 0, -1.62)
- Create falling cubes
- Notice: They fall slowly, bounce higher, float more
- Perfect for space/moon scenes!
Experiment 2: Zero Gravity Chaos
- Set gravity to (0, 0, 0)
- Create several objects with initial velocity
- Give them slight pushes (animate position on frame 1-2)
- Watch them float and drift forever!
- Add damping to slow them down over time
Experiment 3: Slow Motion
- Keep normal gravity (-9.81)
- Set Time Scale to 0.3
- Everything moves in dramatic slow motion
- Great for action sequences!
Experiment 4: Sideways World
- Set gravity to (-9.81, 0, 0)
- Create a "floor" on the X axis
- Objects fall to the side!
- Rotate camera for mind-bending effect
🎬 Film Technique: Many action movies use altered gravity in CGI simulations. Reduce gravity slightly (to -7.0 or -8.0) to make debris float more dramatically. Increase gravity (to -12.0) to make impacts more violent. These subtle changes create more visually interesting results than real physics!
Scene-Specific Configurations
🎯 Recommended Settings by Scene Type
| Scene Type | Gravity | Steps/Sec | Iterations |
|---|---|---|---|
| Simple Falling | -9.81 | 60 | 10 |
| Tall Tower/Stacking | -9.81 | 120 | 20-30 |
| Fast Projectiles | -9.81 | 120-240 | 10-15 |
| Domino Chain | -9.81 | 60-120 | 15-20 |
| Space/Zero-G | 0 | 60 | 10 |
| Destruction (many objects) | -9.81 | 60-120 | 10-15 |
When to Adjust World Settings
💡 World Settings Decision Guide
Adjust Gravity When:
- Creating non-Earth environments (space, moon, other planets)
- Want stylized slow-motion or fast-action effects
- Need directional gravity for artistic reasons
Increase Steps Per Second When:
- Objects moving very fast
- Objects passing through each other
- Simulation looks jittery or unstable
Increase Solver Iterations When:
- Stacking tall towers (they collapse immediately)
- Objects sink into each other
- Constraints are wobbly or breaking
- Need very accurate collision detection
Keep Defaults When:
- Simple scenes with basic falling/rolling
- Testing and don't need perfect accuracy
- Want fastest possible calculation time
⚠️ Common World Setting Mistakes
- Too high Steps Per Second: Simulation becomes very slow for minimal quality gain
- Too low Solver Iterations: Objects pass through each other
- Wrong gravity axis: Objects fall sideways when you meant down
- Forgetting to bake: Changes won't show in renders without baking
🎨 Practical Examples
Now let's put everything together with some fun, practical examples! These tutorials will help you master rigid body physics by creating real-world scenarios you can use in your projects.
Example 1: Domino Chain Reaction
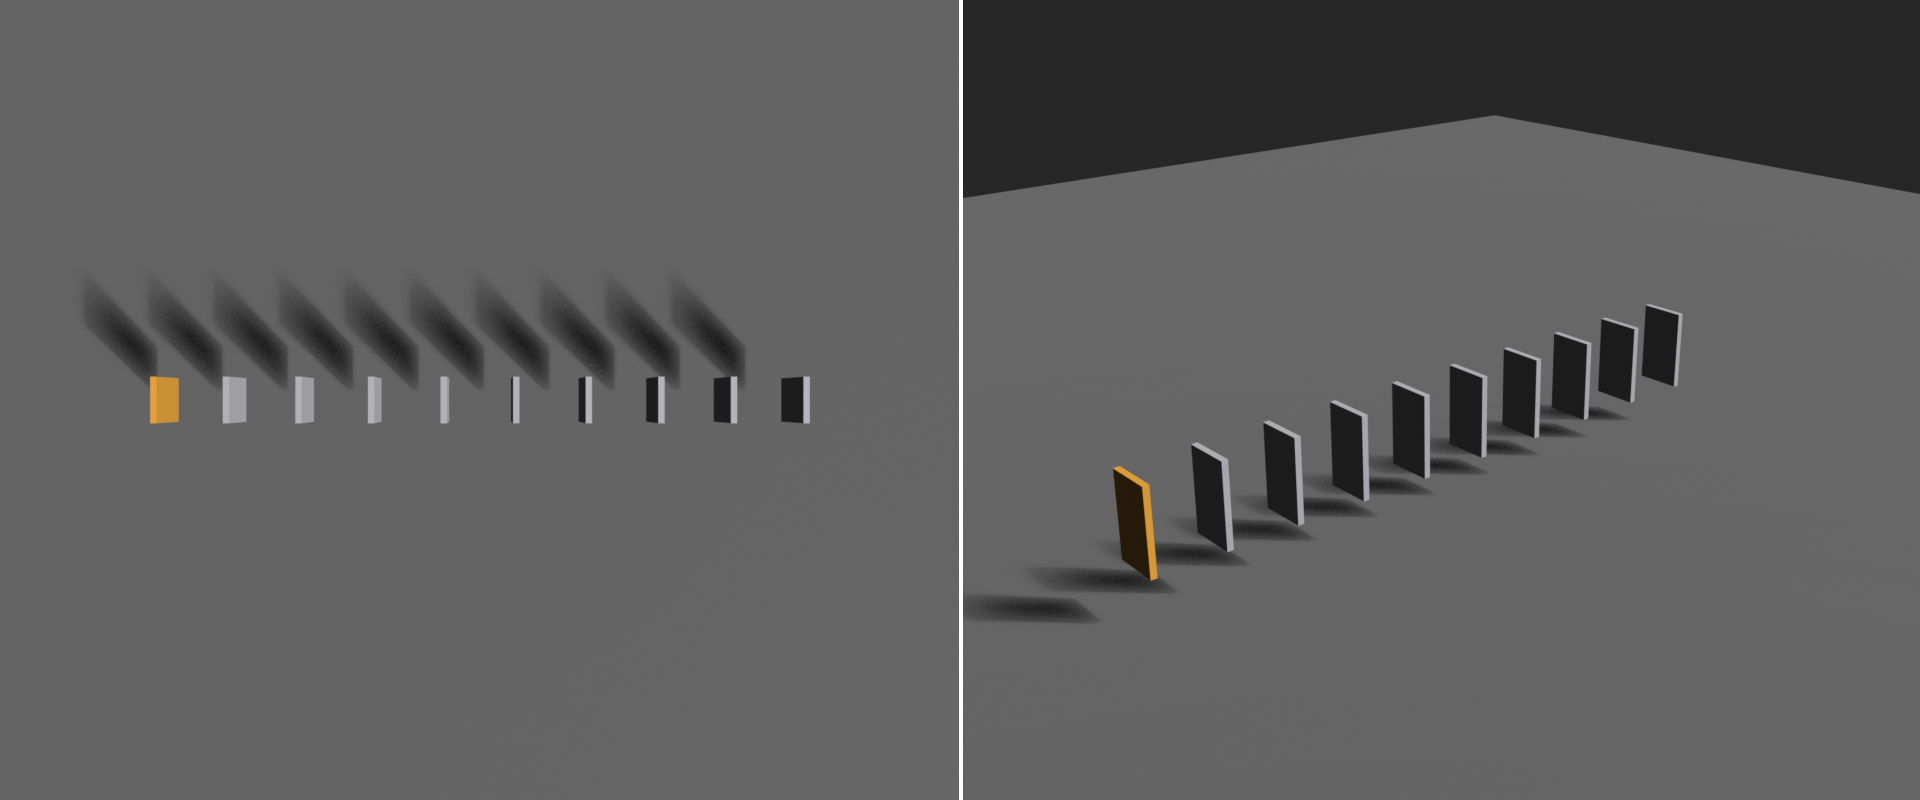
The classic physics demonstration—a chain of dominos toppling one after another. This teaches precise placement and demonstrates force transfer between objects.
✅ Creating a Domino Chain
Step 1: Create First Domino
- Add cube: Shift + A → Mesh → Cube
- Scale thin: S, Y, 0.1, Enter
- Scale tall: S, Z, 2, Enter
- This creates a domino shape
Step 2: Position and Duplicate
- Position first domino upright
- Select it, Shift + D to duplicate
- Move along X: X, 0.4, Enter (small gap)
- Repeat to create 10-15 dominos in a line
- Tip: Use Array Modifier for perfect spacing!
Step 3: Physics Setup
- Select all dominos (A)
- Add Rigid Body → Active
- Settings for all:
- Mass: 0.5 (light enough to topple)
- Friction: 0.5
- Shape: Box (perfect for rectangular)
Step 4: Add Ground
- Add plane, scale large
- Rigid Body → Passive
- Friction: 0.6 (stable surface)
Step 5: Start the Chain
- Add small sphere at one end
- Position it to roll into first domino
- Give sphere Active physics
- Or: Manually tip first domino (rotate slightly at frame 1)
Step 6: Fine-Tune
- Test the simulation
- Adjust spacing if dominos miss each other
- Increase Solver Iterations to 15-20 for stability
- Watch the satisfying cascade!
🎯 Pro Tip: For curved domino paths, use a Curve modifier and Array modifier together! Create a curve path, array the dominos along it, and they'll follow the curve perfectly.
Example 2: Bowling Alley
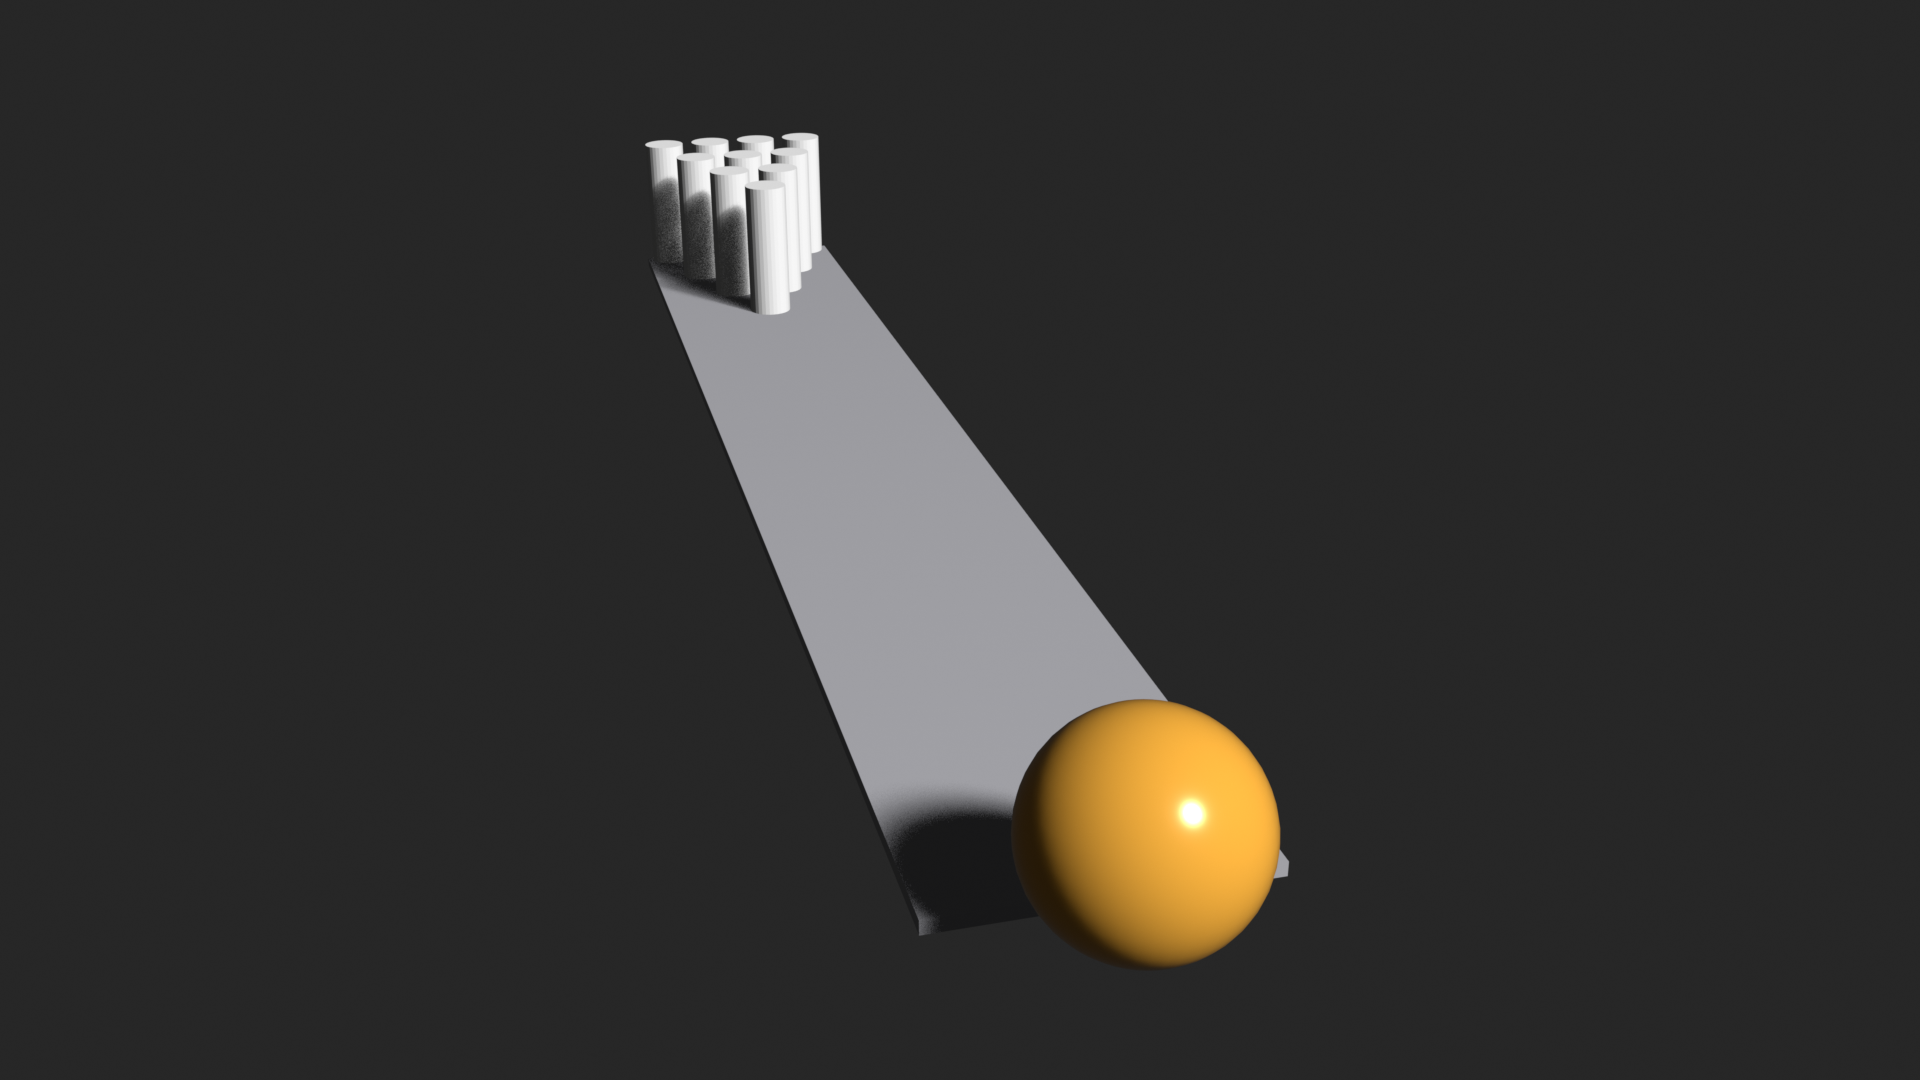
Create a simple bowling scene with a ball rolling down a lane to hit pins. Great for understanding mass, collision, and momentum transfer.
✅ Bowling Simulation
Step 1: Create the Lane
- Add plane, scale long: S, Y, 5, Enter
- Rigid Body → Passive
- Friction: 0.1 (slippery bowling lane)
Step 2: Create Bowling Pins
- Add cone (Shift + A → Mesh → Cone)
- Scale and shape to look like pin
- Position at end of lane
- Duplicate in triangle formation (1-2-3-4 pattern)
- Total: 10 pins in bowling triangle
Step 3: Pin Physics
- Select all pins
- Rigid Body → Active
- Settings:
- Mass: 1.5 (bowling pin weight)
- Shape: Convex Hull or Cylinder
- Friction: 0.4
- Start Deactivated: Enable (pins don't move until hit)
Step 4: Create Bowling Ball
- Add UV Sphere
- Scale to bowling ball size (radius 0.11 meters in reality)
- Position at start of lane
- Rigid Body → Active
- Settings:
- Mass: 7.0 (standard bowling ball: 7kg)
- Shape: Sphere (perfect fit!)
- Friction: 0.3
- Bounciness: 0.1 (barely bounces)
Step 5: Give Ball Initial Velocity
- Two methods:
- Method A: At frame 1, ball at start. At frame 2, move ball forward. Creates initial push.
- Method B: Position ball on slight ramp, gravity provides velocity
Step 6: Test and Refine
- Play simulation
- Adjust ball speed by changing how far you move it
- Watch for realistic pin scatter!
- Increase Steps Per Second to 120 for accuracy
Example 3: Jenga Tower
Stack blocks in a tower and watch physics determine how it falls when you remove pieces.
✅ Building a Jenga Tower
Step 1: Create a Block
- Add cube
- Scale to Jenga proportions: S, Z, 0.3, S, X, 1.5, Enter
- This creates rectangular block
Step 2: Build First Layer
- Duplicate 3 times, arrange side-by-side (touching)
- This is one layer: 3 blocks horizontal
Step 3: Build Tower
- Duplicate entire layer upward
- Rotate new layer 90° (perpendicular to below)
- Repeat for 10-15 layers
- Alternating directions: horizontal, vertical, horizontal...
Step 4: Physics Setup
- Ground plane: Passive, high friction (0.8)
- All blocks: Active
- Mass: 1.0
- Friction: 0.6 (wood on wood)
- Shape: Box
- Damping: 0.1 (settles quickly)
Step 5: Remove a Block
- Method 1: Delete a middle block before frame 1
- Method 2: Animate a block sliding out (keyframe it moving)
- Method 3: Add "pusher" object that knocks block out
Step 6: Critical Settings
- Increase Solver Iterations to 30+ (critical for stacking!)
- Increase Steps Per Second to 120
- These prevent tower collapsing immediately
- Tower should stand stable until block removed
⚠️ Tower Stacking Tips
- If tower collapses immediately: Increase Solver Iterations drastically (40-50)
- If blocks sink into each other: Increase Steps Per Second to 240
- For perfect stability: Make bottom layer Passive (locked in place)
- Patient building: Start simulation, let tower settle for 50 frames before removing blocks
Example 4: Newton's Cradle
✅ Physics Demonstration Device
Setup:
- Create 5 spheres in a perfect line (touching)
- All spheres: Active, Mass 1.0, Bounciness 0.9, Shape: Sphere
- Create 5 small cubes above spheres (supports)
- Cubes: Passive (don't move)
- Add Point constraints:
- Sphere 1 to Cube 1
- Sphere 2 to Cube 2
- Continue for all 5
- Pull first sphere to the side (G, X, 2)
- Play: Classic Newton's Cradle motion!
Fine-tuning:
- Increase Solver Iterations to 20
- Set Bounciness exactly same for all spheres
- Disable Collisions on Point constraints
- Perfect alignment is critical!
Example 5: Dice Roll
✅ Random Dice Simulation
Quick Setup:
- Add cube (your die)
- Position high above ground
- Rotate randomly: R, Z, 45, R, Y, 30 (any angles)
- Active physics:
- Mass: 0.01 (dice are very light)
- Shape: Box
- Bounciness: 0.3
- Friction: 0.4
- Ground: Passive, Friction 0.5
- Let it drop and tumble!
For Multiple Dice:
- Duplicate several dice
- Vary starting positions and rotations
- They'll collide and tumble realistically
- Each run gives different results (like real dice!)
Quick Reference: Common Scenarios
📋 Setup Quick Guide
| Scenario | Key Settings | Critical Factor |
|---|---|---|
| Dominos | Mass 0.5, Box shape, 15-20 iterations | Precise spacing |
| Bowling | Ball: Mass 7.0, Pins: 1.5, Start Deactivated | Ball velocity |
| Stacking | High friction (0.8), 30+ iterations, 120 steps/sec | Solver iterations |
| Rolling Ball | Sphere shape, low friction (0.2), slight slope | Surface friction |
| Destruction | Varied masses, convex hull, moderate settings | Initial impact force |
| Dice/Random | Very light mass (0.01), varied rotation, medium bounce | Initial randomness |
💭 Learning Through Play: The best way to master rigid body physics is experimentation! Try these examples, then modify them. What happens if you make the bowling ball super light? What if you give dominos different masses? Every "failure" teaches you something about physics behavior!
⚡ Optimization and Performance
Rigid body simulations can be computationally expensive, especially with many objects. Let's learn how to keep your simulations running smoothly without sacrificing quality.
Understanding Performance Bottlenecks
Different factors affect simulation speed in different ways. Knowing what slows things down helps you optimize effectively.
🐌 What Slows Down Simulations
Number of Active Objects:
- Most significant factor
- 10 objects = fast, 100 objects = slow, 1000 objects = very slow
- Each active object requires continuous calculation
- Impact: Exponential (more objects = much slower)
Collision Shape Complexity:
- Mesh shape = slowest
- Convex Hull = moderate
- Primitives (Box, Sphere) = fastest
- Impact: Can double or triple calculation time
Solver Settings:
- Steps Per Second: Higher = slower
- Solver Iterations: Higher = slower
- Impact: Linear (double the steps = double the time)
Number of Constraints:
- Each constraint adds calculation
- Complex constraint types slower than simple
- Impact: Moderate per constraint
Optimization Strategies
✅ Speed-Up Techniques
1. Use Simple Collision Shapes
- Default to Box, Sphere, or Cylinder whenever possible
- Only use Convex Hull when primitives don't work
- Reserve Mesh shape for Passive objects only
- Speed gain: 2-5x faster
2. Reduce Active Object Count
- Convert settled objects to Passive after they stop moving
- Use Start Deactivated for objects that don't move initially
- Delete or hide objects that leave the scene
- Speed gain: Proportional to objects removed
3. Lower Settings for Testing
- Testing: 30 Steps/Sec, 5 Iterations
- Final: 60-120 Steps/Sec, 10-20 Iterations
- Only increase if you see problems
- Speed gain: 2-4x faster for testing
4. Use Collision Collections
- Group objects that need to collide
- Objects far apart don't need to check each other
- Reduces unnecessary collision checks
- Speed gain: Varies, significant in large scenes
5. Simplify Collision Geometry
- Create low-poly proxy objects for collision
- Hide collision proxies, show detailed visual mesh
- Physics uses simple, render shows complex
- Speed gain: 3-10x for complex objects
6. Bake Early and Often
- Baked simulation plays instantly
- Don't recalculate while tweaking other aspects
- Bake test ranges (frames 1-50) before full simulation
- Speed gain: Infinite (instant playback)
Baking Your Simulation

Baking pre-calculates your entire simulation and saves it to disk. This is essential for final rendering and smooth playback.
✅ How to Bake Rigid Body Physics
Step 1: Prepare Scene
- Finalize all physics settings
- Ensure simulation works as desired
- Set timeline to correct frame range
Step 2: Configure Bake Settings
- Go to Scene Properties → Rigid Body World
- Set Simulation Start to your first frame
- Set Simulation End to your last frame
- Keep Cache Step at 1 (every frame)
Step 3: Bake
- Click "Bake" button in Cache section
- Blender calculates entire simulation
- Progress shown in header
- Wait for completion (can take minutes to hours)
Step 4: Verify and Use
- Scrub timeline—movement is instant and smooth
- Button changes to "Free Bake"
- Simulation is locked—changes require re-bake
- Cache files saved in folder next to .blend file
💡 Baking Best Practices
- Test bake first: Bake frames 1-50 to verify settings
- Save before baking: In case of crash or issue
- Bake overnight: Large simulations take time
- Keep unbaked version: Save separate file before baking
- Note cache location: Include in project backups
Performance Comparison
📊 Optimization Impact
| Optimization | Effort | Speed Gain | Quality Loss |
|---|---|---|---|
| Simple Collision Shapes | Low | High (2-5x) | Usually none |
| Lower Solver Settings | None | Medium (2x) | Some (less stable) |
| Deactivate Settled Objects | Medium | High (varies) | None |
| Collision Proxies | High | Very High (5-10x) | None |
| Baking | None | Infinite (instant) | None |
⚠️ When NOT to Optimize
Sometimes optimization isn't worth it:
- Simple scenes: 10-20 objects run fine without optimization
- One-time renders: If baking once, optimization might take longer than just waiting
- When accuracy matters: Don't sacrifice correctness for speed in final output
- Testing phase: Optimize after you know settings work
💭 Professional Workflow: Studios use a three-tier approach: Low-quality for real-time preview (fast iteration), medium-quality for test bakes (verify it works), high-quality for final render (overnight bake). This balances speed during work with quality in results.
🎯 Project: Tower Collapse
Time to put everything together! Create a dramatic tower of blocks that collapses when hit by a wrecking ball. This project combines stacking, collision, mass differences, and proper setup.
🎨 What You'll Create
A dynamic destruction scene featuring:
- A tower of stacked blocks (10-15 blocks high)
- A heavy wrecking ball on a cable
- Ball swings and demolishes the tower
- Realistic physics-based destruction
- Proper collision, mass, and constraint usage
⏱️ Estimated Time: 30-45 minutes
Project Steps
✅ Step 1: Build the Tower
- Create ground: Plane, scale large, Passive, Friction 0.7
- Create block: Cube, scale to brick proportions (S, Z, 0.5, S, Y, 1.5)
- Stack blocks:
- Duplicate vertically (Shift + D, Z)
- Create 3-4 blocks per layer
- Build 5-6 layers (15-20 blocks total)
- Slight offset or rotation for instability
- Block physics:
- All Active
- Mass: 2.0 (concrete blocks)
- Shape: Box
- Friction: 0.6
- Bounciness: 0.1
✅ Step 2: Create Wrecking Ball
- Add sphere: UV Sphere, scale to wrecking ball size (2-3 units)
- Position: High and to the side of tower
- Physics:
- Active
- Mass: 50.0 (very heavy!)
- Shape: Sphere
- Bounciness: 0.2
- Friction: 0.3
✅ Step 3: Add Cable Support
- Create anchor: Small cube high above ball, Passive
- Add constraint:
- Rigid Body Constraint (Shift + A → Force Field)
- Type: Point
- Position at anchor location
- Object 1: Anchor cube
- Object 2: Wrecking ball
- Optional: Create visual cable with cylinder (not part of physics)
✅ Step 4: Set Up the Swing
- Pull ball back: At frame 1, move ball away from tower (G, X, -5)
- Alternative: At frame 1, give ball slight push toward tower
- Let physics do the rest: Constraint + gravity = natural swing
✅ Step 5: Critical World Settings
- Scene Properties → Rigid Body World
- Steps Per Second: 120 (tower needs stability)
- Solver Iterations: 30 (prevent tower collapse before impact)
- These settings are crucial for this project!
✅ Step 6: Test and Refine
- First test: Let tower sit for 50 frames
- Should remain stable (not collapse)
- If collapses: Increase iterations to 40-50
- Second test: Let ball swing and hit
- Impact should scatter blocks dramatically
- Heavy ball vs light blocks = big destruction!
- Adjust:
- Ball too weak? Increase mass or pull back farther
- Ball too strong? Decrease mass to 30.0
- Tower unstable? Increase solver iterations
✅ Step 7: Final Polish
- Camera: Position to capture full action
- Lighting: Add lights for drama
- Materials: Give blocks and ball materials (optional)
- Bake: Pre-calculate simulation for smooth playback
- Render: Create final animation!
Success Checklist
✅ Project Completion Criteria
- ☐ Tower stands stable for at least 50 frames
- ☐ Wrecking ball swings naturally on cable
- ☐ Ball impacts tower with significant force
- ☐ Blocks scatter realistically
- ☐ No blocks passing through each other
- ☐ Simulation is smooth (no jittering or explosions)
- ☐ Simulation is baked for rendering
- ☐ Dramatic and satisfying destruction!
Bonus Challenges
💡 Take It Further
Challenge 1: Multiple Towers
- Build 2-3 towers in a row
- One ball knock down multiple structures
- Chain reaction as debris hits other towers
Challenge 2: Breakable Constraints
- Set Breaking Threshold on ball constraint
- Ball breaks free after impact
- Continues causing destruction
Challenge 3: Slow Motion
- Reduce Time Scale to 0.3
- Dramatic slow-mo destruction effect
- Render at high frame rate
Challenge 4: Different Materials
- Mix block masses (heavy base, light top)
- Varied bounciness for different effects
- Observe how different properties change result
📚 Lesson Summary
Congratulations! You've completed your journey through rigid body physics in Blender. You now have the power to create realistic physical simulations—from simple falling objects to complex mechanical systems. Let's recap what you've mastered.
🎯 Key Concepts Mastered
Fundamental Understanding:
- What rigid body physics is and when to use it
- How Blender calculates physics frame by frame
- The difference between rigid, soft, cloth, and fluid simulations
- Real-world physics principles applied in 3D
Active vs. Passive Objects:
- Active objects respond to physics forces
- Passive objects provide environment and obstacles
- When to use each type
- Animated passive objects for moving platforms
Physical Properties:
- Mass: How heavy objects are and how they impact
- Friction: How surfaces resist sliding
- Bounciness: How much energy is retained in collisions
- Damping: How quickly objects slow down
- Creating realistic material behavior through property combinations
Collision Shapes:
- Seven collision shape types and when to use each
- Performance vs. accuracy trade-offs
- Choosing optimal shapes for speed and realism
- Collision margin and its effects
Constraints:
- Eight constraint types for connecting objects
- Creating hinges, joints, springs, and motors
- Building mechanical systems and chains
- Constraint settings and troubleshooting
World Settings:
- Controlling gravity direction and strength
- Solver settings for accuracy vs. speed
- Simulating different environments (Earth, Moon, space)
- Cache and baking for final renders
Practical Skills:
- Creating common scenarios (dominos, bowling, towers)
- Optimization techniques for better performance
- Baking simulations properly
- Troubleshooting common problems
Essential Takeaways
💡 Remember These Key Points
- Active = moves, Passive = stays put: This distinction is fundamental to every rigid body scene
- Simple shapes are fast: Use Box and Sphere whenever possible; complexity kills performance
- Solver settings matter: Increase iterations for stability, increase steps for accuracy
- Mass differences create drama: Heavy ball hitting light blocks = satisfying destruction
- Constraints enable mechanics: Hinges, joints, and motors create complex behavior from simple connections
- Always bake before rendering: Simulations must be pre-calculated for consistent results
- Test with low settings: Optimize after you know it works
- Physics is creative: Unrealistic settings can create interesting stylized effects
Quick Reference Tables
📋 Rigid Body Quick Reference
Common Material Properties:
| Material | Mass | Friction | Bounce |
|---|---|---|---|
| Rubber Ball | 0.5 | 0.8 | 0.8 |
| Wood Block | 1.5 | 0.6 | 0.2 |
| Metal Box | 10.0 | 0.4 | 0.2 |
| Concrete | 20.0 | 0.8 | 0.05 |
Collision Shape Performance:
- ⚡⚡⚡⚡⚡ Fastest: Box, Sphere
- ⚡⚡⚡⚡ Very Fast: Capsule, Cylinder
- ⚡⚡ Moderate: Convex Hull
- ⚡ Slow: Mesh (Passive only)
Solver Settings by Scene:
- Simple falling: 60 steps/sec, 10 iterations
- Stacking/towers: 120 steps/sec, 30 iterations
- Fast projectiles: 240 steps/sec, 15 iterations
- Testing: 30 steps/sec, 5 iterations
Common Problems and Solutions
⚠️ Quick Troubleshooting Guide
Objects pass through each other:
- → Increase Steps Per Second (try 120)
- → Check collision physics is enabled
- → Increase collision margin
Tower collapses immediately:
- → Increase Solver Iterations (try 30-50)
- → Increase friction on all objects (0.8)
- → Let settle for 50 frames before action
Simulation is jittery/unstable:
- → Increase damping values (0.1-0.2)
- → Increase Solver Iterations
- → Check objects aren't intersecting at start
Very slow performance:
- → Use simpler collision shapes (Box instead of Mesh)
- → Reduce number of Active objects
- → Lower solver settings for testing
Constraints don't work:
- → Check Object 1 and Object 2 are assigned
- → Enable "Disable Collisions" between connected objects
- → Position constraint empty at connection point
Where to Go From Here
🚀 Next Steps in Your Journey
Practice Projects:
- Create a Rube Goldberg machine (complex chain reactions)
- Build a marble run with ramps and obstacles
- Simulate a building demolition (with Cell Fracture addon)
- Create a pinball machine with flippers and bumpers
- Make a bridge collapse simulation
Advanced Topics to Explore:
- Combining rigid body with other physics (cloth, fluid)
- Using Python to procedurally create physics setups
- Cell Fracture addon for destruction effects
- Rigid body in character ragdoll physics
- Vehicle simulations with constraints
Related Lessons:
- Lesson 32: Particle Systems - Combine particles with rigid bodies
- Lesson 33: Hair and Fur - Mix soft and rigid physics
- Lesson 34: Cloth Simulation - Combine cloth with rigid obstacles
- Lesson 40: Geometry Nodes - Procedural rigid body setups
🎉 Congratulations!
You've mastered rigid body physics—one of Blender's most powerful and fun simulation systems! From simple falling cubes to complex mechanical contraptions, you now have the skills to bring realistic physics into your 3D projects. Whether you're creating action sequences, product demonstrations, or abstract animations, rigid body physics adds that extra layer of believability and dynamism.
Remember: physics simulation is as much an art as it is science. Real-world accuracy is great, but don't be afraid to bend the rules for dramatic effect. Sometimes the best results come from impossible physics! Keep experimenting, stay curious, and have fun watching things fall, bounce, and crash. You've completed Module 8—onward to even more exciting Blender adventures!